AUTOMATIC1111's Stable Diffusion WebUI is the most popular and feature-rich way to run Stable Diffusion on your own computer.
In this guide we'll get you up and running with AUTOMATIC1111 so you can get to prompting with your model of choice.
Keep in mind AUTOMATIC1111 does not have official AMD support. Instead, we'll be using lshqqytiger's fork, a variation of AUTOMATIC1111 which uses the AMD supported DirectML.
(You can find the NVIDIA GPU installation instructions here)
Out of all the methods I've tested to get AUTOMATIC1111 working on AMD, this is by far the easiest one.
You can use the Docker method to run the official AUTOMATIC1111 repository instead of the fork, but it is much more troublesome.
So let's get started!
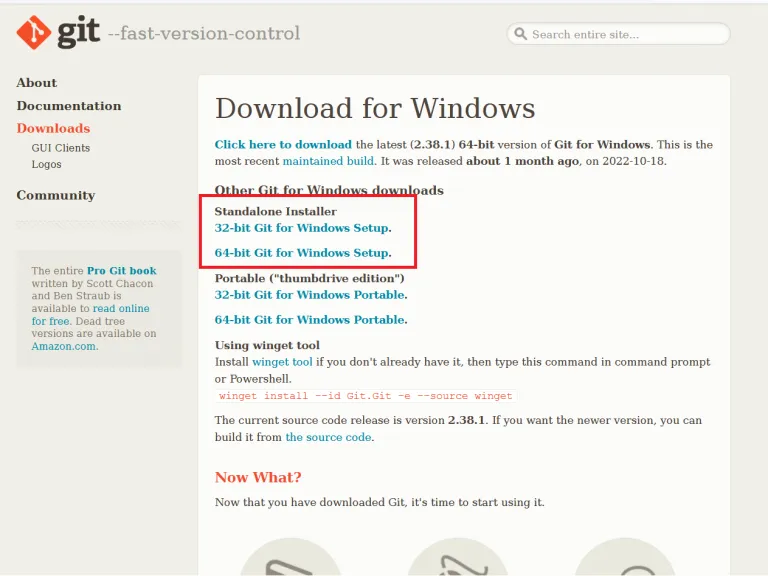
Step 1: Install Git
Go to the official Git website to download Git.
Get the Standalone Installer. Choose the appropriate Git installer for your Windows operating system.
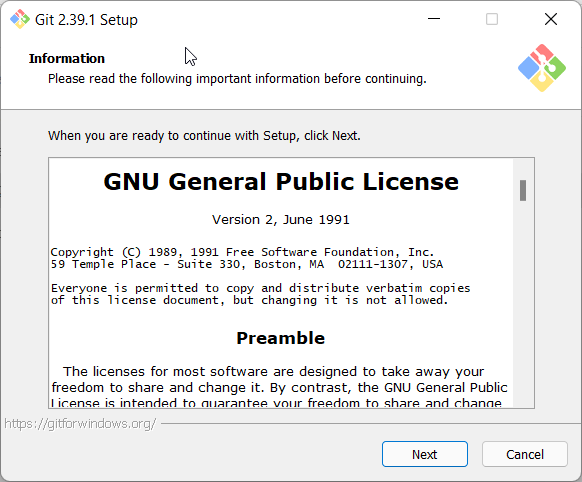
Open the .exe you just downloaded. Click Next to accept the license.
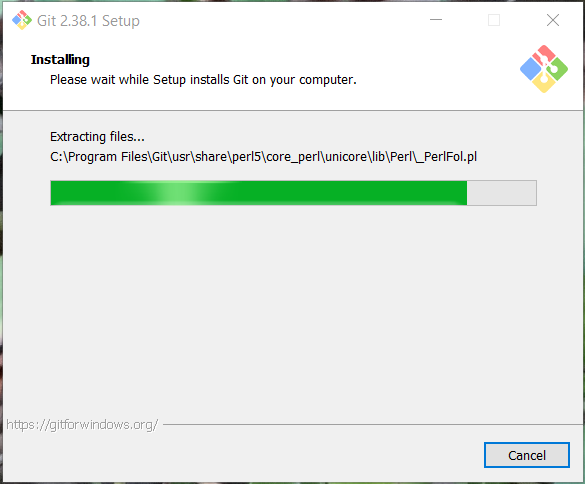
The default options are completely fine. Click Next.

You will be given many screens of options. The defaults are all fine. Click Next for all of them. Git will install.
Step 2: Install Python
Install Python from the official site. You want the latest version of 3.10. Make sure you choose the right version for your platform, 32-bit or 64-bit.
Important: In the installation wizard, make sure you check "Add python.exe to PATH".

You can go with all of the other default options.
Step 3: Download lshqqytiger's Version of AUTOMATIC1111 WebUI
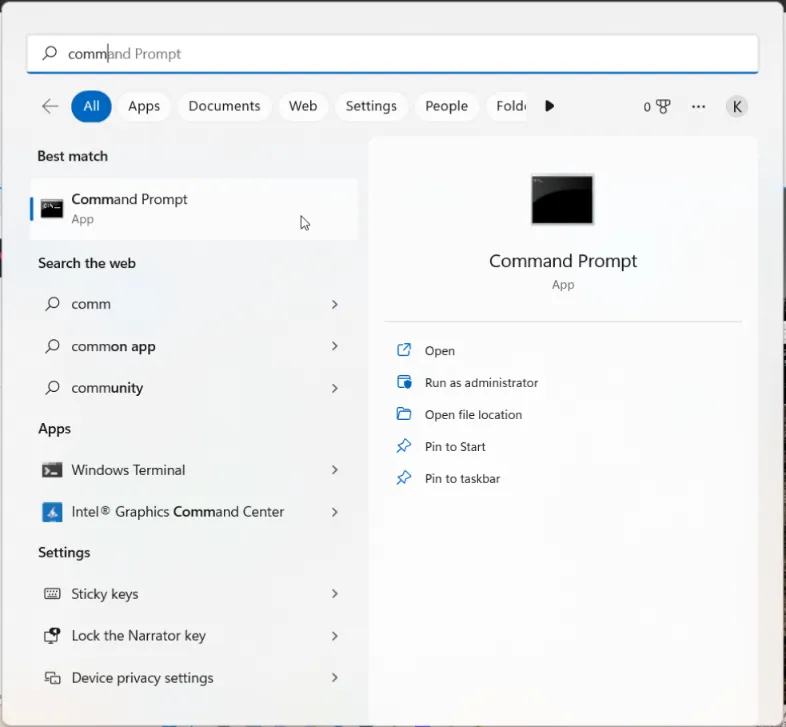
Press the Window keyboard key or click on the Windows icon (Start icon). Search for "Command Prompt" and click on the Command Prompt App when it appears.
You should see a line like this:
C:\Users\YOUR_USER_NAME

Use this command to move into folder (press Enter to run it):
cd FOLDER_NAMEUse this command to go back up a folder:
cd ..Use this command to list all folders within the folder you are in. This can help you orient yourself:
dirAs an example, I will install Stable Diffusion in my Documents folder. I would type this command:
cd documents
When you are in the folder you want to install Stable Diffusion to, copy and paste the following command and press Enter:
git clone http://github.com/lshqqytiger/stable-diffusion-webui-directml && cd stable-diffusion-webui-directml && git submodule init && git submodule updateGive the WebUI some time to download.
After your download is complete, you'll be able to see your new folder stable-diffusion-webui-directml in the Windows Explorer.
Configure VRAM Settings
Do this step if you have less than 6GB VRAM. Otherwise, you can skip this step.
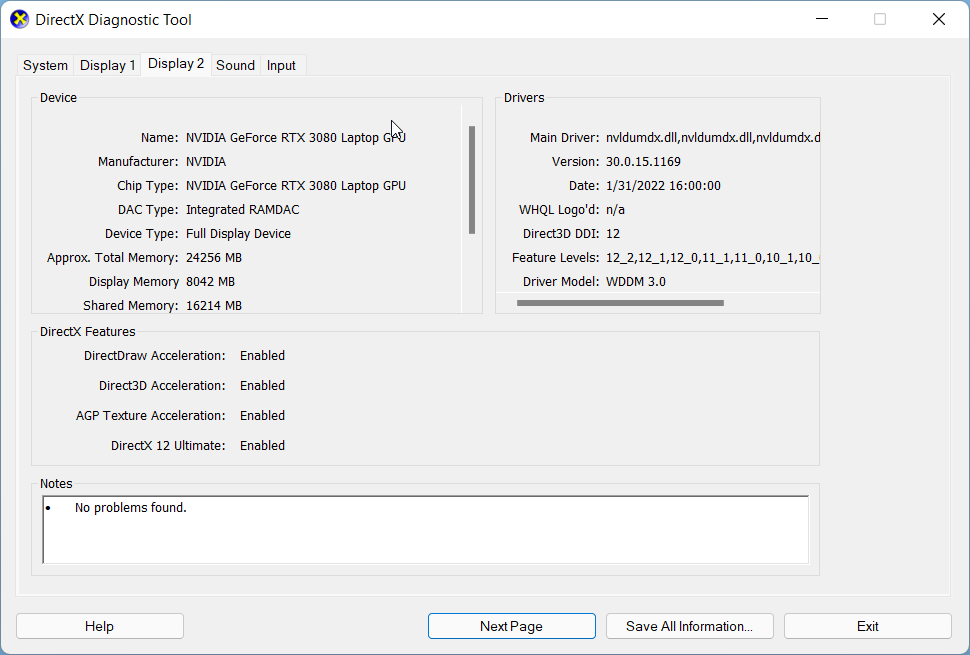
Check how much VRAM you have by typing "dxdiag" in the searchbar and clicking dxdiag (DirectX Diagnostic Tool).
Your VRAM will be listed under Display Memory in the Display (or Display 2) tab:
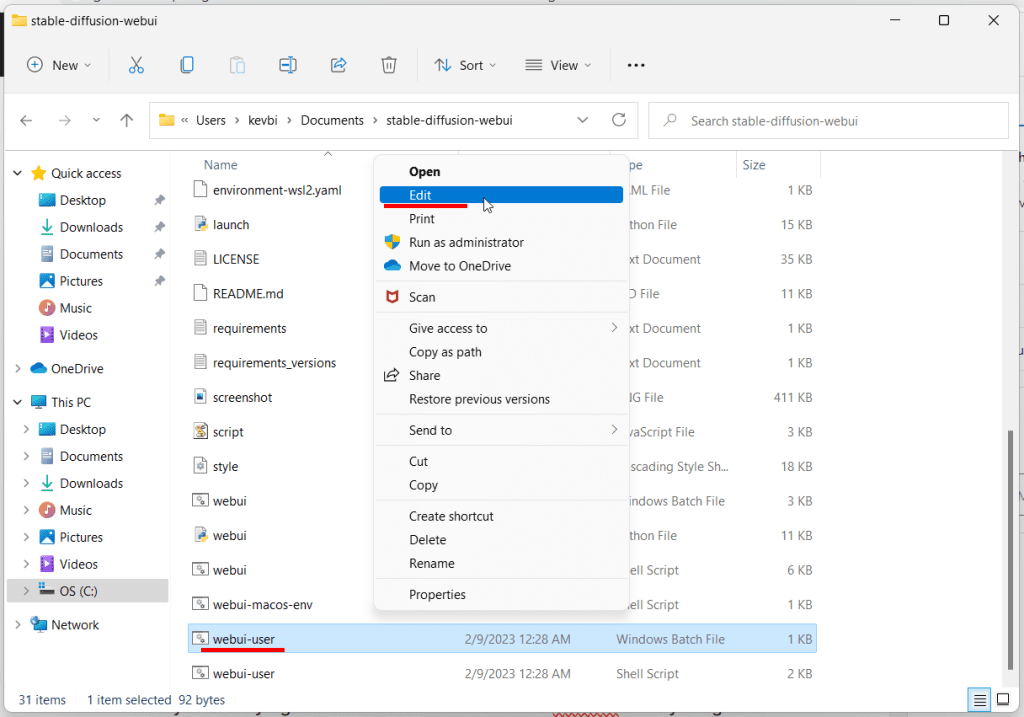
Open the stable-diffusion-webui-directml folder you just downloaded. Find the file named webui-user.bat (Windows Batch File) and right click -> Edit (Windows 11: Right click -> Show more options -> Edit).
Add this line to the "set COMMANDLINE_ARGS=" line, so that it looks like this:
COMMANDLINE_ARGS=--opt-sub-quad-attention --lowvram --disable-nan-check
Optional: I recommend adding --autolaunch to auto open the URL for you.
Save this file and close it.
Rename your edited webui-user.bat file to webui.settings.bat to avoid your settings being overwritten after you update your WebUI.
Step 4: Run the WebUI
Double click the file you just edited: webui.settings.bat.
It will take several minutes for the Web UI to install the required modules. This step will also download the Stable Diffusion v1.5 model.
If you added --autolaunch to your COMMANDLINE_ARGS in the step above, the WebUI will open in your web browser.
Otherwise, wait for the success message, and then navigate to the URL http://127.0.0.1:7860 to access the WebUI.
Step 5: Testing Our First Prompt
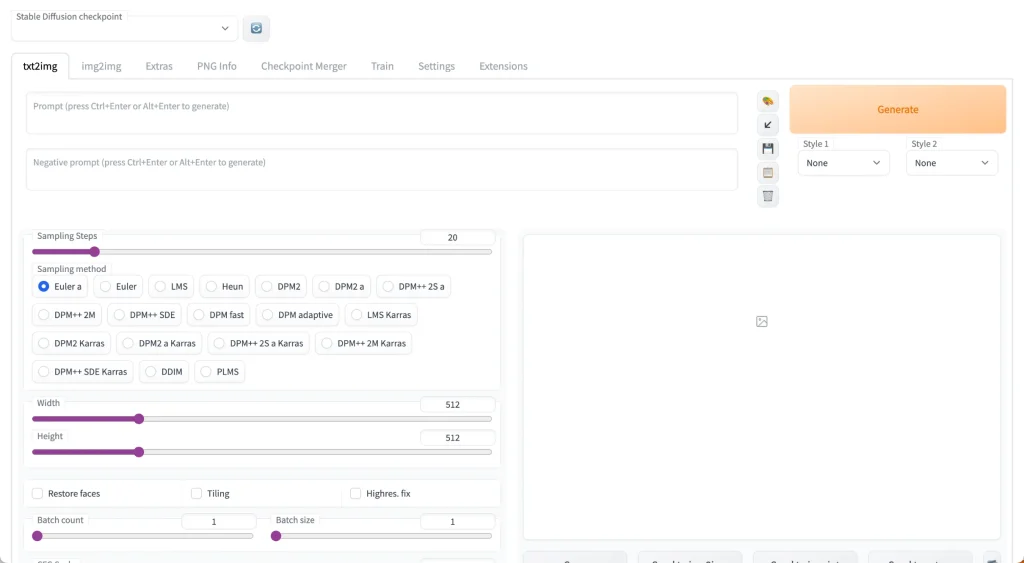
Here's what your interface will look like:
You’ll notice at the top there’s a toggle called “Stable Diffusion Checkpoint”.
You can use this to switch to any of the models you have placed in the stable-diffusion-webui/models/Stable-diffusion folder.
Check out this list of popular models and this list of popular anime models.
For our example, we'll use Stable Diffusion v1.5 since it comes downloaded with your installation.
The filename is v1-5-pruned-emaonly.safetensors [6ce0161689].
Enter the prompt:
portrait of beautiful girl, brown hair, freckles, tshirt, professional lighting, indoor, artistic photographyNow enter the negative prompt:
lowres, bad anatomy, bad hands, text, error, missing fingers, extra digit, fewer digits, cropped, worst quality, low quality, normal quality, jpeg artifacts,signature, watermark, username, blurry, artist nameSet the height slider to 768 and keep the width at 512 to create a portrait aspect ratio suitable for people.
Set the Seed to 3463 to make sure you get the same result.
Then click Generate and wait for the magic to happen! Here’s what I got:
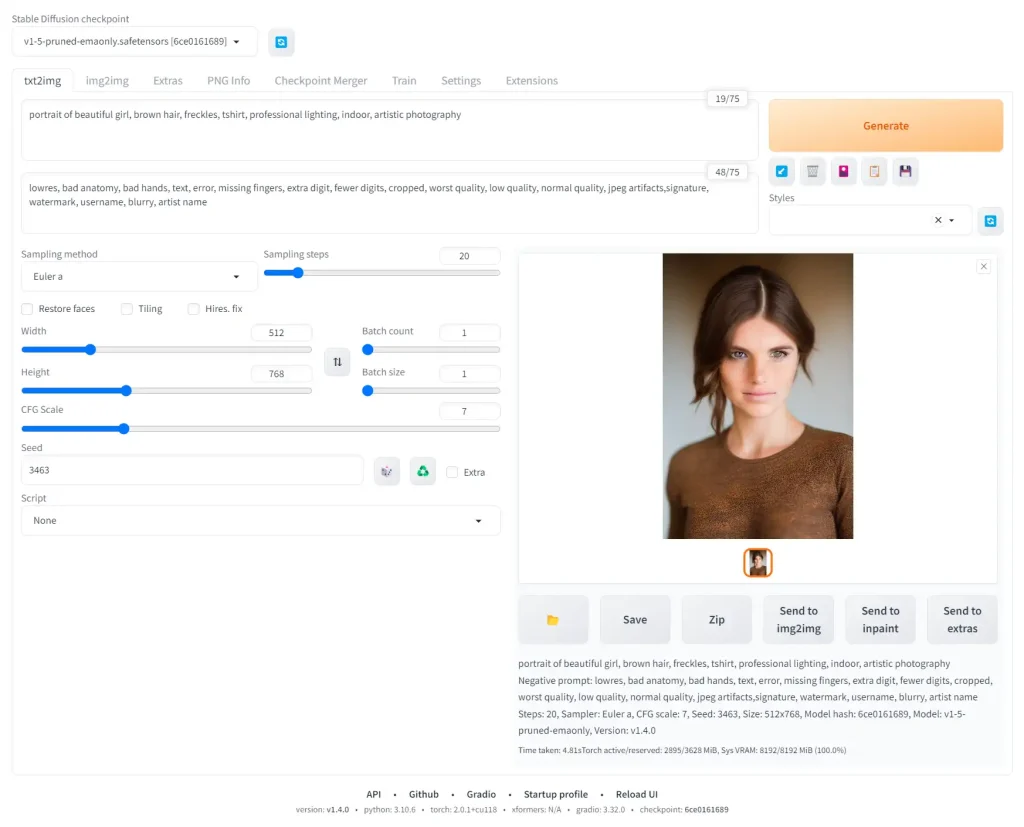

I am using the default sampler Euler a. You can play with these samplers to get an idea of what they do.
Check the official wiki for all the features that have been implemented in AUTOMATIC1111.
You can check out these basic prompts for where to get next:
I also highly recommend experimenting with popular models:
Next Steps
From here, the sky is the limit!
I recommend going through the rest of the Stable Diffusion for Beginners series:
Part 1: Getting Started: Overview and Installation
Part 2: Stable Diffusion Prompts Guide
Part 3: Stable Diffusion Settings Guide
Part 3: Models
Part 4: LoRAs
Part 5: Embeddings/Textual Inversions
Part 6: Inpainting
Part 7: Animation


I installed but I cannot find the webui-user.bat file. Using Windows 11 and and AMD RX580 8GB GPU
Hey Stefan, check the folder stable-diffusion-webui-directml that you downloaded.
Hello, thank you for the help with this.
The installer never seems to finish. I open webui-user.bat and it goes to “Model loaded in 4.0s (load weights from disk: 0.6s, create model: 0.4s, apply weights to model: 1.1s, apply half(): 0.8s, load VAE: 0.1s, move model to device: 0.9s).”
And there it stops. Twice. I hit enter several times, it just stays there for hours and never moves ahead.
I really hope you can help, I have an AMD CPU and a ATI AMD GPU, and I’ve attempted several installations of Stable-Diffusion and Invoke-AI, none of them use the GPU. It takes me 20 minutes to complete a small image. My computer is not exceptional, but it’s not really a slouch either, my CPU is an AMD Ryzen 9 5950X 16-core, 32-Thread Unlocked Desktop Processor.
Your install instructions for AMD were perfect! No hiccups or gotchas at all. Thank you.
Hey Derek, glad to hear that!
well… I tried and when I click on Generate nothing happens
AMD
well… I tried and when I click on Generate nothing happens
AMD
Hi,
No matter what I try, I see the image developing but when the process finished, I get a black image.
Image burning, happens a lot depending on setup, GPU, prompts, etc… you need to add some details should anyone give you help.