Inpainting is an essential part of any Stable Diffusion workflow.
It lets you correct the small defects by "painting" over them and regenerating that part.
It has 2 main uses:
- Fixing flawed parts of the image.
- Modify an image to your exact requirements.
By the end of this guide, you'll be able to go from this to this:

This is Part 6 of the Stable Diffusion for Beginners series:
Part 1: Getting Started: Overview and Installation
Part 2: Stable Diffusion Prompts Guide
Part 3: Stable Diffusion Settings Guide
Part 3: Models
Part 4: LoRAs
Part 5: Embeddings/Textual Inversions
Part 6: Inpainting
Part 7: Animation
Requirements
You should have downloaded AUTOMATIC1111. If not, use the following download guides:
Getting Started
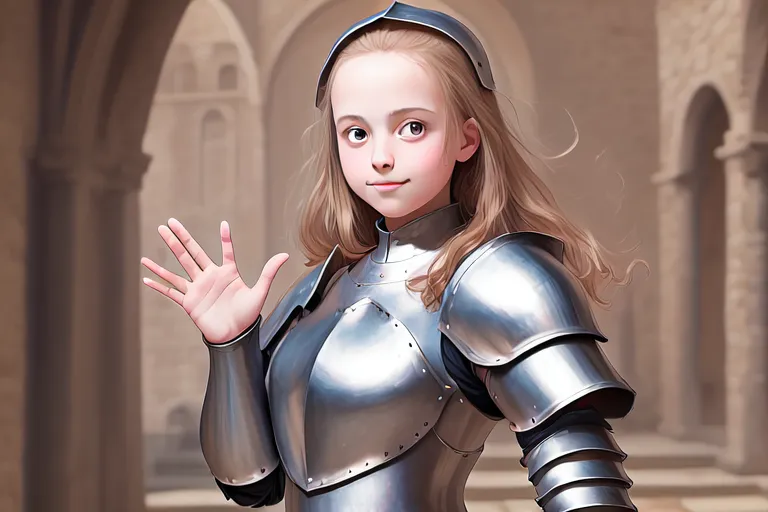
Generate your image as you normally would with any model and prompt.
Model: Dreamshaper
Prompt:
masterpiece, 1girl, medieval armor, waving to cameraThis is a good image to use inpainting on because the hands look like an easy fix. The character's forehead is quite large too, so I will fix that.
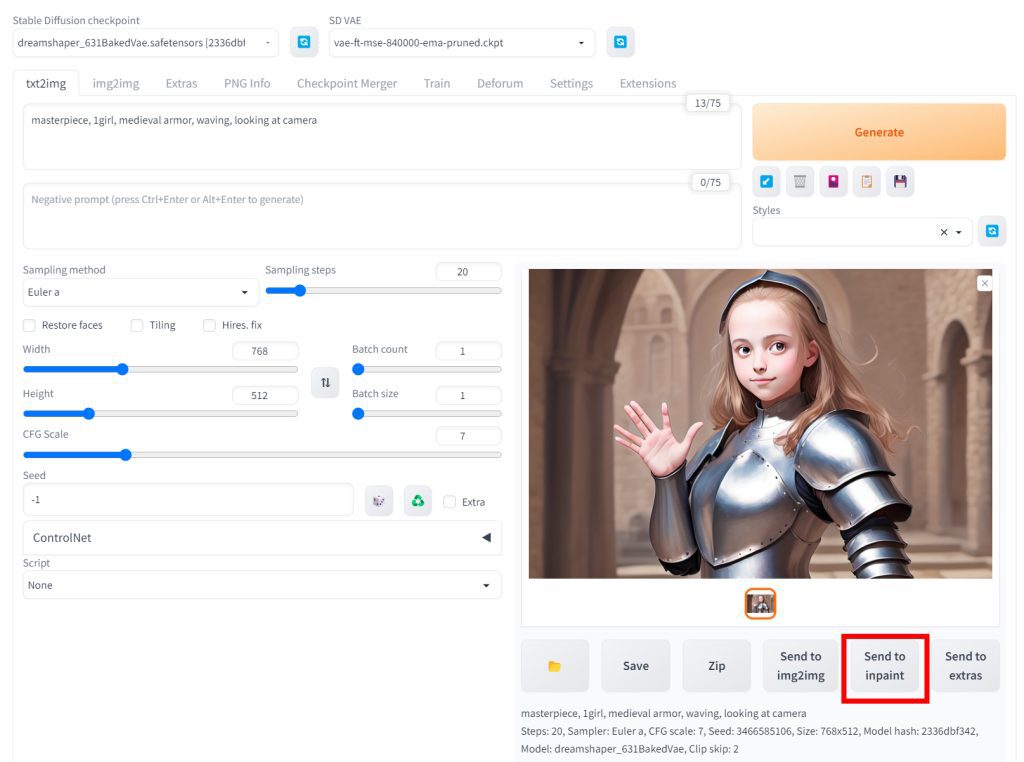
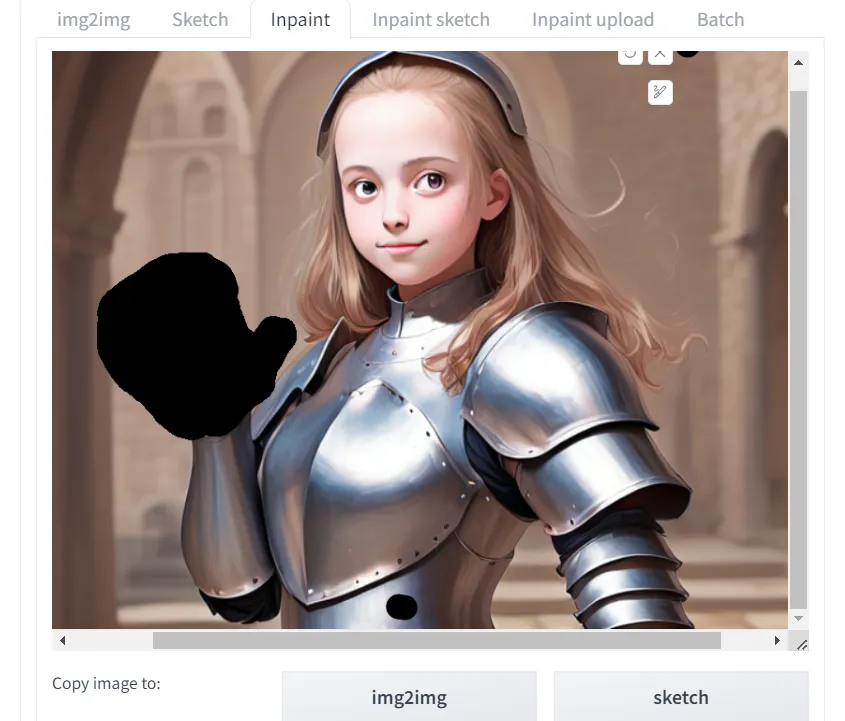
Click on the Send to inpaint shortcut underneath your image (this sends the image to the Inpaint subtab underneath the img2img tab.
Painting the Mask
You'll notice a lot of settings in the Inpaint tab. We'll get to that in a moment.
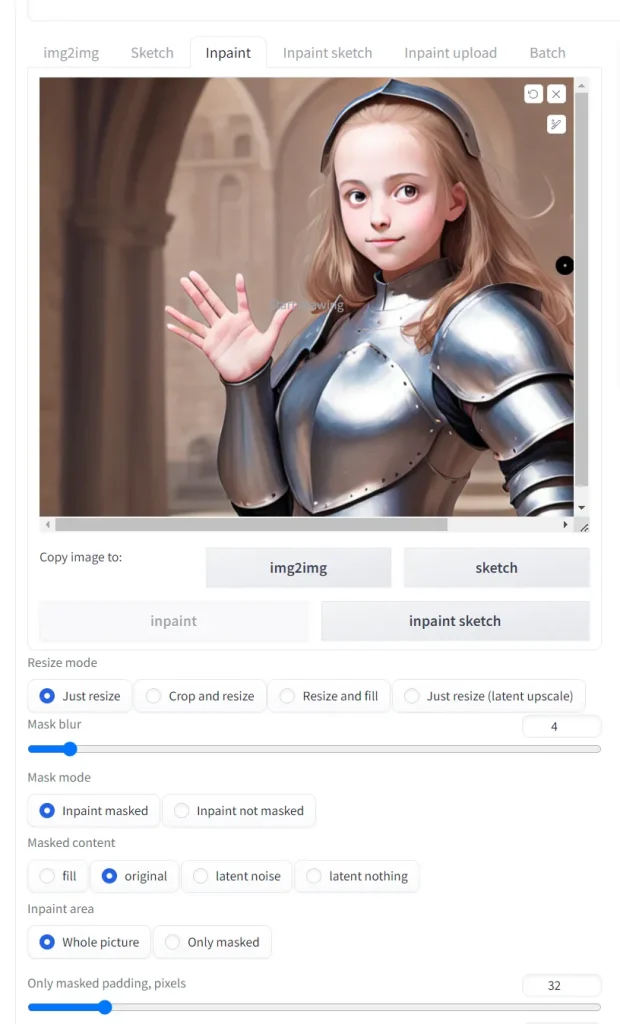
For now, you just want to paint over the parts you want to regenerate. This is called the mask. I like to leave a big margin on my masked area, so there is a bit of surrounding context that gets regenerated as well.
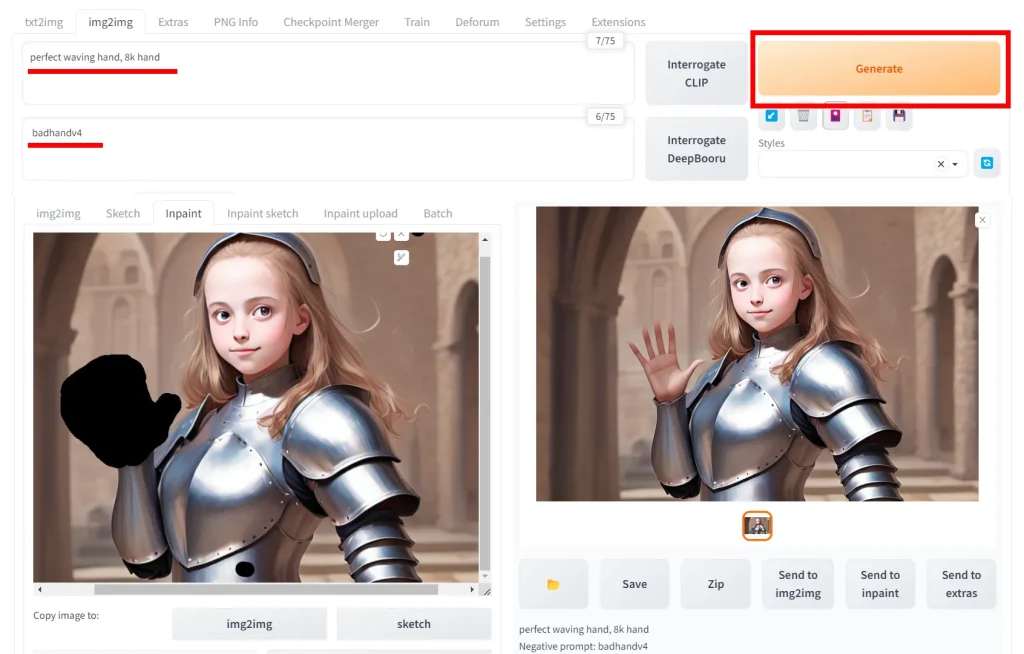
Prompting for Inpainting
This is a big confusing: you enter a new prompt for inpainting in the same place you write your prompt.
I say confusing because it looks like the same input box, but you'll see that they're different inputs on different tabs.
You're going to need a special prompt that focus on the elements of the image that you want to change.
In the negative prompt I'm using a textual inversion (embedding). This is not necessary but highly recommended.
Here's a few suggestions for fixing specific parts of the image:
| Faces | <describe the face here>, perfect face, very deep eyes |
| Anime Faces | <describe the face here> medium shot, anime, extremely detailed, intricate, ((clear_focus)), ((sharp_focus)), perfect_face, very deep eyes, ((round pupils)) |
| Hands | perfect hands, realistic hands |
If you're inpainting something else, for example a pedestrian walking in the background just describe that thing in your prompt.
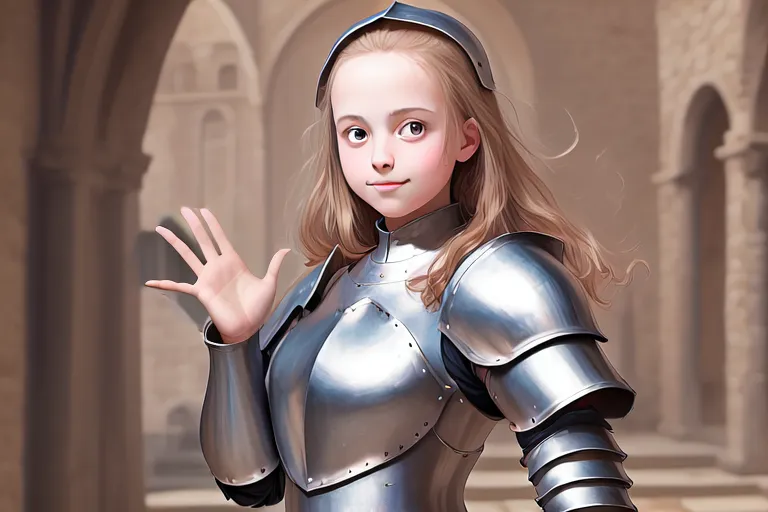
After 2 or 3 rerolls, we get a result we're satisfied with:
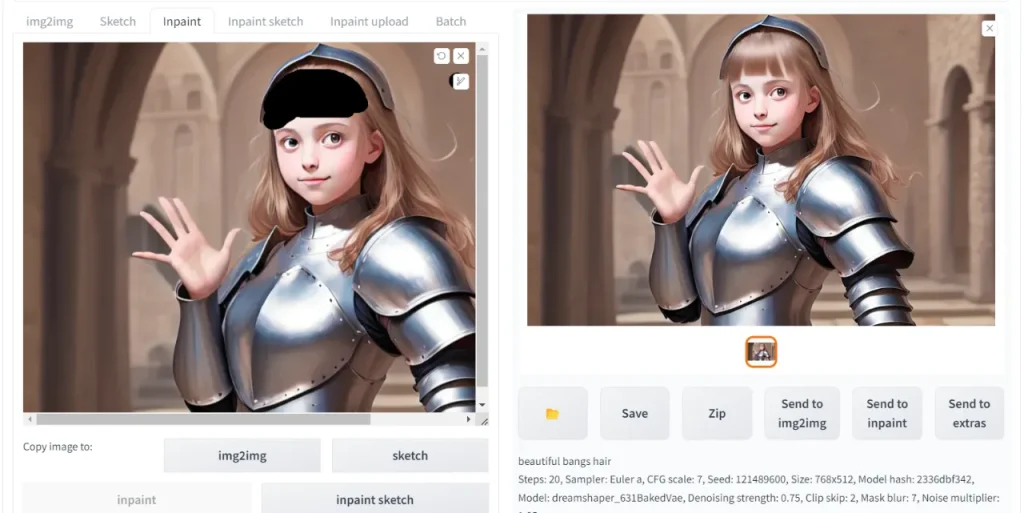
Next, I'll repeat the same process with the forehead. Save the new image and press X on the old image.
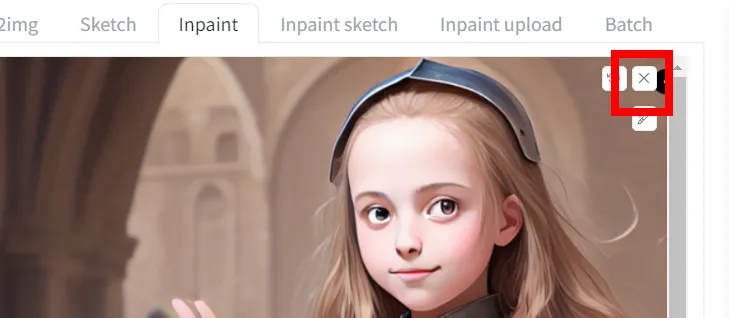
Upload the new image in the box that appears:
Then mask and prompt. Here my prompt is just "beautiful bangs hair".
Inpainting Settings
Here is a rundown of the settings and which ones you might want to change:
Resize mode
This setting only applies if you're changing your resolution (width and height settings below). Most of the time you won't touch it.
- Just resize: Resize to new resolution.
- Crop and resize: Resize so the entirety of the new resolution is filled with the image
- Resize and fill: Resize so that all of the old image fits inside the new one. Fill any missing space with colors.
Mask blur
- Inpaint masked: Paint over the part you painted black
- Inpaint not masked: Paint over everything not the part you painting black
Mask content
- Fill: Initialize generation with colors of the image
- Original: Initialize generation with what was there before
- Latent noise or Lantent nothing: Initialize generation with nothing
Inpaint area
- Whole picture: Context of the whole picture used. You should use this one.
- Only masked: Only masked area used
Standard settings
You'll also notice the standard Stable Diffusion generation settings below the inpainting settings.
Sampling Steps: set it to whatever is getting you good results.
Batch count: it will probably take a few attempts for the AI to create what you want it to so why not speed the process up by generating multiple images in one go?
CFG Scale: how closely the AI adheres to your prompt. Set to whatever has been working best for you.
Denoising strength: determines how little respect the algorithm should have for image's content. At 0, nothing will change, and at 1 you'll get an unrelated image. Start at 0.3 and work your way up from there.
Height & Width: set to the dimensions of your image.