LoRAs (Low-Rank Adaptations) are smaller files (anywhere from 1MB ~ 200MB) that you combine with an existing Stable Diffusion checkpoint models to introduce new concepts to your models, so that your model can generate these concepts.
These new concepts generally fall under 1 of 2 categories: subjects or styles.
Subjects can be anything from fictional characters to real-life people, facial expressions, poses, props, objects & environments.
Styles include visual aesthetics, art styles, and artist styles.
Quick Facts:
- Fine-tuning AI models to perform specific tasks can be slow and difficult. LoRA was created as a faster and more efficient way of fine-tuning large language models. LoRA was developed by Microsoft Research in 2021 [Paper][Github].
- It was later adapted to diffusion models for image generation.
- LoRAs are the most popular way to create custom generations because the hardware requirements to train them is much lower than that of full models. Their small size makes them easy to share and download.
- You can train your own LoRA with as little as 10 training images
- You must train your LoRA on top of a foundational/base model:
- Most realistic LoRAs today are trained on Stable Diffusion v1.5 (or models based on it)
- Most anime/cartoon/stylized LoRAs today are trained on NAI Diffusion (or models based on it)
- The next generation of LoRAs will be trained on SDXL
Quick Use:
- AUTOMATIC1111 users can use LoRAs by downloading them, placing them in the folder
stable-diffusion-webui/models/Loraand then adding the phrase<lora:LORA-FILENAME:WEIGHT>to your prompt, whereLORA-FILENAMEis the filename of the LoRA without the file extension, andWEIGHT(which takes a value from 0-1) is the strength of the LoRA - Sometimes LoRAs have trigger words that you must use in the prompt in addition to the keyphrase above
- You can use as many LoRAs in the same prompt as you want
In this guide, we'll briefly cover what a LoRA is, how it compares to other fine-tuning techniques, showcase some popular LoRAs, show you how to run them, and finally, show you how to train one.
This is part 4 of the Stable Diffusion for Beginners series:
Part 1: Getting Started: Overview and Installation
Part 2: Stable Diffusion Prompts Guide
Part 3: Stable Diffusion Settings Guide
Part 3: Models
Part 4: LoRAs
Part 5: Embeddings/Textual Inversions
Part 6: Inpainting
Part 7: Animation
What are LoRAs?
A LoRA is a type of training method for fine-tuning Stable Diffusion models.
What is fine-tuning?
Let's say we want to train a image model to generate images of our own likeness.
Training a model from scratch will be extremely expensive and prohibitive to most people.
Instead of training a new model from scratch, we can re-use an existing one as the starting point. We can take a model like Stable Diffusion v1.5 and train it on a much smaller dataset (the images of us), creating a model that is simultaneously good at the broad task of generating realistic images and the narrow task of generating images of our likeness.
LoRA vs Dreambooth
Dreambooth is another fine-tuning technique that lets you train your model on a concept like a character or style. Practically speaking, Dreambooth and LoRA are meant to achieve the same thing.
The difference is that Dreambooth updates the entire model, but LoRA outputs a small file external to the model.
This means Dreambooth training will produce a full checkpoint model (this is one of main ways people create custom models), but LoRA files must be used in combination with an existing checkpoint model.
In terms of quality, a well trained LoRA is comparable to a Dreambooth model. LoRA has the advantage of a much faster training process, lower GPU requirements, and smaller outputs.
LoRA vs Hypernetwork
Hypernetworks work almost the exact same as LoRA. They're also smaller files that you use with checkpoint models to introduce new concepts to your generations.
The difference is a technical one: hypernetworks and LoRAs both change values as they pass through the attention layers of the model, however they do this differently.
You can think of them as "legacy LoRAs" because they have largely become obsolete.
If you have a hypernetwork that you use and enjoy however, there's no reason to stop using it.
LoRA vs Textual Inversion
LoRA and Dreambooth are meant to teach a model a new concept.
Textual Inversion/Embeddings on the other hand, uses things that the model already knows to create a desired output. They're more like prompt helpers than anything.
Let's use faces as an example. When we're using a textual inversion to generate a face, the model isn't generating a "new" face.
Instead, our textual inversion is just a shortcut for the specific nose / chin / mouth / eyes combination already in the model that resembles what we want.
You can see the limitation: if it's not in the model already, it can't be produced by a textual inversion.
Textual Inversions remain very popular because they are used in Negative Prompts (a usage commonly referred to as a "negative embedding"). People train textual inversions on undesirable things like bad hands and mutations. When we place these in our negative prompts, we can improve almost every prompt.
What can LoRAs do?
LoRAs are extremely versatile. Here are some concepts that the Stable Diffusion community has trained LoRAs on:
- Quality improvements (eg. Detail Tweaker)
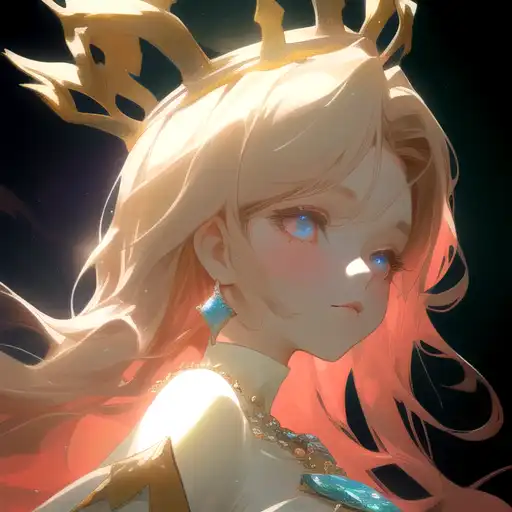
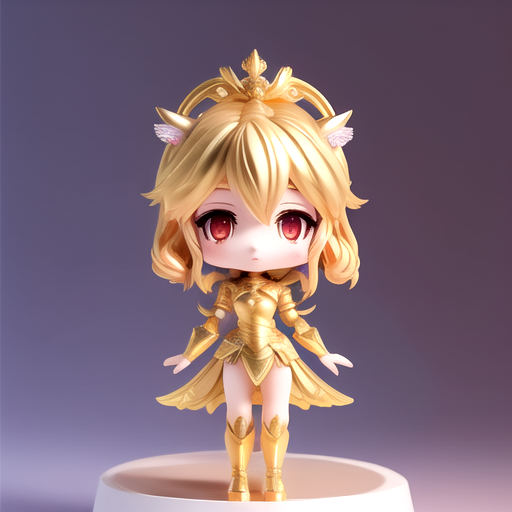
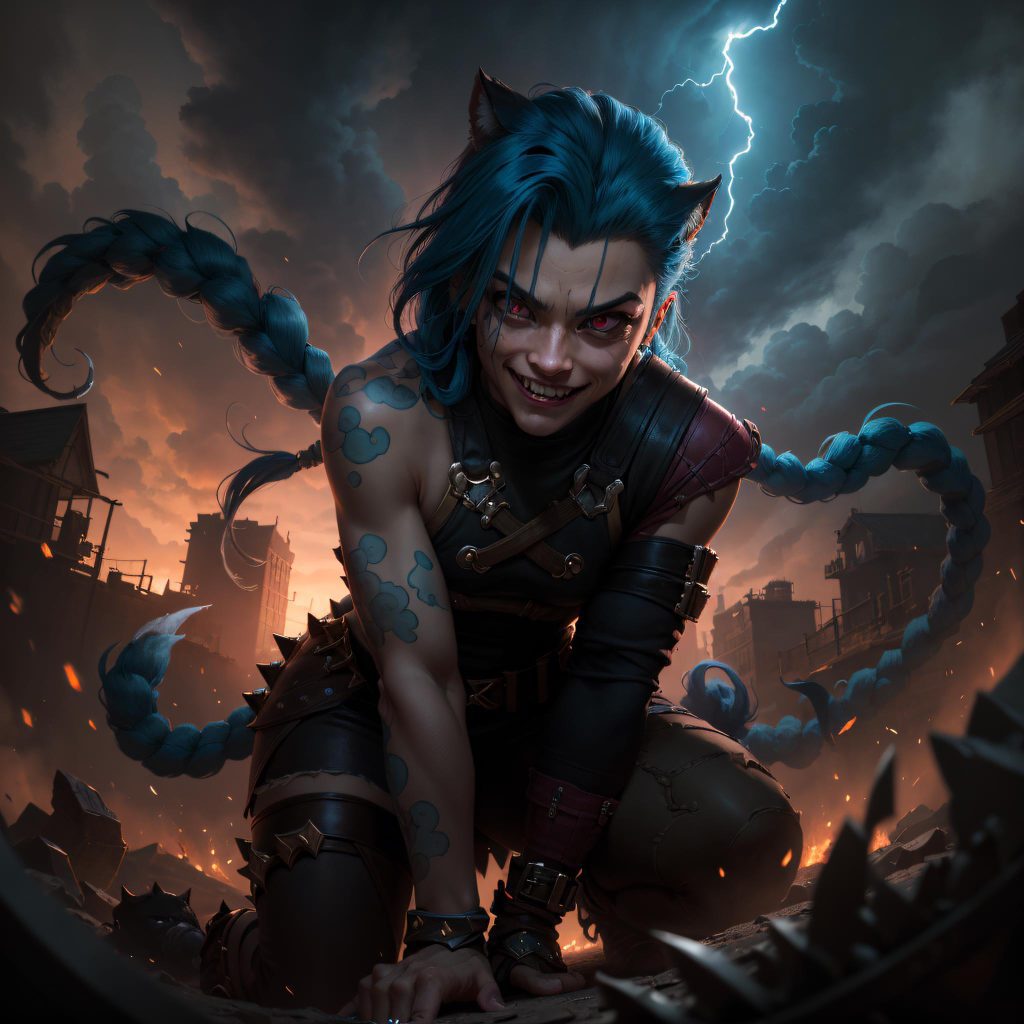
- Styles/aesthetics (eg. Arcane style, Studio Ghibli style, Anime Lineart)
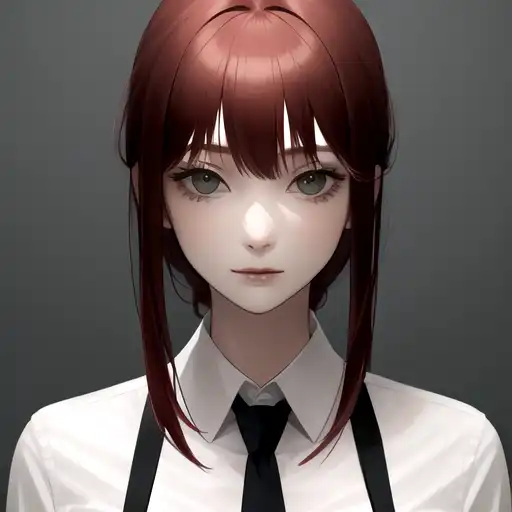
- Characters or people (eg. Makima, Cute_girl_mix)
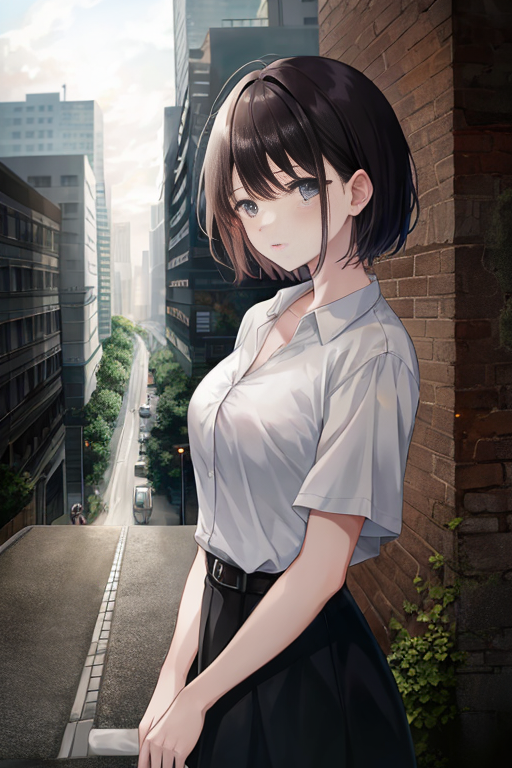
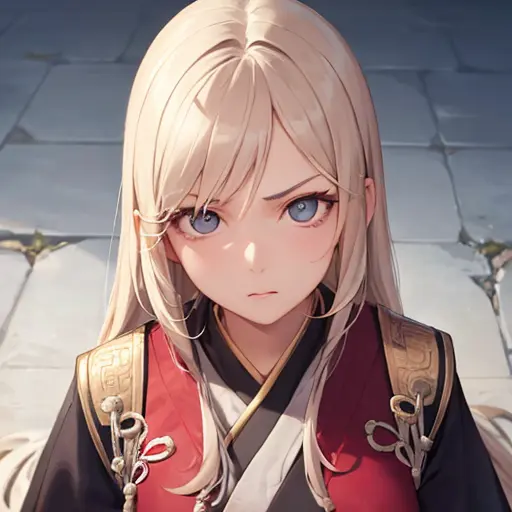
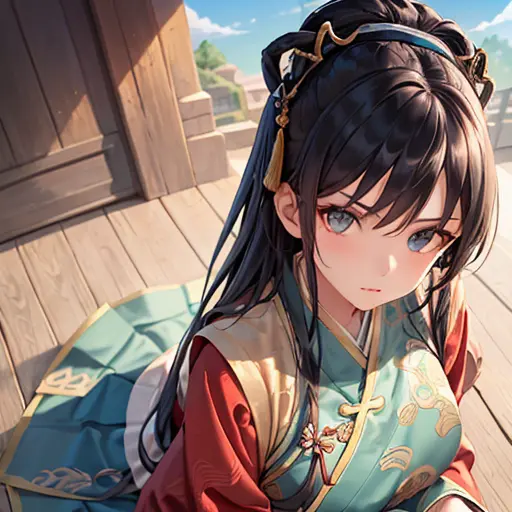
- Clothing or objects (eg. Hanfu, Taiwanese Foo)
- Settings (eg. School building)
The generations below use the same model, same prompt, and same seed. The only difference is the presence of the LoRA:
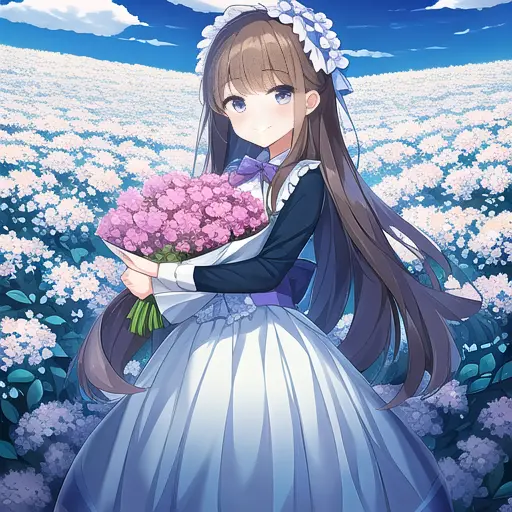
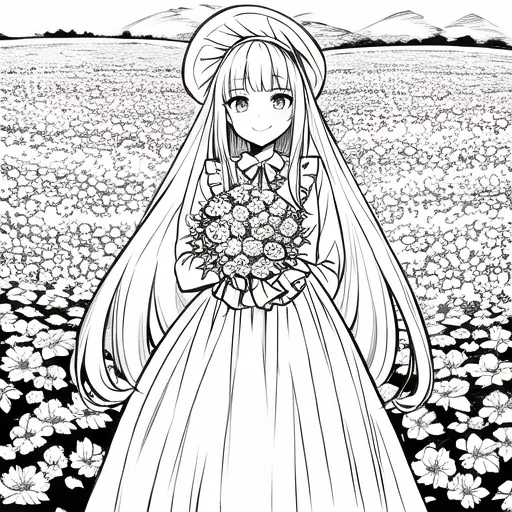
You can use LoRAs with any Stable Diffusion model, so long as the model and LoRA are both part of the same series:
- LoRAs trained from SD v1.x will only work with models trained from SD v1.x
- LoRAs trained from SD v2.x will only work with models trained from SD v2.x
- LoRAs trained from SDXL will only work with models trained from SDXL
Generally, realistic LoRAs work better with realistic models, and anime LoRAs work better with anime models. However this distinction is not so clear, as most popular models today are merges of realistic and anime/stylized models.
Sometimes, creators will usually have notes about recommended models in their LoRA descriptions.
Where do you download LoRAs?
There are 2 places to find LoRAs:
- Civitai.com: Most popular and recommended
- HuggingFace.co: Less popular. The problem is HuggingFace puts LoRAs in the same category as checkpoint models, so there's no easy way to find them.
I won't go into detail on NSFW LoRAs, but there are plenty on Civitai, you just have to make an account to see them.
Popular LoRAs
General Purpose LoRAs
LoRAs can be used to enhance image quality or produce interesting variations of an image.
- epinoiseoffset - increases contrast for better quality images. Recommended 🔥
- Detail Tweaker - increase or decrease the level of detail. Recommended 🔥
- CharTurnerBeta - creates character turnarounds for character design
Style/Aesthetic LoRAs
Produce a certain aesthetic or art style.
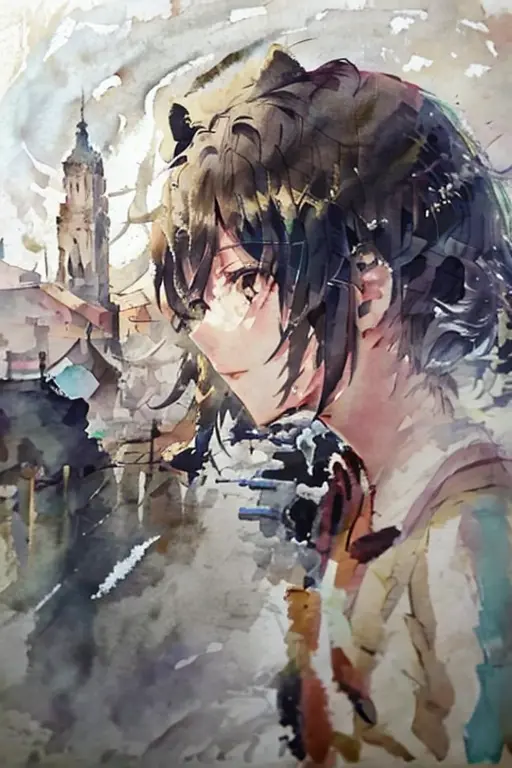
- Colorwater - watercolor style
- Anime lineart - lineart / colorbook style
- Anime tarot card art style - intricate tarot card illustration style
- Blindbox - 3D chibi style
- Anime Magazine Cover - magazine cover style

Character/Person LoRAs
Create a fictional character or a real-life person.
Costume LoRAs
- 【Costume】Straitjacket - adds straightjacket to characters
- Oversized Sweater/hoodie
- Urban Samurai - techwear & katanas
How to use LoRAs
With AUTOMATIC1111
Prerequisite: You have a working and updated AUTOMATIC1111. Here are platform specific instructions:
You must also have a checkpoint model downloaded and placed in the folder stable-diffusion-webui/models/Stable-diffusion. I'll use Anything V3 in this example.
- Download the LoRA file (
.ptor.safetensor) and place it in the folderstable-diffusion-webui/models/Lora. As an example, I’ll use Detail Tweaker, but you can use any LoRA you want. - Start your WebUI (click
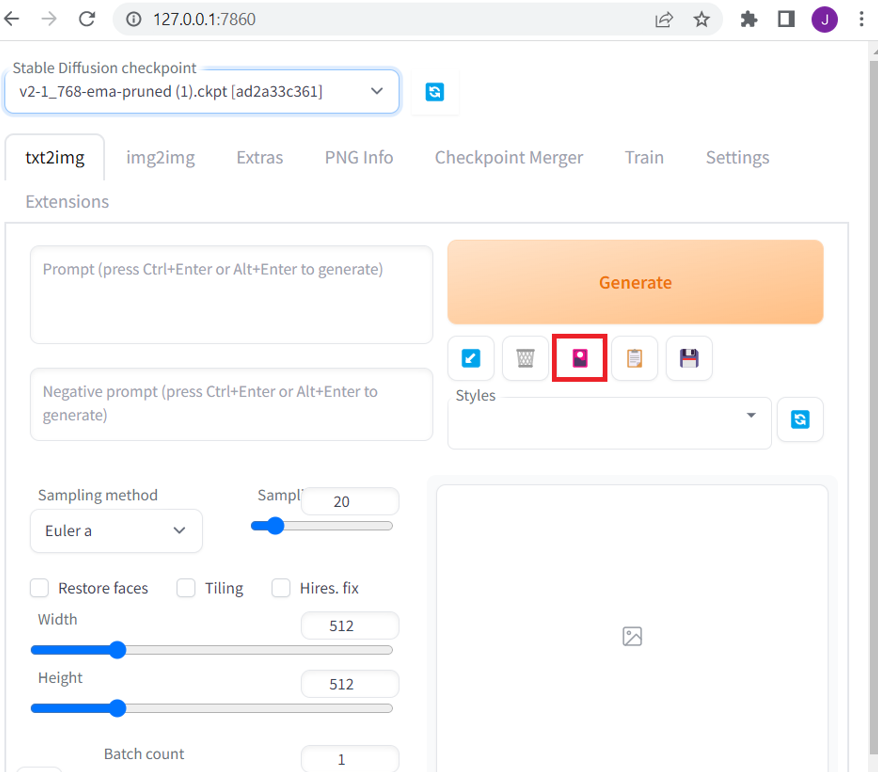
webui-user.bat). - Under the
Generatebutton, click on theShow Extra Networksicon. It’s a small pink icon:
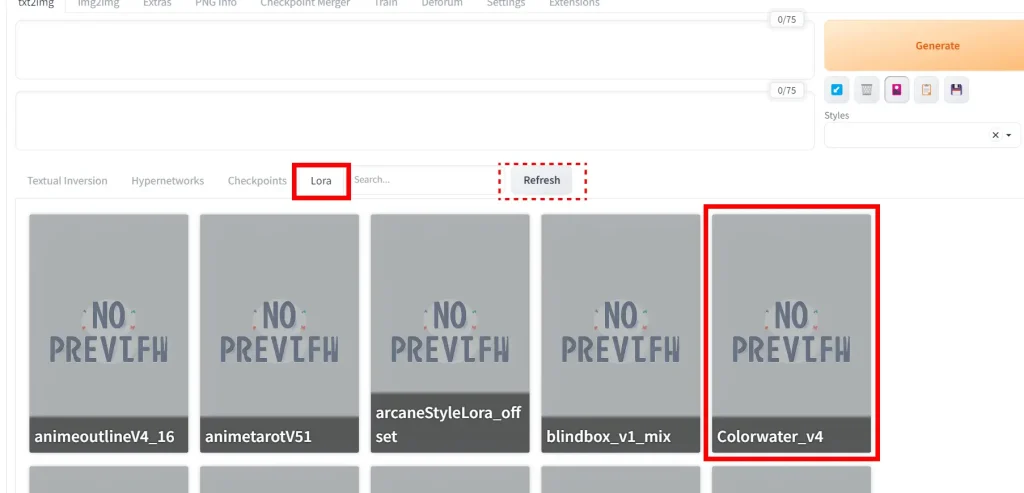
Click on the LoRA tab. It will show all the LoRAs in the folder stable-diffusion-webui/models/Lora (if you don't see anything, click the grey Refresh button).
Click on the LoRA you want, and the LoRA keyphrase will be added to your prompt. You can use as many LoRAs in the same prompt as you want.
You can also just write the LoRA keyphrase manually. It follows the format: <lora:LORA-FILENAME:WEIGHT>
LORA-FILENAME is the filename of the LoRA model, without the file extension (eg. no .safetensor).
WEIGHT is how strong you want the LoRA to be. The range is 0-1; 0 is the same as deactivating the LoRA, 1 is maximum strength. With many LoRAs, a weight of 1 can be overpowering to the point of creating poor results, so experiment with lower values like 0.5 to 0.8.
(Detail Tweaker is a little special. It goes in 2 directions, and accepts anything between -1 and 1. -1 will remove details, and 1 will add details.)
Trigger words: Sometimes LoRAs will have trigger words. These are words that activate the concept.
(Our example Detail Tweaker, does not have any trigger words. On the other hand, with a LoRA like Anime Lineart, you would want to include "lineart" in your prompt. The creator will usually tell you these trigger words, if any, in the LoRA description.)
Example
Write the prompt:
(extremely detailed CG unity 8k wallpaper),(masterpiece), (best quality), (ultra-detailed), (best illustration),(best shadow),(an extremely delicate and beautiful), dynamic angle, floating, finely detail,Depth of field,1girl,solo,girl with beautiful detailed despair face and long fluttering hair and beautiful detailed eyes,((blood)) <lora:add_detail:1>And the negative prompt:
mutated hands and fingers:1.5,lowres, bad anatomy, bad hands, fused fingers,text error, liquid digit,missing fingers, extra digits,malformed feet, fewer digits, cropped,fused feet,worst quality, low quality, standard quality, jpeg artifacts , signature, watermark, username, blurry,bad mouth,cracked mouthSet the seed: 3944989649
And then click Generate. Here's what I get.
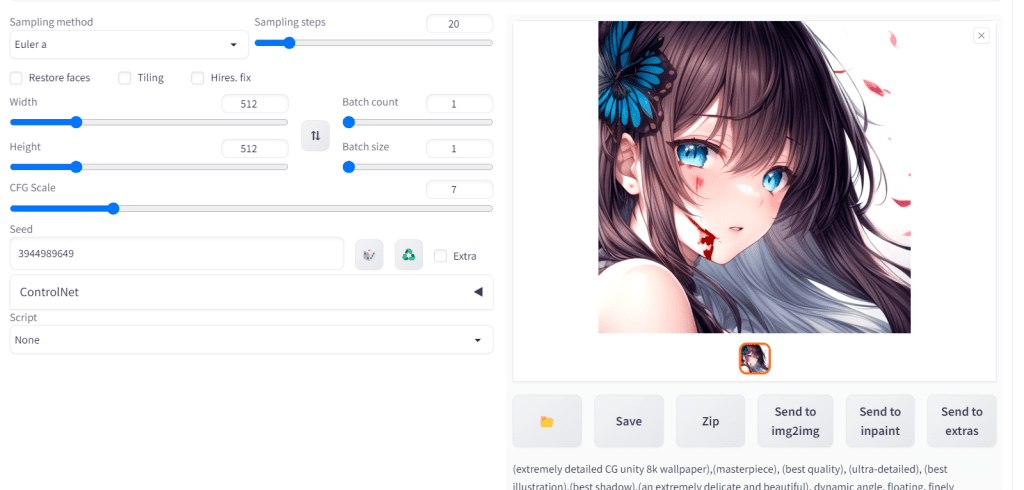
Make sure your settings are all the same if you are trying to follow along. I am using the Euler a sampler, 20 sampling steps, and a 7 CFG Scale.
How can you tell what the LoRA is actually doing?
Change <lora:add_detail:1> to <lora:add_detail:0> (deactivating the LoRA completely), and then regenerate.
Then change this phrase to <lora:add_detail:-1> and regenerate (remember the negative direction removes detail).
Then we can compare the generations:
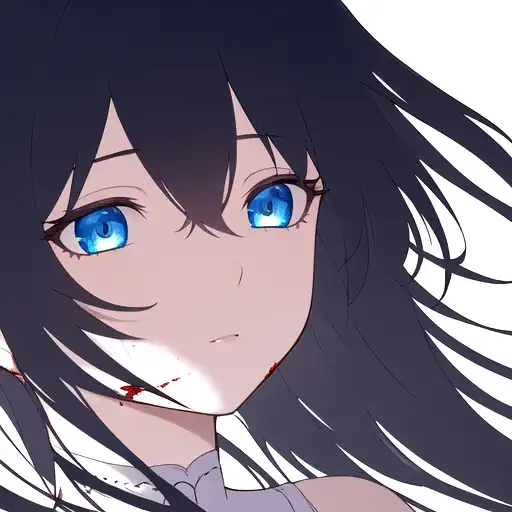
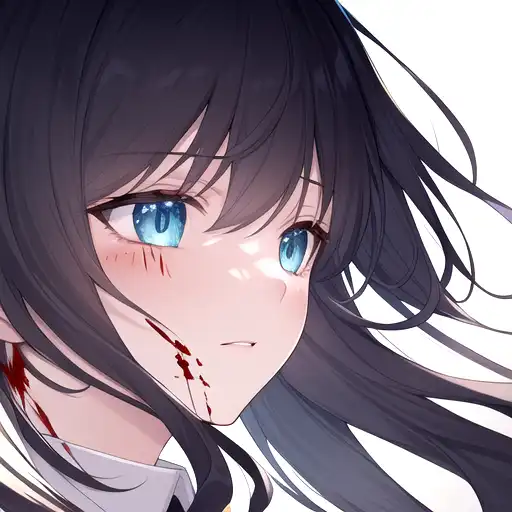
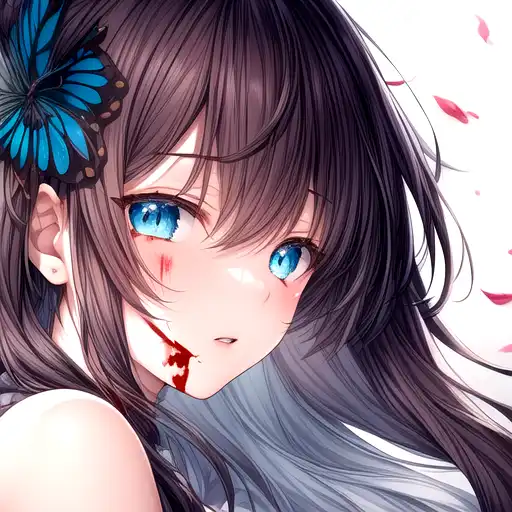
Adding detail gives a boost in detail, lighting and textures. On the other hand, removing details creates a flat style illustration which is appealing in its own way.
Training LoRAs
Training LoRAs has been compared to baking a cake, and that's the best analogy I've seen so far.
You try to get the best ingredients (training images), use the right temperature (settings), but after you pop it in the oven (start training) you can only pray that everything goes right.
You'll have no idea if your will be successful or not until it's actually finished (althought you can check on progress throughout).
That's why it's important to dive in and BAKE, instead of trying to create the "perfect LoRA". You should spend more time baking and less time reading!
A failed LoRA will teach you much more than any guide you read. Use the default numbers below and troubleshoot from there. It's impossible to entirely predict what the AI is going to do, what elements it's going to struggle with, how it will accept the given images and so on.
The good part: every LoRA you train will give you better intuition and new insights into how to train the next one better.
I don't claim this is the "right" way train. These are some best practices that I've picked up from training around 40 LoRAs.
I've written a separate guide for training SDXL LoRAs with Runpod.
Before you get started you'll need:
- NVIDIA GPU with at least 6GB, but realistically 8GB or more of VRAM (solutions for AMD cards exist but are not mature)
- If you don't have NVIDIA, don't have enough VRAM, or just plain want to train faster, you can use Google Colab for your training.
- A foundational model:
- Many (but not all) models are suitable as your foundational/base model. Pick a model that is good at what you're trying to do. More model suggestions below.
- Here are some ideas:
- For anime/cartoon style, choose a NAI family model: NAI Diffusion, AnythingV3.0, AnythingV4.0, AnythingV4.5, AnythingV5.
- For realistic style, choose Stable Diffusion v1.5, or if you have 12GM VRAM, you can go for SDXL.
Here's what we'll be doing:
- Prepare training images
- Create folder structure
- Install Koyha SS
- Captioning/Tagging
- Train LoRA
Step 1: Prepare training images
Decide what you want the subject for your LoRA to be before you start.
One of our subscribers sent me a dataset of Lisa, the K-pop artist:
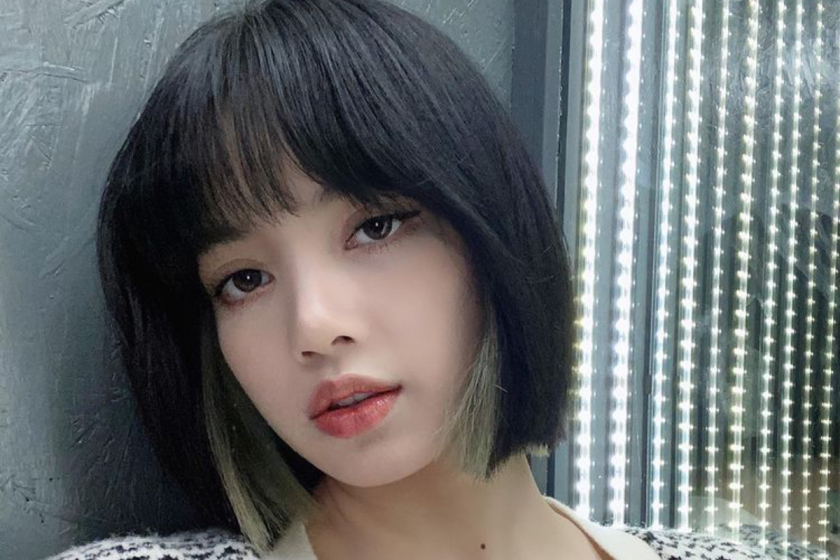
I'l use this as an example to train a LoRA step-by-step. Here are the images the LoRA is capable of producing when it's finished:
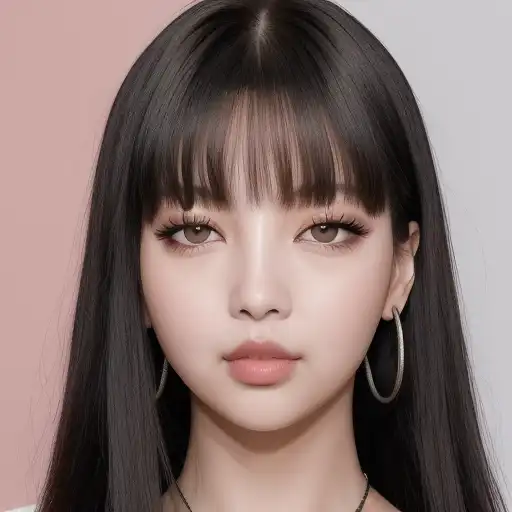
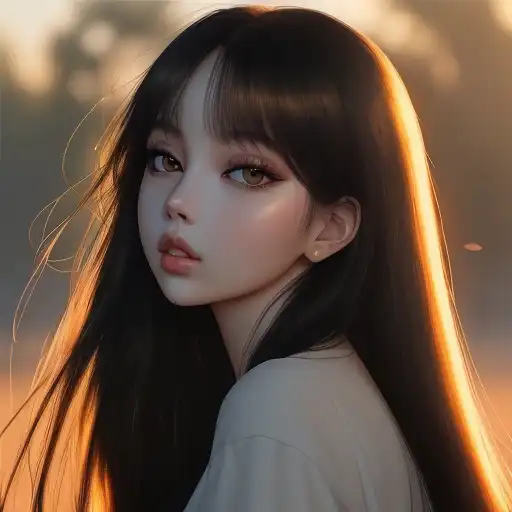
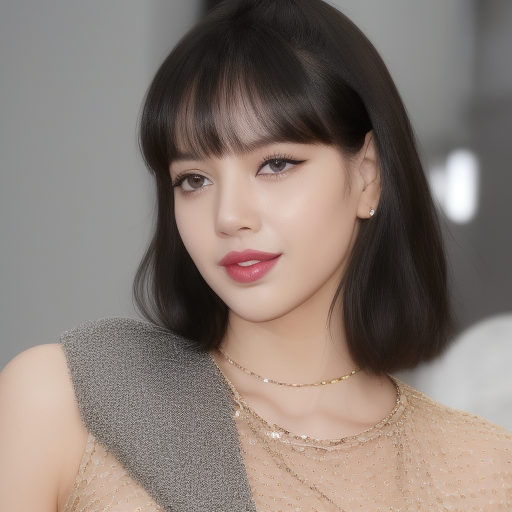
The dataset has 34 images. The more images the better, but quality matters. Don't add images for the sake of adding images if they are low quality.
Only use JPGs and PNGs. Convert any WEBP images to JPG/PNG before starting.
If creating a character, make sure your images have:
- Unique poses
- Unique zoom angles
- Different outfits
- Different colors
- Higher resolution than 512x512
Image Sources
Here are some helpful websites to get images from:
- Pinterest: Great for versatility. You'll probably find what you're looking for
- Danbooru: Largest booru website - most anime checkpoint models and LoRAs get their images from here
- Safebooru: Like Danbooru, but only for SFW images
- MovieStillsDB: Archive of 1 million+ movie stills, searchable by actors and film title
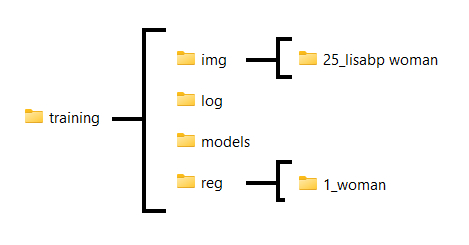
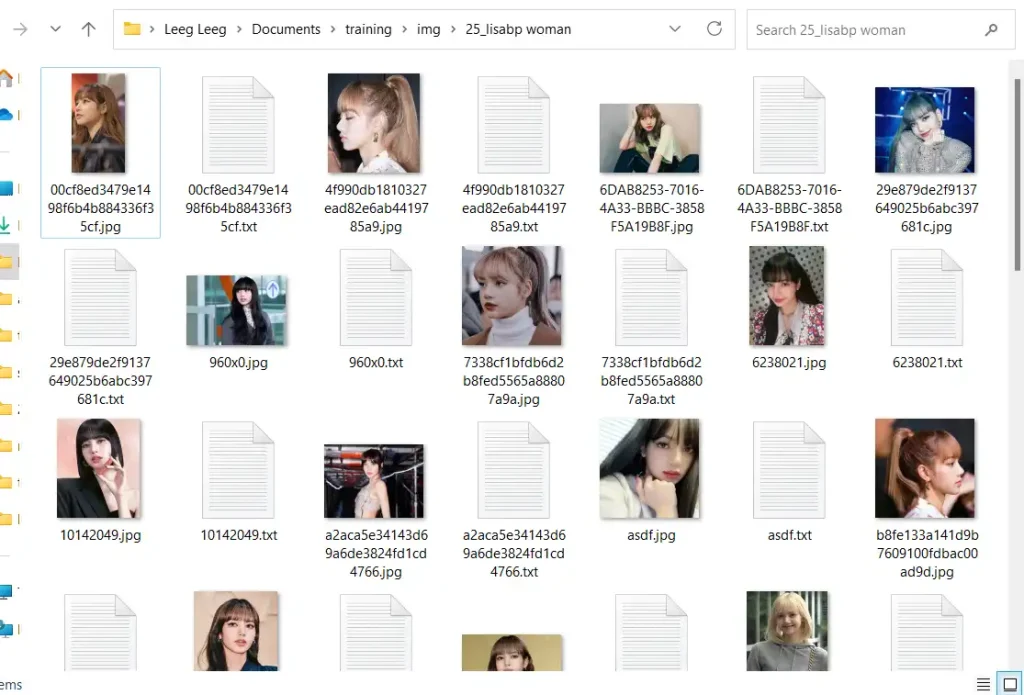
Step 2: Folder Structure
Create this folder structure:
img: This is the folder that will hold the image folder- Inside this
imgfolder create a subfolder following the conventionREPEATS_TRIGGERCLASSREPEATSis the number of passes the training algorithm will make over every image, per epoch.
A good number is 200-400 divided by the amount of images you have, rounded down. eg. 34 images, 200 / 34 ≈ 6 (there are no hard-and-fast rules when it comes to choosing this number. I'll explain why I calculate it like this below)
TheTRIGGERis something that will be mentioned in your prompt for the LoRA to be applied correctly. Choose something unique that the model will not interpret as something else --->lisabp, I won't use "lisa" because the model might interpret that as something else.
For theCLASS, use the broad class of thing your subject falls in. --->woman
So I would call my folder6_lisabp woman
Do not put anything else inside this folder!
- Inside this
model: This folder is where your final models will be placedlog(optional): Where your logs will goreg(optional): This is where regularization images are placed. This is optional, but highly recommended.- Create a subfolder with the following format:
1_CLASSwhere:CLASS: should be the same as the one used in the naming of your image folder above --->woman
So in this example we would use1_woman
- Create a subfolder with the following format:
I like to put everything in the same folder to stay organized. I'll end up with a folder structure that looks like this:
Step 3: Regularization Images for Training
Regularization images are optional. You can completely exclude regularization images and train almost everything just fine.
There are various ways to get regularization images.
Here are some premade sets you can download:
https://huggingface.co/datasets/ProGamerGov/StableDiffusion-v1-5-Regularization-Images/tree/main
I will be using the "woman" dataset woman_v1-5_mse_vae_ddim50_cfg7_n4420.zip.
Download the set that you think is best for your subject. Extract the zip folder.
Copy over at least X number of images to the subfolder in the reg folder you created in the previous step (mine is called 1_woman), where X = REPEATS * NUMBER_OF_TRAINING_IMAGES.
In our case this is 6*34 = 204 images.
Step 4: Install Koyha SS
Koyha SS is the best-in-class user interface for training models right now.
Required Dependencies
- Install Python 3.10
- make sure to tick the box to add Python to the 'PATH' environment variable
- Install Git
- Install Visual Studio 2015, 2017, 2019, and 2022 redistributable
Open an Command Prompt window (In the searchbar, search for "command prompt", click Command Prompt).
In the command prompt, navigate to where you with to install Kohya.
Use this command to move into folder (press Enter to run it):
cd FOLDER_NAMEUse this command to go back up a folder:
cd ..Use this command to list all folders within the folder you are in. This can help you orient yourself:
dirAs an example, I will install Koyha in my Documents folder. I would type this command:
cd documents
Copy and paste each line, one by one, and press Enter.
git clone https://github.com/bmaltais/kohya_ss.git
cd kohya_ss
.\setup.bat
Enter 1, and then 1 for the options:
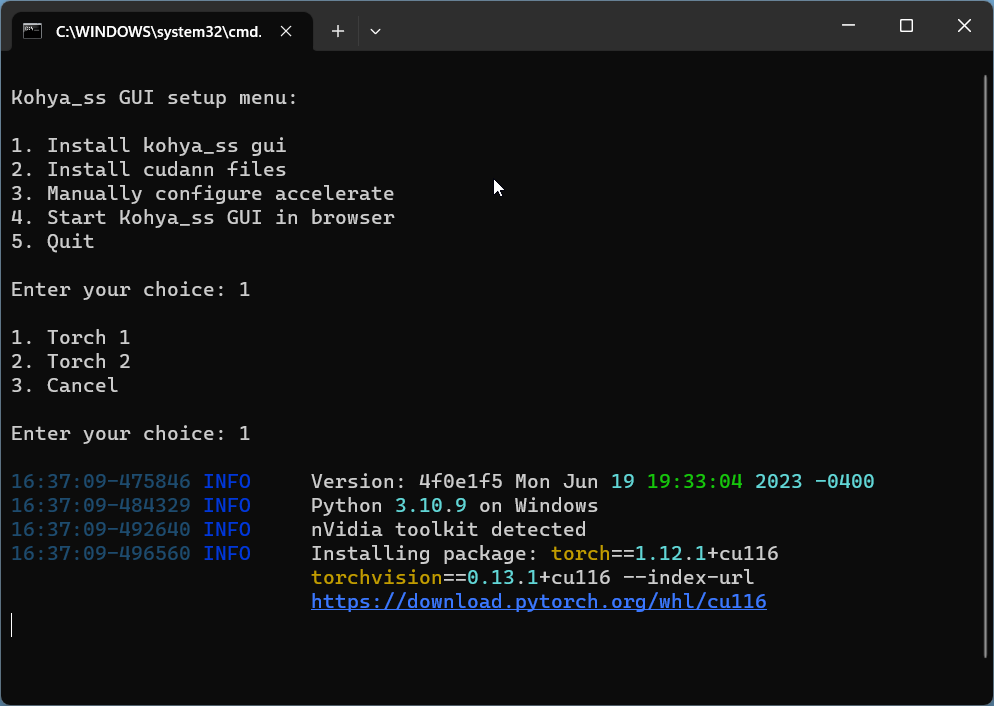
Note: it may take a while to fully install the packages.
When the installation is complete, enter 4, which is the option to Start Kohya_ss GUI in browser.
In a few seconds it should give you the success message:
Running on local URL: http://127.0.0.1:7860
Go to this URL in your web browser http://127.0.0.1:7860 to open the interface:
Step 5: Caption Images
Every image in your training data needs a corresponding caption, or a .txt files that describes the content of the image.
Luckily, Koyha has a built in tool for automatically recognizing and captioning images.
It will help us caption with natural language sentences like: "girl with yellow dress sitting down", as well as comma divided tags like "1girl, yellow dress, sitting". The caption style depends on whether your subject is realistic or anime/stylized.
For Realistic Subjects
Click on the Utilities tab -> Captioning tab -> BLIP Captioning tab.
In Image folder to caption, select the folder with your training images.
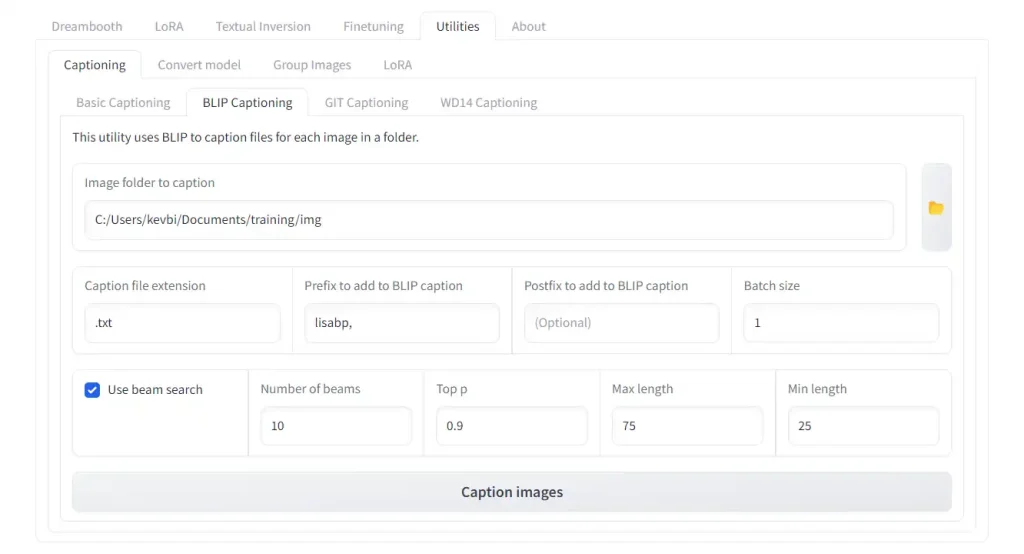
For the settings:
Prefix to add to BLIP caption: Add your chosen triggerword, followed by a comma and space. In our case 'lisabp, 'Batch size: Stay at 1-2, unless you have a GPU with higher VRAM.Use beam search: CheckedNumber of beams: Increasing this setting produces more coherent 'sentence-like' captions. Set this between 10-15.Min length: Set this to 25-30, otherwise the captions will be too short.
Hit "Caption Images". The first time you do this, it will take a while to download the BLIP captioner. Check your Command Prompt for status updates.
After the captioning is done, the tool will automatically place the caption files in the same folder as your training images.
For Anime / Stylized Subjects
Anime subjects require a different captioning style.
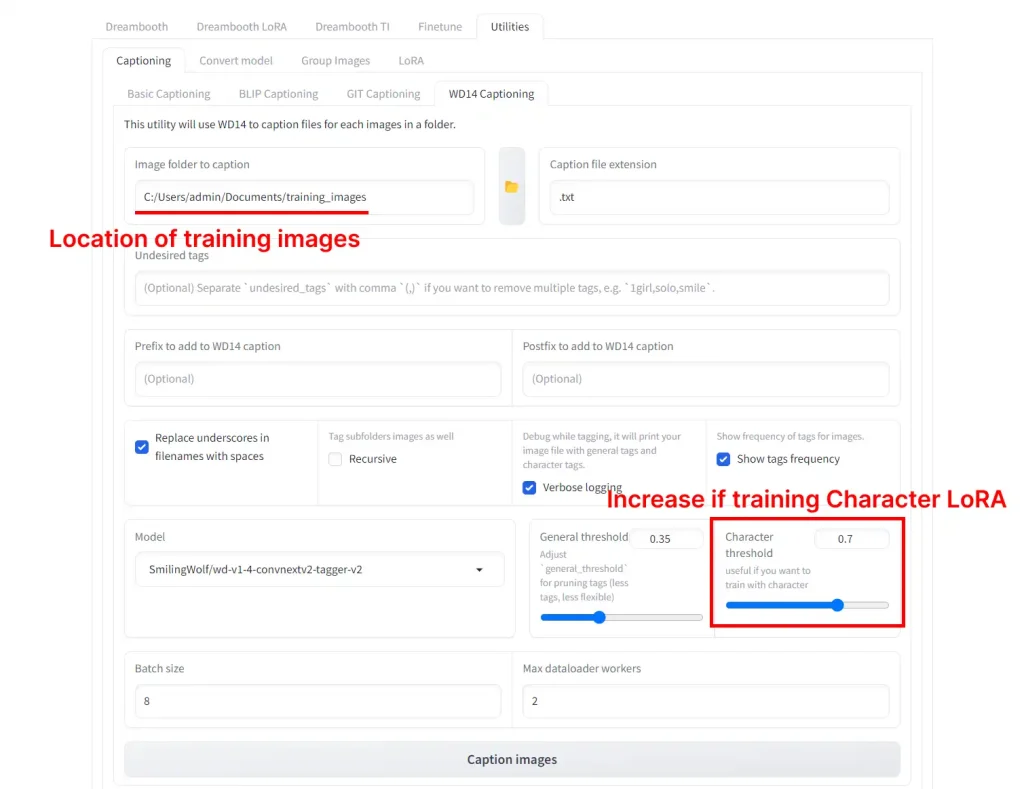
Click on the Utilities tab -> Captioning tab -> WD14 Captioning tab.
In Image folder to caption, select the folder with your training images.
If you're training a style LoRA you can leave the default settings. If training a character LoRA change the Character Threshold setting to 0.7
Hit "Caption Images". The first time you do this, it will take a while to download the Blip captioner. Check your Command Prompt for status updates.
After the captioning is done, the tool will automatically place the caption files in the same folder as your training images.
Step 6: Training
You're finally ready to train!
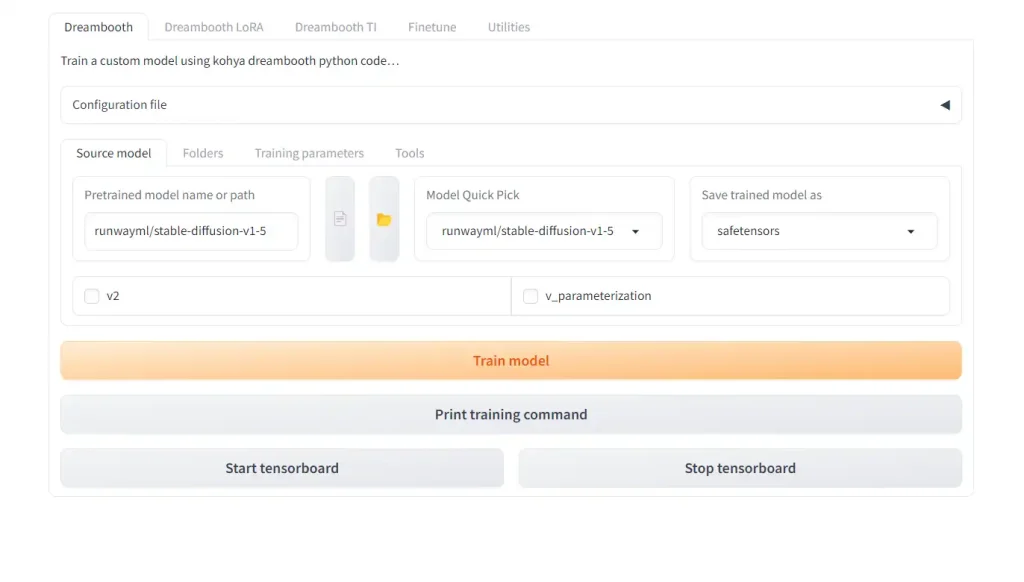
Make sure you switch to the LoRA tab, and are not on the Dreambooth tab. This has caused a lot of confusion because the contents of the tabs look the same.

Model Selection
Select the foundational (base) model you will train your LoRA on.
Model Quick Pick will let you use the base models from StabilityAI and its partners:
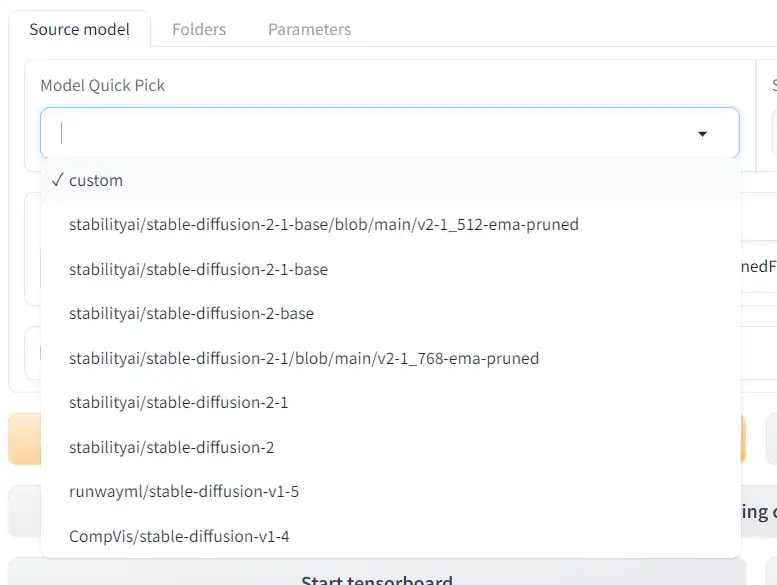
If you select custom, you can choose a model you have downloaded.
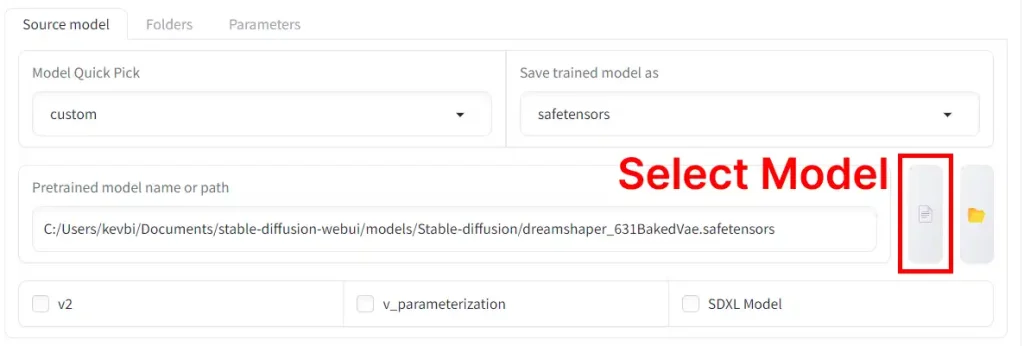
Other options:
v2checkbox: Check the v2 checkbox if you're using Stable Diffusion v2.0 or v2.1 as a base, or a model finetuned from these.SDXL Modelcheckbox: Check the SDXL Model checkbox if you're using SDXL v1.0 as a base, or a model finetuned from SDXL. This requires minumum 12 GB VRAM. If you don't have enough VRAM try the Google Colab.
The base models work fine; sometimes custom models will work better. Here are some models that I recommend for training:
- NeverEnding Dream - Great model for character and specific subject training (BLIP or WD14 both work)
- Anything V5 - Anything V3 kicked off a generation of anime LoRAs. This is next version from the same author. (WD14 captioning)
- ReV Animated -A dependable and predictable model that you can use as a fallback (BLIP or WD14 both work)
- AnyLora - Model created for training anime LoRAs (WD14 captioning)
Configuration File
Download the configuration file (Go to link, then Right Click page -> Save as), then change the extension so the filename is pastebin.com_raw_ZgbbrE7f.json
Click the "Configuration File" dropdown and then Open.

Select the file you just downloaded and then press Load.
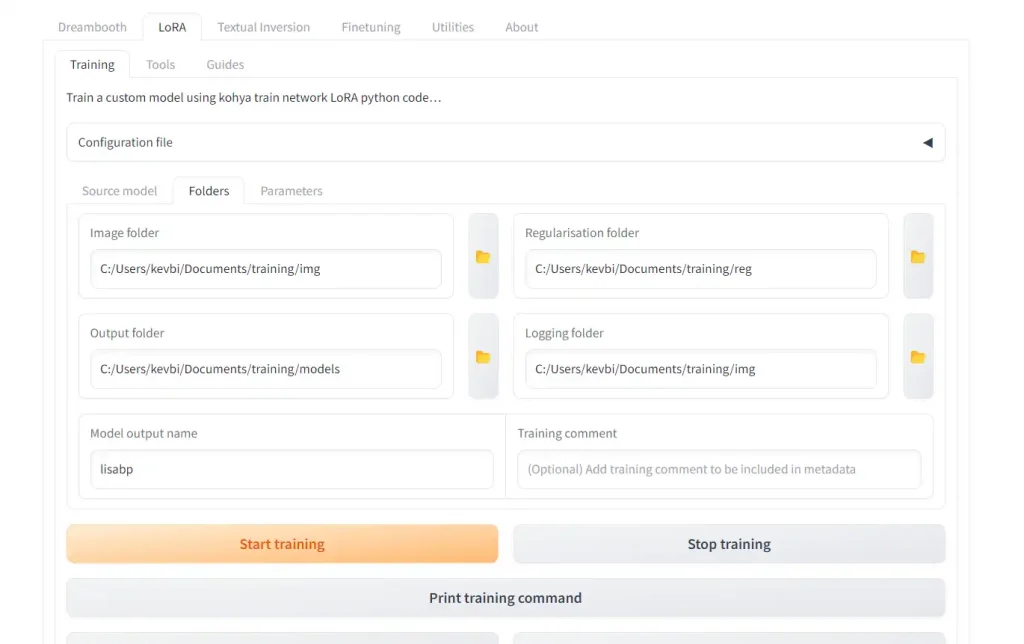
Set Folders
Go to the "Folders" tab and set your folders:
Image folder: location ofimgfolder you made in previous step (NOT the numbered subfolder inside it)Output folder: folder to put your LoRAs in when completeRegularizationfolder(optional): location of reg folder that contains a subfolder with your regularization imagesLoggingfolder(optional): folder to output your logs toModel output name: Name of your outputted LoRA. I usually like to name the LoRA the trigger word followed by a version number like "_v1", in case I train a few (most of the time, it takes multiple tries to get it right).
Epochs and Steps
I find that character LoRAs come out best when trained on between 1500-3000 steps.
There are a number of ways to achieve this, but first let's understand how steps are calculated:
total steps = (number of images * repeats * epochs * regularization multiplier) / batch size
- number of images is self explanatory, it's the number of training images you gathered earlier and put in a subfolder.
- repeats is the number of times our training algorithm will go over each image per epoch. We get the repeats from the number we used in the name our training image folder earlier. Our folder name was
6_lisabp woman, and 6 was the number of repeats. - epochs is a setting you can change in the
Parameterssubtab. It shows how many complete passes the learning algorithm makes through the entire training dataset. - regularization multiplier is either 1 or 2. If you aren't using regularization images, this is 1 (nothing happens). If you are using regularization images, this is 2 (steps are doubled).
- batch size is a setting you can change in the
Parameterssubtab. It refers to how many images are being trained at once.
You can use your number of images as a starting point to calculate these other numbers. Here's an example:
I have 34 images of my subject, and my folder is named 6_lisabp, meaning 6 repeats. With one epoch you get 34 images × 6 repeats = 204 steps.
If I set epochs to 10, I will run the training for a total of 34 images × 6 repeats × 10 epochs = 2040 steps, which falls within my recommended step range of 1500-3000.
Now why wouldn't I just set my repeats to 60 and set my epochs to 1? Wouldn't that yield the exact same result? (34 images × 60 repeats × 1 epoch = 2040 steps)
Yes, it would. There is no difference in the resulting LoRAs if we train for 1 repeat & 100 epochs compared to 100 repeats & 1 epochs, everything else being equal.
The reason we use epochs is they let us testing our LoRA throughout the training process. There's a setting that allows you to output a LoRA every epoch. If you only had one epoch, you would only get the final model. If I have 10 epochs, I'll get 10 versions of the model, outputted every 204 steps.
This lets you test every LoRA to see at what point the model is trained best, and and what point the model becomes overfitted.
So: the lower repeats we have, the epochs we can have, the more models we can output throughout the training process, helping us pick the true best number of steps for training our model!
This is why I recommed tweaking your repeats so that a single epoch (number of images × number repeats) is 200-400 steps. This will let you get many models to choose from.
Start Training!
Hit Train model and the training will commence. In the Command Prompt window, you will see a progress bar:
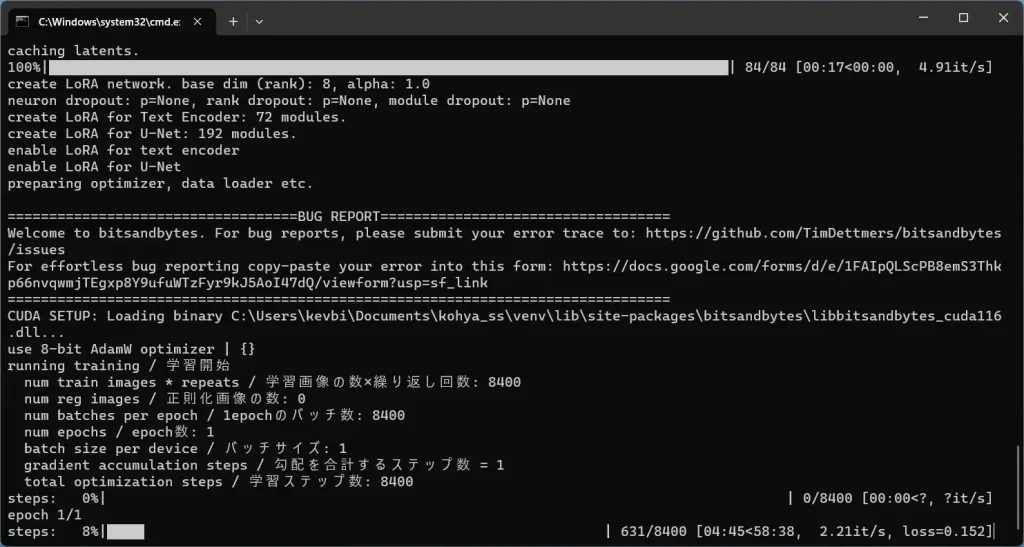
Training will take anywhere depending on 15 minutes to 2 hours, depending on your GPU and the size of your dataset.
After your LoRA is finished, you can use them as described earlier in this guide with AUTOMATIC1111 WebUI.
Make sure to include the LoRA keyphrase your trigger word in your prompt. As an example:
(Most likely you don't want to set the weight at the maxium of 1)
lisabp with long black hair golden hour light <lora:lisabp:0.85>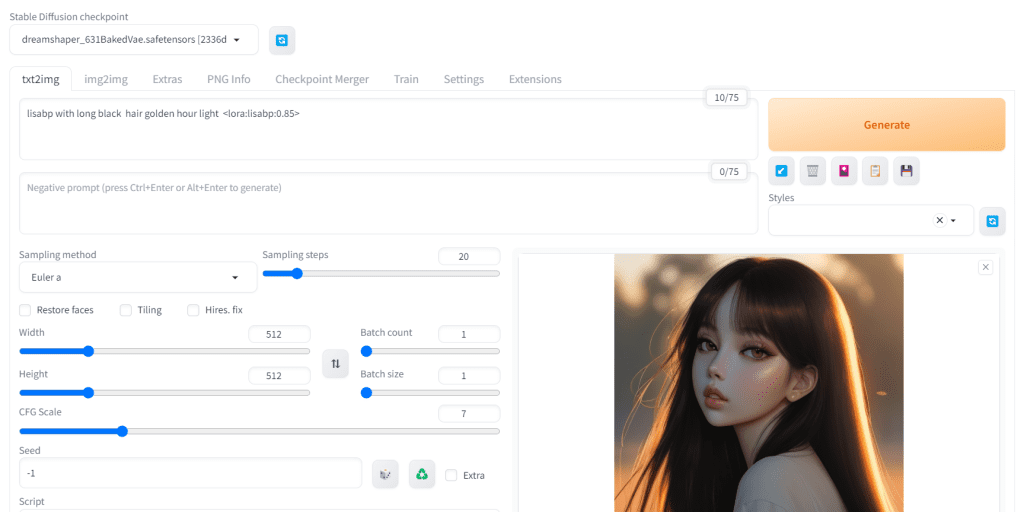
You can try your LoRA with different checkpoint models (including the model you used to train it). A lot of this is random: some LoRAs just work much better with some models than others.
Koyha Settings
There are no 'perfect' training settings: the settings will always depend on the subject and your images.
Let's dive into the ones we might want to change:
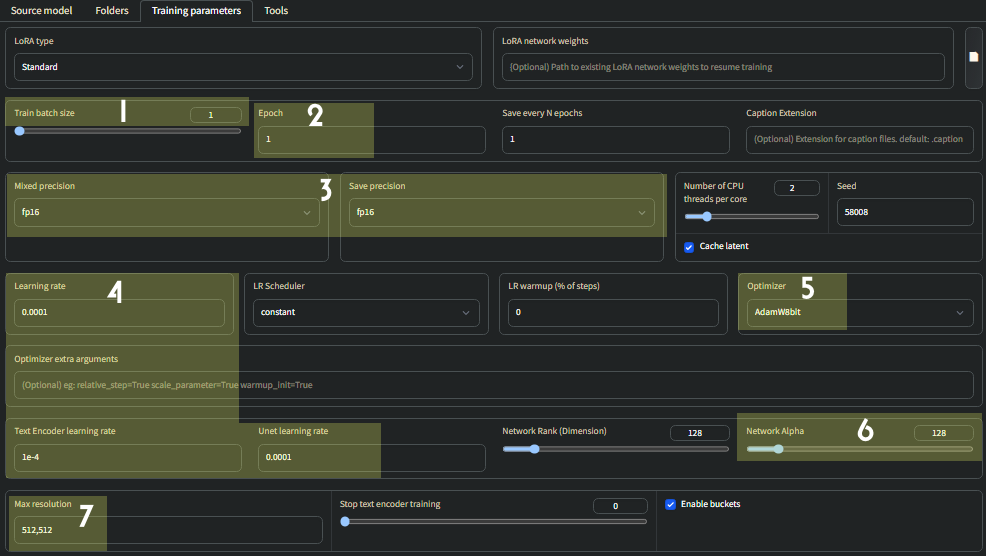
1. Batch size
How many images are trained simultaneously.
Higher values speedup training at the cost of VRAM usage.
If you have:
- 6-8GB VRAM - leave this at 1
- 10GB - set to 2
- 12GB - set to 3
(NOTE: You will need to change learning rate proportional to batch size, see 4)
2. Epoch
The number of epochs is how many complete passes the learning algorithm makes through the entire training dataset.
Every epoch, the algorithm goes through all the training data, updating the LoRA based on the accumulated information.
Repeats refers to how many times each individual image is trained within an epoch.
The number of repeats are set by this folder name inside the img folder: 11_lisabp woman. This means we'll have 11 repeats per image.
If I have 34 images and 11 repeats, One epoch will be 34 * 11 = 374 steps.
If I specify 8 epochs, I will be training on a total of 8 * 374 = 2958 steps.
More epochs usually yields better results.
I recommend not exceeding 3500 total steps for a LoRA.
Save every n epochs
This is a great way to output models midway throughout the training.
Sometimes models trained on too many steps are overcooked.
The model you want might not be the final model, but one of the earlier ones.
If I have 986 steps an epoch, 3 epochs, and set my Save every n epoch to 1, I will get 3 models trained on 986, 1972 and 2958 steps.
3. Mixed Precision / Save Precision
Mixed Precision: bf16 trains faster than fp16, but only works on 30XX and 40XX GPUs.
Always keep Save Precision as fp16 though.
4. Learning Rate / Text Encoder Learning Rate / Unet Learning Rate
You should adjust all three of these parameters according to your batch size. They will be your Batch size divided by 1000.
Example: Batch size of 3
- Learning rate: 0.0003
- Text encoder learning rate: 0.0003
- Unet learning rate: 0.0003
5. Optimizer
On 10XX GPUs, you won't be able to use AdamW8bit
Instead, change this to AdamW
6. Network Rank (Dimension) / Network Alpha
Generally, it is best to keep Network Rank (Dimension) and Network Alpha the same.
For style LoRAs, 256 is a good number to use for both Network Rank & Network Alpha.
Character LoRAs will need no more than 128 for both Network Rank & Network Alpha.
7. Max Resolution
If you have a high amount of VRAM, you can train at a higher resolution such as 768x768. Otherwise, leave this at 512x152
Generating Sample Images
You can choose to generate samples every X number of steps under Sample images config
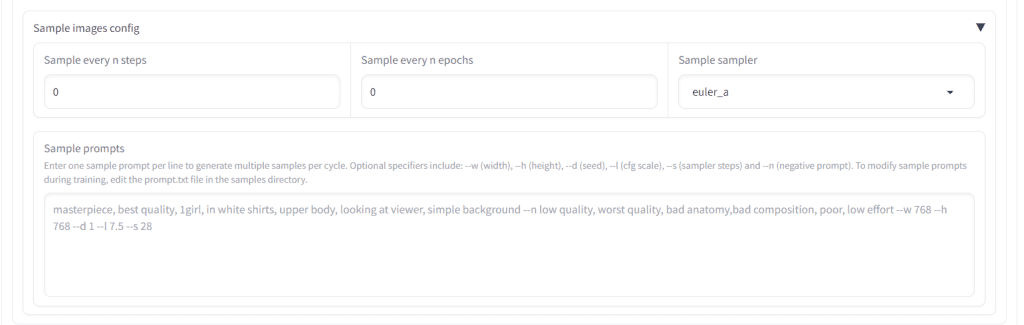
The more frequently you make samples, the slower the LoRA will train. However, this is a good way to see if the LoRA is going the way you want it.
Generally, one sample every 200-400 steps is adequate to gauge the training progress.
Simply put in a relevant sample prompt followed by:
--n low quality, worst quality, bad anatomy, --w 512 --h 512 --d 1 --l 7.5 --s 20Samples will be generated inside a folder within your output directory you specified earlier.
(Note: many samples, especially early ones, may turn out distorted, this is normal)
Further Reading
Civitai. "Making a LoRA is like baking a cake, https://civitai.com/articles/138/making-a-lora-is-like-baking-a-cake."
Zoomy Izumi. "My Lora Experiment Part 4, https://www.zoomyizumi.com/my-lora-experiment-part-4/."
FAQ
It's recommended to have anywhere from 30-150 well-tagged images, although you can make a perfectly serviceable LoRA with as few as 10 images.
No, images of any aspect ratio and size can be trained, the script automatically resizes them and trains in a way that preserves their aspect ratio. Some use bulk image cropping tools to make their training data uniform squares, but it's largely redundant and can cut out important parts of the image.
For a character, it should be a healthy variation of angles, poses, and attire
It should be a mix of static and dynamic images, with simpler backgrounds and single subject. You should not have complex objects; you should avoid the subject holding objects.
Captioning is king: 50 well tagged images will make a better LoRA than 150 poorly tagged images.
Using these settings, it can be anywhere from 15 minutes to around 2 hours at most depending on your GPU.

Does the training occured locally or on replicate?
Hey Mi, this guide is for training locally.
This is a great guide to using LoRA! I definitely think it’s one of the best ways to generate images.
Wonderful guide
Thanks Angela!
I’m just getting started to collect knowledge base for AI, especially for Stable Diffusion. This is one of the best, if not the best site to guide you. Thank you for your hard work and to share your experience. Regards, Alexander
Hey Alex, really appreciate it. Happy to help out.
This is making my head melt!
I run SD1.5 GUI and Makeayo – I typed in Honda GoldWing Gl1500 and it produces similar looking machines but none of them resembling the actual bike. I don’t know why people are calling this “Intelligence”.
So, my immediate thought was to build a database but reading this article has left me wondering how much time this would actually take!
Good, detailed article though 🙂
Hey Gareth – I know the feeling. The actual training can take under 30 minutes if you have a decent GPU (say, RTX 30XX or better).
It’s the prep – finding training images and installing all this software that takes the longest.
Hey Yubin thanks for making this awesome guide! I have an issue where my outputs are low contrast, I’m not sure if it’s my client-side of automatic1111, but I’ve observed that before the output is done (when it is still denoising) there a vibrant color, but when the result is done, the contrast turns to mush, and the final image is not as vibrant. Is this a common side effect with Lora?
Hey Ryan, glad it was helpful!
Sounds like a VAE issue, are you using one?
Reference:
https://aituts.com/vae
Hello,
I follow your tutorial, everything is ok… until the last step when I click on “start training” button. I have an error message in a command consol.
I don’t know what is the problem.
Do you think it’s possible for you to contact me by email please?
Can you paste the error?