Deforum is an extension for AUTOMATIC1111 that allows you to create beautiful AI generated videos. You might've seen these type of videos going viral on TikTok and Youtube:
In this guide, we'll teach you how to make these videos with Deforum and the Stable Diffusion WebUI. We'll talk about:
- Making videos from prompts only
- Making videos from your existing, real-life videos
- Most important settings
- Prompts to try
Making these videos is much easier than most people think.
Here's how they work:
- You enter a series of prompts, and the exact times you want the images generated by these prompts to appear.
- Stable Diffusion generates these images and fills in the rest with transition images, creating a sequence that looks like a continuous video.
- Meanwhile, you can adjust the position of the camera creating effects like zooming and rotating.
Installation
You have 2 options: installing the Stable Diffusion WebUI to your computer, or using Google Colab (running everything in the cloud)
If you want to install to your computer, follow the guide for your platform:
- Windows installation (NVIDIA GPU)
- Windows installation (AMD GPU)
- Apple Silicon installation (Mac M1/M2)
If you want to run in cloud with Google Colab:
Installing Deforum on Windows
After you've installed the WebUI using the NVIDIA tutorial or the AMD tutorial, you will now have a folder named stable-diffusion-webui.
Open the Command Prompt (Search for "command prompt") and navigate to the folder you just downloaded, stable-diffusion-webui.
Use the command dir to list folders inside your current directory, and use the command cd FOLDER-NAME to navigate to a folder.
Once you're inside stable-diffusion-webui, enter this command to download the Deforum extension:
git clone http://github.com/deforum-art/deforum-for-automatic1111-webui extensions/deforumAfter the download is complete, go to the extensions tab and click: "Apply and restart UI".
Installing Deforum on Mac
After you've installed the WebUI using the Mac tutorial, you will now have a folder named stable-diffusion-webui.
Open the Terminal (Spotlight search for "terminal") and navigate to the folder you just downloaded, stable-diffusion-webui.
Use the command ls to list folders inside your current directory, and use the command cd FOLDER-NAME to navigate to a folder.
Once you're inside stable-diffusion-webui, enter this command to download the Deforum extension:
git clone http://github.com/deforum-art/deforum-for-automatic1111-webui extensions/deforum
After the installation is complete, go to the extensions tab and click: "Apply and restart UI".
Choose Model
As with all things Stable Diffusion, the checkpoint model you use will have the biggest impact on your results.
Here's a list of the most popular Stable Diffusion checkpoint models.
For the rest of this guide, we'll either use the generic Stable Diffusion v1.5 model or the popular general-purpose model Deliberate.
Don't feel constrained by our choices: the examples will work with any model, however the results may be very different.
Checkpoint models either come in .ckpt or .safetensors format. All you have to do with these files is place them in the folder stable-diffusion-webui/models/Stable-diffusion.
Generate Your First Video
Reload the UI again to see your models. We've selected the Stable Diffusion v1.5 model.
Click on the Deforum tab.
Then click on the Prompts subtab.
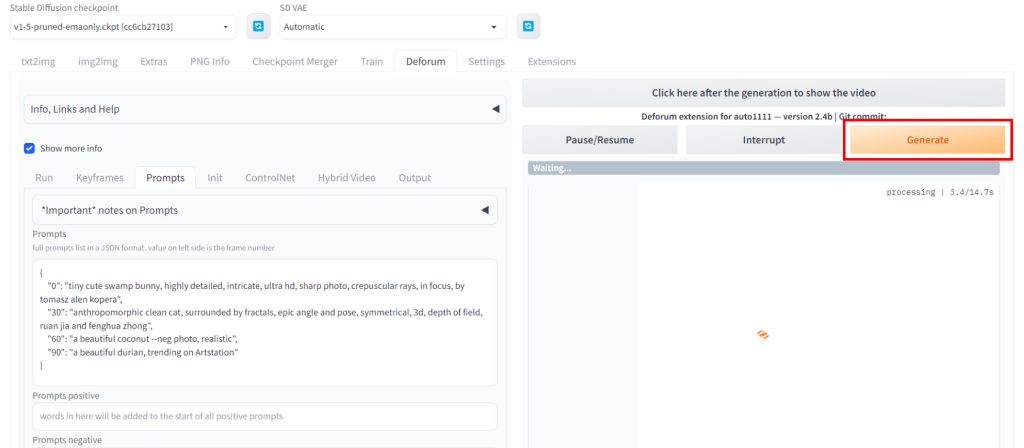
The placeholder prompt will help you realize how Deforum works:
{
    "0": "tiny cute swamp bunny, highly detailed, intricate, ultra hd, sharp photo, crepuscular rays, in focus, by tomasz alen kopera",
    "30": "anthropomorphic clean cat, surrounded by fractals, epic angle and pose, symmetrical, 3d, depth of field, ruan jia and fenghua zhong",
    "60": "a beautiful coconut --neg photo, realistic",
    "90": "a beautiful durian, trending on Artstation"
}
The number in front is the frame, and is followed by the prompt for that frame. Every frame in-between is a transition state.
You can set the total number of frames in the Keyframes tab.
The default total frames is 120, and the default FPS (frames per second) is 15, resulting in a video that is 8 seconds long.
Click the orange Generate button to make your first video using the placeholder prompt.
When the video generation is complete, click on the button Click here after generation to see the video.
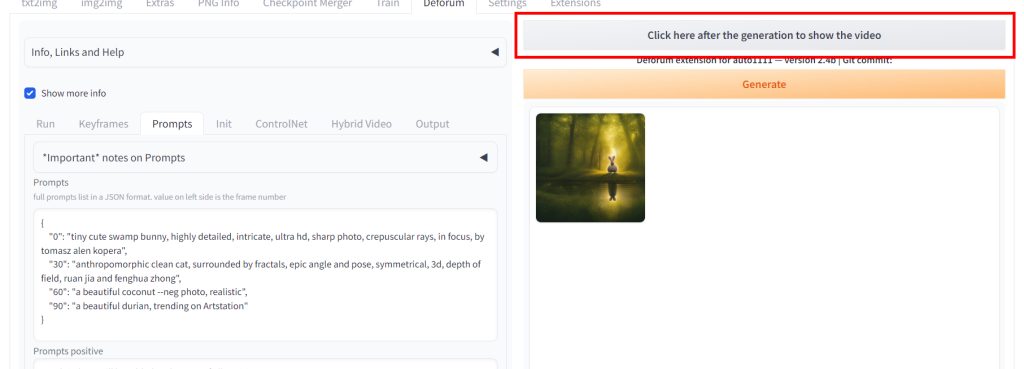
This is what we got:
Now let's get to how you can make more beautiful results.
Example Prompts
We're going to use the Deliberate model for the following examples.
Go to the keyframes tab and you'll see 4 animation modes:
- 2D - simulates 2D motion, so you can zoom and pan
- 3D - simulates 3D motion, so you can zoom, pan, rotate & orbit
- Interpolation - older, like the previous 2 but you can't control motion
- Video Input - input for ControlNet videos
The individual settings can get quite complex. FizzleDorf does a good job of summarizing them.
2D
A common use of 2D is creating images that look like they're zooming in.
Select the 2D option in the Keyframes tab.
Strength Schedule refers to the influence of the previous frame on the next. 1 is max and 0 is no influence. You can keep this at the default.
Then enter the following Motion settings:
Motion settings:
Zoom — 0:(0.97)
Angle — 0:(0)
Transform Center X — 0:(0.5)
Transform Center Y — 0:(0.5)
Translation X — 0:(-1)
Translation Y — 0:(0)
Increase the Max frames to 180.
Click on the Prompts tab and enter the prompt and negative prompt.
Prompt:
{
    "0": " open street, wild west, professional majestic oil painting by Ed Blinkey, Atey Ghailan, Studio Ghibli, by Jeremy Mann, Greg Manchess, Antonio Moro, trending on ArtStation, trending on CGSociety, intricately detailed, fine details, hyperdetailed, raytracing, subsurface scattering, diffused soft lighting, shallow depth of field, by (Oliver Wetter)",

    "80": "open street, colony on the moon, spires and turrets, science fiction,  oil painting by Ed Blinkey, Atey Ghailan, Studio Ghibli, by Jeremy Mann, Greg Manchess, Antonio Moro, trending on ArtStation, trending on CGSociety, intricately detailed, fine details, hyperdetailed, raytracing, subsurface scattering, diffused soft lighting, shallow depth of field, by (Oliver Wetter)",

    "150": "open street, town, distant stars and planets, science fiction,  oil painting by Ed Blinkey, Atey Ghailan, Studio Ghibli, by Jeremy Mann, Greg Manchess, Antonio Moro, trending on ArtStation"
}
Negative Prompt:
((anime)), headphones, child, deformed, bad anatomy, disfigured, poorly drawn face, mutation, mutated, extra limb, urly, disgusting, poorly drawnhands, missing limb, floating limb, disconected limb, malformed hands, blurry, ((((mutated hands and fingers)))), watermark, watermarked, oversaturated, censores, distorted hands, amputation, missing hands, doubled face, obese, doubled hands
Click Generate. Here's our result:
3D
With 3D, you can do interesting things like rotate the camera.
Select the 3D option in the Keyframes tab. Then enter the following Motion settings:
Motion settings:
Translation X — 0:(0)
Translation Y — 0:(0)
Translation Z — 0:(0)
Rotation 3D X — 0:(0)
Rotation 3D Y — 0:(-1)
Rotation 3D Z — 0:(0)
Increase the Max frames to 180.
Click on the Prompts tab and enter the prompt and negative prompt.
Prompt:
{
    "0": " 1girl astronaut standing on the moon, beautiful, big eyes, (detailed skin, skin texture), astronaut suit, ussr style, professional majestic oil painting by Ed Blinkey, Atey Ghailan, Studio Ghibli, by Jeremy Mann, Greg Manchess, Antonio Moro, trending on ArtStation, trending on CGSociety, intricately detailed, fine details, hyperdetailed, raytracing, subsurface scattering, diffused soft lighting, shallow depth of field, by (Oliver Wetter)",

    "80": "colony on the moon, spires and turrets, science fiction,  oil painting by Ed Blinkey, Atey Ghailan, Studio Ghibli, by Jeremy Mann, Greg Manchess, Antonio Moro, trending on ArtStation, trending on CGSociety, intricately detailed, fine details, hyperdetailed, raytracing, subsurface scattering, diffused soft lighting, shallow depth of field, by (Oliver Wetter)",

    "150": "bare moon, distant stars and planets, science fiction,  oil painting by Ed Blinkey, Atey Ghailan, Studio Ghibli, by Jeremy Mann, Greg Manchess, Antonio Moro, trending on ArtStation, trending on CGSociety, intricately detailed, fine details, hyperdetailed, raytracing, subsurface scattering, diffused soft lighting, shallow depth of field, by (Oliver Wetter)"
}
Negative Prompt:
((anime)), headphones, child, deformed, bad anatomy, disfigured, poorly drawn face, mutation, mutated, extra limb, urly, disgusting, poorly drawnhands, missing limb, floating limb, disconected limb, malformed hands, blurry, ((((mutated hands and fingers)))), watermark, watermarked, oversaturated, censores, distorted hands, amputation, missing hands, doubled face, obese, doubled hands
Click Generate. Here's our result:
Tips & Tricks
Video aspect ratio for TikTok / mobile
If you're making a vertical video for TikTok, Youtube Shorts or Instagram Reels, you'll want to change the aspect ratio to 9:16.
In the Deforum tab, click the Run subtab, Set the width to 320 and the height to 569.
You can use higher resolutions (eg. 400x711), but the generation will take longer.
Use regular txt2img for rapid testing
You might have noticed generating these videos takes quite a bit of time.
It's unrealistic to generate entire videos when you're still testing prompts out.
Click on the txt2img tab, and test out prompts as you regularly would. You can go back and forth between the txt2img tab and the Deforum tab.
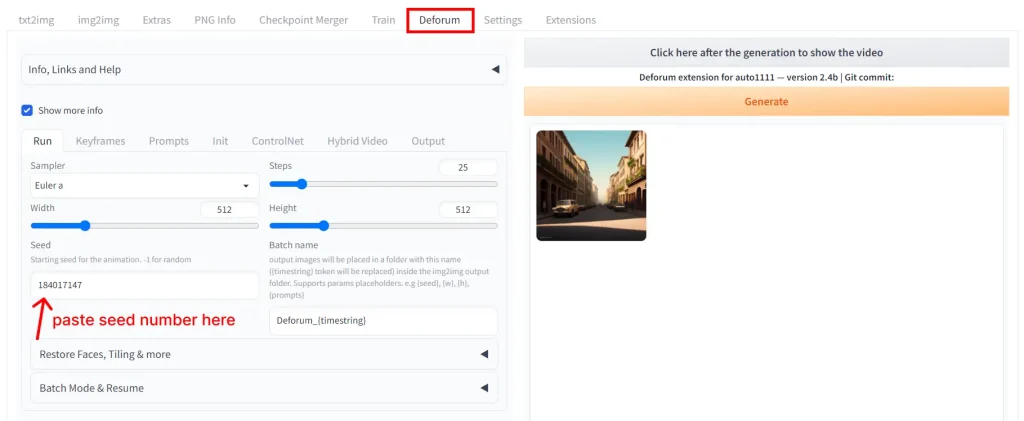
Make sure you set a Stable Diffusion seed value. The actual value doesn't matter as much as having one.
The same prompt with the same seed will always produce the same result. So if you get something you like and you know the seed, you can produce the same exact result in the Deforum tab.
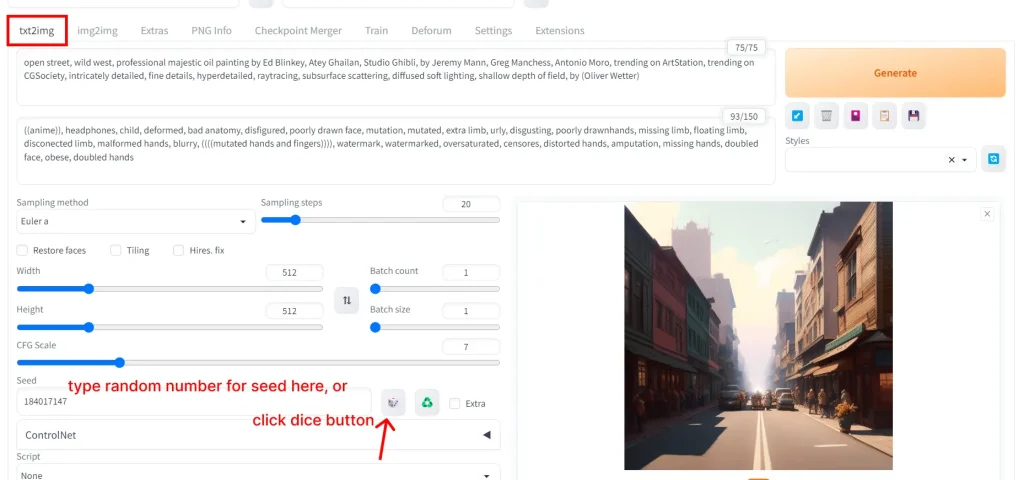
(make sure you copy this seed over to the Deforum tab)
Add Sound
Since the download file is a .mp4, you can add a soundtrack to it.
Go to the Output tab, and check the File option under the Add sountrack label. You can use the sample track, or enter the URL or absolute path of an audio file.
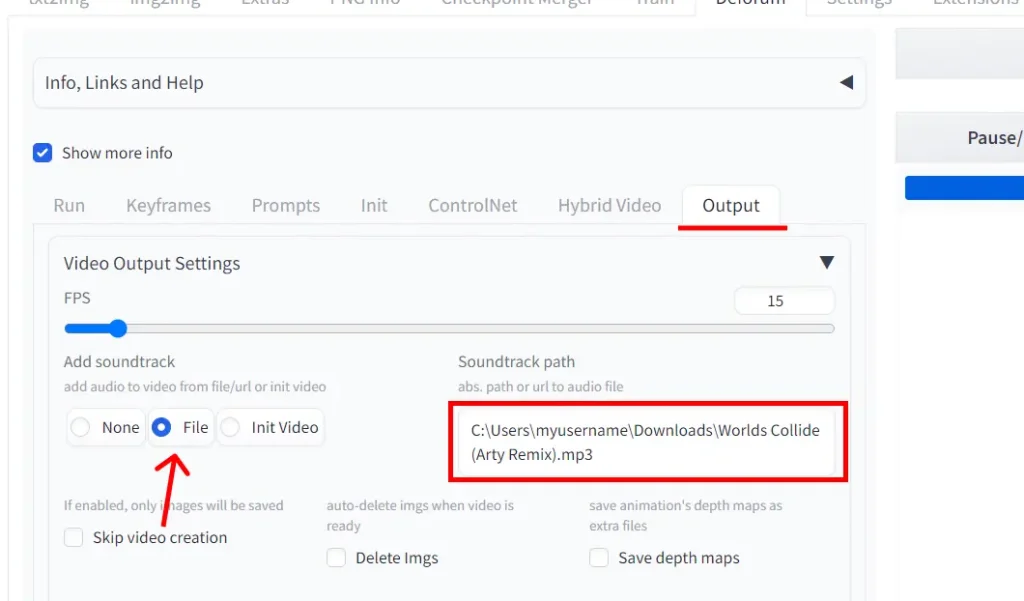
(you can get the absolute path of any file on your computer by right clicking the file and selecting Copy as path)
Click Generate and your video will come with audio!