Update July 2023: LLama-2 has been released. Llama-2 was trained on 40% more data than LLaMA and scores very highly across a number of benchmarks. Here are the Llama-2 installation instructions and here's a more comprehensive guide to running LLMs on your computer.
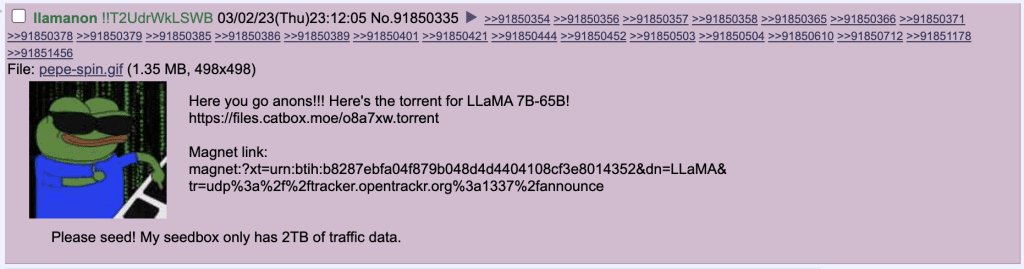
On March 3rd, user ‘llamanon’ leaked Meta's LLaMA model on 4chan’s technology board /g/, enabling anybody to torrent it. A troll later attempted to add the torrent magnet link to Meta's official LLaMA Github repo.
This means LLaMA is the most powerful language model available to the public.
LLaMA quickfacts:
- There are four different pre-trained LLaMA models, with 7B (billion), 13B, 30B, and 65B parameters.
- Meta reports that the LLaMA-13B model outperforms GPT-3 in most benchmarks.
- Meta reports the 65B model is on-parr with Google's PaLM-540B in terms of performance.
4-bit LLaMa Installation
4-bit quantization is a technique for reducing the size of models so they can run on less powerful hardware.
Thanks to the efforts of many developers, we can now run 4-bit LLaMA on most consumer grade computers.
Here's some user-reported requirements for each model:
| Model | Model Size | Minimum Total VRAM | Card examples | RAM/Swap to Load* |
|---|---|---|---|---|
| LLaMA-7B | 3.5GB | 6GB | RTX 1660, 2060, AMD 5700xt, RTX 3050, 3060 | 16 GB |
| LLaMA-13B | 6.5GB | 10GB | AMD 6900xt, RTX 2060 12GB, 3060 12GB, 3080, A2000 | 32 GB |
| LLaMA-30B | 15.8GB | 20GB | RTX 3080 20GB, A4500, A5000, 3090, 4090, 6000, Tesla V100 | 64 GB |
| LLaMA-65B | 31.2GB | 40GB | A100 40GB, 2x3090, 2x4090, A40, RTX A6000, 8000, Titan Ada | 128 GB |
These instructions are for Windows & Linux. For Mac M1/M2, please look at these instructions instead.
1. Install Prerequisites
Build Tools for Visual Studio 2019
Download "2019 Visual Studio and other products" (requires creating a Microsoft account). You must download the 2019 version.
In the Visual Studio Build Tools installer, check the Desktop development with C++ option and install:

Install Miniconda
Download and install miniconda. All default settings are OK.
Install Git
Install Git if you don't already have it.
2. Create Conda Environment
Open the application Anaconda Prompt (miniconda3) and run these commands one at a time.
It will take some time for the packages to download. If you get conda issues, you'll need to add conda to your PATH.
conda create -n textgen python=3.10.9

conda activate textgen

pip install torch==1.13.1+cu116 torchvision==0.14.1+cu116 torchaudio==0.13.1 --extra-index-url http://download.pytorch.org/whl/cu116
3. Oobabooga WebUI & GPTQ-for-LLaMA
Oobabooga is a good UI to run your models with. It's like AUTOMATIC1111's Stable Diffusion WebUI except it's for language instead of images. GPTQ-for-LLaMA is the 4-bit quandization implementation for LLaMA.
Navigate to the directory you want to put the Oobabooga folder in. Enter these commands one at a time:
git clone http://github.com/oobabooga/text-generation-webui.git

cd text-generation-webui

pip install -r requirements.txt

pip install torch==1.12+cu113 -f http://download.pytorch.org/whl/torch_stable.html

mkdir repositories

cd repositories

git clone http://github.com/qwopqwop200/GPTQ-for-LLaMa.git

cd GPTQ-for-LLaMa

pip install ninja

conda install -c conda-forge cudatoolkit-dev

python setup_cuda.py install
If python setup_cuda.py install doesn't work (error: [WinError 2] The system cannot find the file specified), try this instead:
Download and unzip this .whl wheel file. It does not matter where you put the file, you just have to install it. But since your command prompt is already navigated to the GTPQ-for-LLaMa folder you might as well place the .whl file in there. Then enter in command prompt:
pip install quant_cuda-0.0.0-cp310-cp310-win_amd64.whlIf you are on Windows:
Windows only: fix bitsandbytes library
Download libbitsandbytes_cuda116.dll and put it in C:\Users\MYUSERNAME\miniconda3\envs\textgen\Lib\site-packages\bitsandbytes\
Then, navigate to the file \bitsandbytes\cuda_setup\main.py and open it with your favorite text editor. Search for the line:
if not torch.cuda.is_available(): return 'libsbitsandbytes_cpu.so', None, None, None, None
and replace with this line:
if torch.cuda.is_available(): return 'libbitsandbytes_cuda116.dll', None, None, None, None
In the same file, search for this. It will appear twice:
self.lib = ct.cdll.LoadLibrary(binary_path)
and replace both instances with:
self.lib = ct.cdll.LoadLibrary(str(binary_path))
4. Download Model Weights
Here's the latest torrent (timestamp 3-26-23 or March 26, 2023):
Torrent file: Safe-LLaMA-HF (3-26-23).zip
I recommend qbitorrent if you don't already have a torrent client.
You don't have to download all the models. I suggest starting with 7b to check if everything is working properly.
There are many model weight versions floating around. The most updated ones are .safetensor files
After the download finishes, move the folder llama-?b into the folder text-generation-webui/models.
With the most up-to-date weights, you will not need any additional files.
Start
Now you can start the webUI. In command prompt:
python server.py --cai-chat --model llama-7b --no-streamRemember to change llama-7b to whatever model you are actually using.
Wait for the success message.

Then open the WebUI by navigating to:
http://localhost:7860/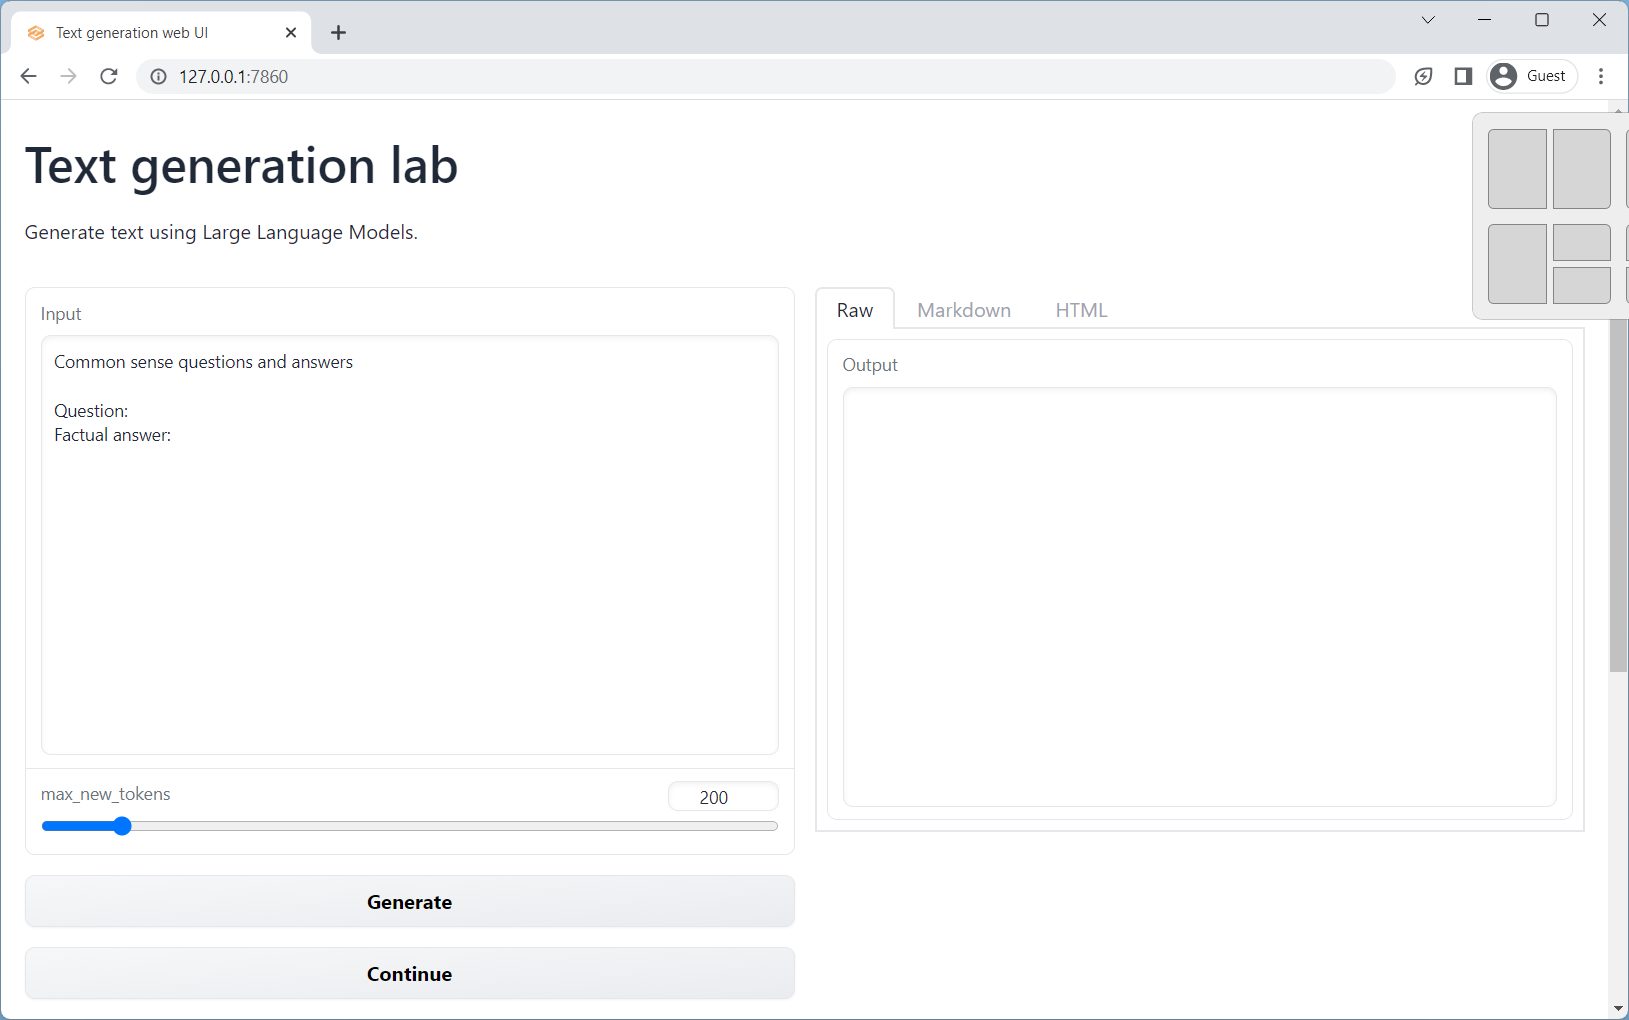
You can obtain better results by putting a repetition_penalty(~1/0.85),temperature=0.7 in model.generate() for most LLaMA models
Troubleshooting thread: http://github.com/oobabooga/text-generation-webui/issues/147
What now?
After you start prompting you'll notice that the results aren't as good as those you would expect from ChatGPT. What gives?
LLaMA hasn't been fine-tuned for chat functionality yet.
Enter Alpaca. Stanford researchers have fine-tuned LLaMA into Stanford Alpaca to behave more like ChatGPT. While they didn't release the weights publicly, they shared the process required to replicate Alpaca. You can try an online version here.
Now that you have Oobabooga working, you can also try it with some other open source models here.
Thank you to the devs who are working tirelessly to make this stuff possible.
This is bleeding edge tech. Things will be updated and other things will break. Let us know if you have any updates or corrections in the comments below or in the Discord.
Troubleshooting
Your NVIDIA GPU must have Pascal architecture or newer. Check this thread.
Fix bitsandbytes library with these instructions.
Try starting with the command: python server.py --cai-chat --model llama-7b --no-stream --gpu-memory 5
The command --gpu-memory sets the maxmimum GPU memory in GiB to be allocated per GPU. Example: --gpu-memory 10 for a single GPU, --gpu-memory 10 5 for two GPUs.
Adjust the value based on how much memory your GPU can allocate.
Download and install CUDA Toolkit 11.7 here: http://developer.nvidia.com/cuda-11-7-0-download-archive


After following the steps, I cannot find the folder ‘anaconda3\env\textgen\Lib\site-packages\bitsandbytes\cuda_setup)’ with the main.py file in it to continue
Hello Nico, this is the folder you downloaded miniconda or anaconda into, by default it is your user folder.
Great guide,
so I could install a 60B version on a single Rtx3090.
Thumbs up
Cheers Tom!
Getting issue with the last step.
C:\Users\Eman.QTIS\WebUI\text-generation-webui\models>python server.py –load-in-4bit –model llama-7b
python: can’t open file ‘C:\\Users\\Eman.QTIS\\WebUI\\text-generation-webui\\models\\server.py’: [Errno 2] No such file or directory
I don’t see any server.py in any folder in the models directory
Hello Emmanuel,
server.pyis located in the root directorytext-generation-webuiHi Nico,
You have to install bitsandbytes -> pip install bitsandbytes
You’ll have the folder available then
Hello! Great article! Thank you! I need help 🙁
I stuck at #3 (Win 10 x64, VS 2019 is installed ok, all previous steps are ok too)
The line I stuck :
python setup_cuda.py install
It produces me these lines : ( 🙁 )
(textgen) λ python setup_cuda.py install
running install
C:\Users\nuke\miniconda3\envs\textgen\lib\site-packages\setuptools\command\install.py:34: SetuptoolsDeprecationWarning: setup.py install is deprecated. Use build and pip and other standards-based tools.
warnings.warn(
C:\Users\nuke\miniconda3\envs\textgen\lib\site-packages\setuptools\command\easy_install.py:144: EasyInstallDeprecationWarning: easy_install command is deprecated. Use build and pip and other standards-based tools.
warnings.warn(
running bdist_egg
running egg_info
writing quant_cuda.egg-info\PKG-INFO
writing dependency_links to quant_cuda.egg-info\dependency_links.txt
writing top-level names to quant_cuda.egg-info\top_level.txt
C:\Users\nuke\miniconda3\envs\textgen\lib\site-packages\torch\utils\cpp_extension.py:476: UserWarning: Attempted to use ninja as the BuildExtension backend but we could not find ninja.. Falling back to using the slow distutils backend.
warnings.warn(msg.format(‘we could not find ninja.’))
reading manifest file ‘quant_cuda.egg-info\SOURCES.txt’
writing manifest file ‘quant_cuda.egg-info\SOURCES.txt’
installing library code to build\bdist.win-amd64\egg
running install_lib
running build_ext
C:\Users\nuke\miniconda3\envs\textgen\lib\site-packages\torch\utils\cpp_extension.py:359: UserWarning: Error checking compiler version for cl: [WinError 2] The system cannot find the file specified
warnings.warn(f’Error checking compiler version for {compiler}: {error}’)
error: [WinError 2] The system cannot find the file specified
Please help 🙁
Hey rockshark – I have updated the article to include an alternate method, just install the .whl file.
I’m getting this error when running this comand:
(textgen) PS C:\Users\weefl\oobabooga\text-generation-webui\repositories\GPTQ-for-LLaMa> python setup_cuda.py install
Traceback (most recent call last):
File “C:\Users\weefl\oobabooga\text-generation-webui\repositories\GPTQ-for-LLaMa\setup_cuda.py”, line 6, in
ext_modules=[cpp_extension.CUDAExtension(
File “C:\ProgramData\miniconda3\envs\textgen\lib\site-packages\torch\utils\cpp_extension.py”, line 1048, in CUDAExtension
library_dirs += library_paths(cuda=True)
File “C:\ProgramData\miniconda3\envs\textgen\lib\site-packages\torch\utils\cpp_extension.py”, line 1186, in library_paths
paths.append(_join_cuda_home(lib_dir))
File “C:\ProgramData\miniconda3\envs\textgen\lib\site-packages\torch\utils\cpp_extension.py”, line 2223, in _join_cuda_home
raise EnvironmentError(‘CUDA_HOME environment variable is not set. ‘
OSError: CUDA_HOME environment variable is not set. Please set it to your CUDA install root.
Run the following command in the terminal:
export CUDA_HOME=/usr/local/cuda-X.XWhere you replace X.X by the first two digits of your version number (can be found out e.g. via nvcc –version).
Hello,
When i want to launch Llama with “python server.py –cai-chat –wbits 4 –model llama-7b –no-stream”
Command writes “server.py: error: unrecognized arguments: –cai-chat –wbits 4 –model llama-7b –no-stream”
Can you help me pls ?
Hello Valentin, the commands should have two dashes, as they are written now. My apologies for confusion.
hello, script setup_cuda.py is not avilable in folder C:\Users\…\text-generation-webui\repositories\GPTQ-for-LLaMa
28/03/2023 14:13 1 143 convert_llama_weights_to_hf.py
28/03/2023 14:13 6 455 datautils.py
28/03/2023 14:13 5 622 gptq.py
28/03/2023 14:13 16 831 llama.py
28/03/2023 14:13 3 946 llama_inference.py
28/03/2023 14:13 12 438 llama_inference_offload.py
28/03/2023 14:13 413 modelutils.py
28/03/2023 14:13 18 935 opt.py
28/03/2023 14:13 12 739 quant.py
28/03/2023 14:13 8 603 README.md
28/03/2023 14:13 122 requirements.txt
which one should be executed instead of setup_cuda.py ?
Sorry that it wasn’t clear, you must navigate back to root directory with:
cd ../..I tries also this
(base) C:\Users\xxxxx\miniconda3\envs\textgen\Lib\site-packages\bitsandbytes\cuda_setup>python main.py install
Traceback (most recent call last):
File “C:\Users\xxxxx\miniconda3\envs\textgen\Lib\site-packages\bitsandbytes\cuda_setup\main.py”, line 22, in
import torch
ModuleNotFoundError: No module named ‘torch’
You must be in the textgen environment that you created in the Conda Environment step, try
conda activate textgen.I have this problem anybody knows why ?
python server.py -cai-chat -wbits 4 -model llama-13b -no-stream
usage: server.py [-h] [–model MODEL] [–lora LORA] [–notebook] [–chat] [–cai-chat] [–cpu] [–load-in-8bit]
[–gptq-bits GPTQ_BITS] [–gptq-model-type GPTQ_MODEL_TYPE] [–gptq-pre-layer GPTQ_PRE_LAYER]
[–wbits WBITS] [–model_type MODEL_TYPE] [–groupsize GROUPSIZE] [–pre_layer PRE_LAYER] [–bf16]
[–auto-devices] [–disk] [–disk-cache-dir DISK_CACHE_DIR]
[–gpu-memory GPU_MEMORY [GPU_MEMORY …]] [–cpu-memory CPU_MEMORY] [–no-cache] [–flexgen]
[–percent PERCENT [PERCENT …]] [–compress-weight] [–pin-weight [PIN_WEIGHT]] [–deepspeed]
[–nvme-offload-dir NVME_OFFLOAD_DIR] [–local_rank LOCAL_RANK] [–rwkv-strategy RWKV_STRATEGY]
[–rwkv-cuda-on] [–no-stream] [–settings SETTINGS] [–extensions EXTENSIONS [EXTENSIONS …]]
[–model-dir MODEL_DIR] [–lora-dir LORA_DIR] [–verbose] [–listen] [–listen-port LISTEN_PORT]
[–share] [–auto-launch] [–gradio-auth-path GRADIO_AUTH_PATH]
server.py: error: unrecognized arguments: -cai-chat -wbits 4 -model llama-13b -no-stream
Hey Seb, have updated the article with the new model weights and new start command.
On “python setup_cuda.py install” step I get an error saying “No CUDA runtime is found, using CUDA_HOME=’C:\Program Files\NVIDIA GPU Computing Toolkit\CUDA\v11.3′ ” What have I done wrong?
Naturally, the instruction STILL doesn’t work, though I must congratulate you that using this version I managed to get nearly to the end.
1. You forgot to add change directory instructions when calling download-model.py and server.py.
2. More importantly, the launch command is incorrect, the proper form is
“python server.py –cai-chat –wbits 4 –model llama-13b-hf –no-stream” (notice -hf part – yes, this is how the directory is actually called).
3. Lastly, launch never happens, instead you are presented with a gazillion of “size mismatch for model.layers…” messages (tried both for 13 and 30 versions).
The verdict:
– You still didn’t bother actually following your own instructions to see if they actually work.
– The method described is not working.
I deserve your criticism. The guide had multiple errors when you first read it.
The “size mismatch” errors come from linking to the old model weights… have replaced this with the most recent magnet link. Have also updated the dashes and cd instructions.
Let me know if you can get it working.
I managed to get the bloody thing working, and in GPU mode no less too. Sadly only llama-13 fits into my puny GPU’s 24 GBs of memory, but at least it pushes out answers in about 10 seconds or less. I’ve been playing with bot a lot.
Took me a while to figure out all the quirks of its mechanics. This thing is dumb as a rock.
For example, I have two characters: bot’s character, named Bob, and me, portraying Bob’s father character. The moment I, as Bob’s father, told that Bob’s father’s name is Jack, bot created a THIRD person by the name of Jack, with Jack being Bob’s best friend and pretty much being the duplicate of his father, but NOT actually his father. Since I continued to chat to bot as Jack bot would start complaining to himself as his father’s character that Bob doesn’t spend enough time with him, preferring Jack’s company instead.
The most sad part is how little bot remembers. Well, truth be told ChatGPT 3.5 isn’t much better.
Hello,
First of all, thank you for your work and all this information.
I’m stuck at step 3.
For step 3 “Install Oobabooga”, at the point where you need to write this command:
conda install -c conda-forge cudatoolkit-dev
I’m stuck, this command does not run. Here’s what I have on the screen:
“E:\interf_oobanooga\text-generation-webui>conda install -c conda-forge cudatoolkit-dev ‘conda’ is not recognized as an internal or external command, operable program or batch file.
Could you help me ?
Hello Jerome, check this answer out:
http://stackoverflow.com/questions/44515769/conda-is-not-recognized-as-internal-or-external-command
Hello,
Thanks a lot for the updated guide (I had an issue using CUDA 11.6 and installing 11.7 did it).
Just wanted to say that the link you posted for the llama-65b-4bit.pt is the llama-30b-4bit.pt one.
Hey Kadeus, thanks for the update, will fix.
Hello you have a problem on this article at the section 4. Download Model Weights
when download llama-65b-4bit.pt i see the same file with llama-30b-4bit.pt
Thanks for everything !
Thanks for the notice!
Thank for the guide!
+1 on : link posted for the llama-65b-4bit.pt redirect to the llama-30b-4bit.pt
Thanks Elliot, now if only I could find the actual link!
Hey !
Just downloaded the new weights for the 7b model with the torrent file but I still have the following errors:
-Missing key(s) in state_dict: “model.layers.0.self_attn.k_proj.qzeros”, …
-Unexpected key(s) in state_dict: “model.layers.0.self_attn.k_proj.zeros”,…
-lots of “size mismatch for model.layers”
The sizes mismatch are always like this:
copying a param with shape torch.Size([11008, 1]) from checkpoint, the shape in current model is torch.Size([1, 11008])
Do you know how this cuold be solved ?
Thank you !
Hello Cedric, you have downloaded the 3-26-23 weights?
It is strange, the new weights removed the size mismatch error for me.
One thing you can try is
conda remove -n textgen --allto remove the conda env and then try recreating it.Thanks ! I cleaned everything and performed the installaiton again and now it works 🙂
C:\Users\stb13\miniconda3\envs\textgen\python.exe: can’t open file ‘C:\\WINDOWS\\system32\\text-generation-webui\\repositories\\GPTQ-for-LLaMa\\server.py’: [Errno 2] No such file or directory
(textgen) PS C:\WINDOWS\system32\text-generation-webui\repositories\GPTQ-for-LLaMa> python server.py –cai-chat –model llama-7b –no-stream
Sorry but where is the server.py ?
server.pyis in the root directorytext-generation-webuiyou must navigate out withcd ../..Hello Ybin Ma, thank you so much for your articles, they are very helpful. However, I am experiencing some issues with the Start section.
torch.cuda.OutOfMemoryError: CUDA out of memory. Tried to allocate 86.00 MiB (GPU 0; 8.00 GiB total capacity; 7.28 GiB already allocated; 0 bytes free; 7.28 GiB reserved in total by PyTorch) If reserved memory is >> allocated memory try setting max_split_size_mb to avoid fragmentation. See documentation for Memory Management and PYTORCH_CUDA_ALLOC_CONF
Screenshot : http://i.imgur.com/PEE6CKi.png
I tried some fixes without success.
– python -c “import torch; torch.cuda.set_device(0); torch.cuda.empty_cache()”
– $env:PYTORCH_CUDA_ALLOC_CONF=”max_split_size_mb:512″
Here is some informations :
– GPU = RTX 2060 Super 8GB
– torch.cuda.is_available() = True
– torch.__version__ = 1.13.1+cu116
– python –version = Python 3.10.9
Do you have any suggestions or solutions for this issue?
.
Amaster
Hello Amaster, try starting with the command:
python server.py --cai-chat --model llama-7b --no-stream --gpu-memory 5The command –gpu-memory sets the maximum GPU memory (in GiB) to be allocated by GPU. You can adjust the value based on how much memory your GPU can allocate.
is there a way to run it with cpu mode? It said “cuda out of memory”
Hello, try starting with the command:
python server.py --cai-chat --model llama-7b --no-stream --gpu-memory 5The command –gpu-memory sets the maximum GPU memory (in GiB) to be allocated by GPU. You can adjust the value based on how much memory your own GPU can allocate.
Great news! Thank you so much, Yubin Ma, for your help. Your solution worked perfectly and I really appreciate your assistance. Thanks again for your time and expertise!
Glad to hear it Ama!
I have .pth model files, not .pt. Will the .pth files still work or do I need to do some kind of conversion/transform on them??
The .pth files are the old weights. I recommend downloading the new ones.
Thanks a lot Yubin Ma !
I followed several guide before I found you and none of them were working ! your guide is definitely the best resource we can found !
Working like a charm !
Hey John, glad to hear it, cheers!
Ty !
i have another problem :
CUDA SETUP: Loading binary C:\Users\stb13\miniconda3\envs\textgen\lib\site-packages\bitsandbytes\libbitsandbytes_cuda116.dll…
Loading llama-7b…
Loading checkpoint shards: 100%|█████████████████████████████████████████████████████████| 2/2 [00:00<00:00, 2.77it/s]
Traceback (most recent call last):
File "C:\WINDOWS\system32\text-generation-webui\server.py", line 273, in
shared.model, shared.tokenizer = load_model(shared.model_name)
File “C:\WINDOWS\system32\text-generation-webui\modules\models.py”, line 56, in load_model
model = model.cuda()
File “C:\Users\stb13\miniconda3\envs\textgen\lib\site-packages\torch\nn\modules\module.py”, line 689, in cuda
return self._apply(lambda t: t.cuda(device))
File “C:\Users\stb13\miniconda3\envs\textgen\lib\site-packages\torch\nn\modules\module.py”, line 579, in _apply
module._apply(fn)
File “C:\Users\stb13\miniconda3\envs\textgen\lib\site-packages\torch\nn\modules\module.py”, line 579, in _apply
module._apply(fn)
File “C:\Users\stb13\miniconda3\envs\textgen\lib\site-packages\torch\nn\modules\module.py”, line 579, in _apply
module._apply(fn)
[Previous line repeated 2 more times]
File “C:\Users\stb13\miniconda3\envs\textgen\lib\site-packages\torch\nn\modules\module.py”, line 602, in _apply
param_applied = fn(param)
File “C:\Users\stb13\miniconda3\envs\textgen\lib\site-packages\torch\nn\modules\module.py”, line 689, in
return self._apply(lambda t: t.cuda(device))
RuntimeError: CUDA out of memory. Tried to allocate 86.00 MiB (GPU 0; 4.00 GiB total capacity; 3.40 GiB already allocated; 0 bytes free; 3.40 GiB reserved in total by PyTorch) If reserved memory is >> allocated memory try setting max_split_size_mb to avoid fragmentation. See documentation for Memory Management and PYTORCH_CUDA_ALLOC_CONF
(textgen) PS C:\WINDOWS\system32\text-generation-webui>
you can help me please ? ty
maybe i have a bad configuration with my computer ? i have try this :
python server.py –cai-chat –model llama-7b –no-stream –gpu-memory 4
i can lauch the weblocal but when i have speack with the assistant i have a error
ty for everything
Hello ! i got a problem on the “start” section. While trying to run this cmd : python server.py –cai-chat –model llama-7b –no-stream
I got this error :
Traceback (most recent call last):
File “C:\Users\a\text-generation-webui\server.py”, line 10, in
import gradio as gr
ModuleNotFoundError: No module named ‘gradio’
Could you please help me ? 🙂
Hey! check this out:
http://github.com/oobabooga/text-generation-webui/issues/265
When I launch this command “python server.py –cai-chat –model llama-7b –no-stream”
I have this answer:
Traceback (most recent call last):
File “/home/matrix/text-generation-webui/server.py”, line 10, in
import gradio as gr
ModuleNotFoundError: No module named ‘gradio’
How to fix “server.py”?
As you see I’m on LInux, it may have nothing to do with the issue?
Hey Jimmy, I have not encountered this issue before but check this out:
http://github.com/oobabooga/text-generation-webui/issues/265
Yubin Ma, Thank you so much for this tut!!! 💗
Whoa, where did it pull that profile pic from on my comment???
Test123
Hi,
I have another question.
What do I need to do to have the program up-to-date?
Do I need to go through all the steps from the beginning?
Regards.