Hypernetworks are a fine-tuning technique that enhance the results of your Stable Diffusion generations.
You use hypernetwork files in addition to checkpoint models to push your results towards a theme or aesthetic.
For example, you could use the MJV4 hypernetwork in addition to any checkpoint model to make your results look more like Midjourney.
The alternatives to hypernetworks are:
- LoRAs - more popular, users find they produce better results
- Textual Inversion / Embeddings - very small file size, best for training faces.
All of these function similarly, but the underlying training metholody is different.
Using Hypernetworks
You should already have installed AUTOMATIC1111, which can run on Windows, Mac or Google Colab.
The best place to find hypernetworks is civitai.com.
After downloading
To use a hypernetwork, add the following to your prompt:
<hypernet:FILENAME:WEIGHT>
Where FILENAME is the file name of the hypernetwork, excluding the file extension.
AND WEIGHT is the strength of the hypernetwork from 0-1. 1 is the strongest, and 0 is the same as disabling it.
As a shortcut, instead of writing this phrase, you should click on the pink model button under the big “Generate” button.

Click on the Hypernetworks tab, and you will see all the hypernetworks in your stable-diffusion-webui/models/hypernetworks folder.
Click on any and the tag will automatically be inserted into the prompt.

Be aware that the hypernet phrase is not treated as part of the prompt. It merely directs which hypernetworks to use. It will be removed after the hypernetwork is applied. So you cannot use any prompt syntax like [keyword1:keyword2:0.5] with them.
Training your own
Before starting, make sure you have:
- Installed and working Automatic1111
- At least 10 images of the subject or aesthetic you want to train on
Step 1: Crop images
Training images must have a resolution of 512x512. Anything else will add distortion to the end results.
For this, you can use Birme.net - a website that'll automatically resize your images. I'll be training a golumn hypernetwork.
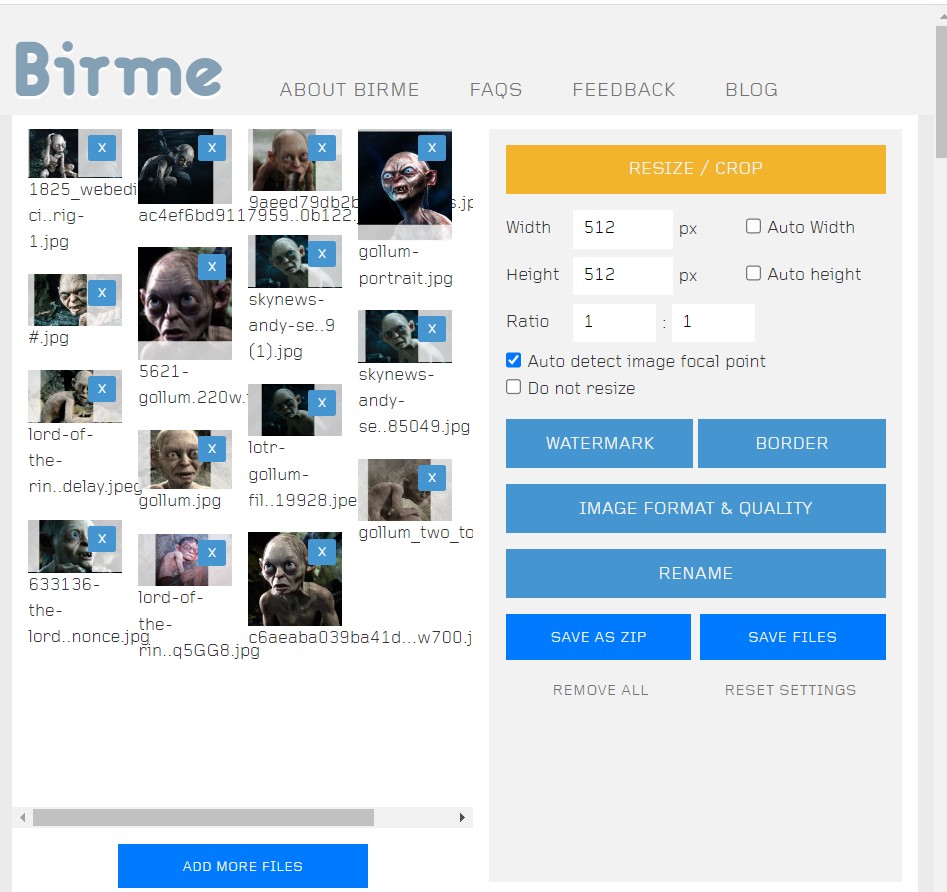
For demonstration purposes, I'm using Gollum from Lord of the Rings.
Step 2: Create a Hypernetworks Sub-Folder
In your stable-diffusion-webui folder, create a sub-folder called hypernetworks.
In the hypernetworks folder, create another folder for you subject and name it accordingly.
Mine will be called gollum.
Inside your subject folder, create yet another subfolder and call it output.
So fa, my file path looks like:
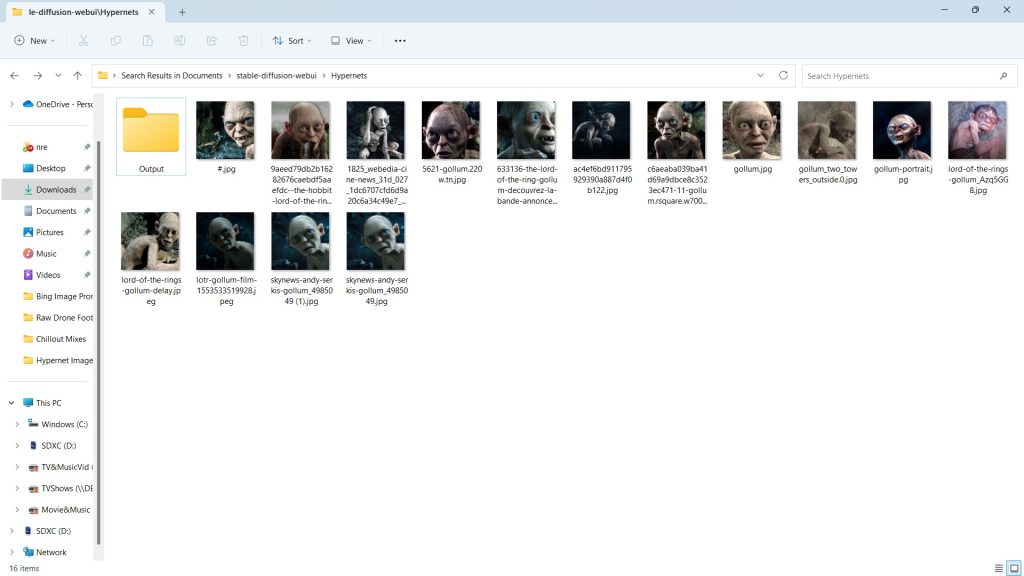
stable-diffusion-webui\hypernetworks\gollum\outputStep 3: Add Your Images
Now, add your resized images to your subject folder:
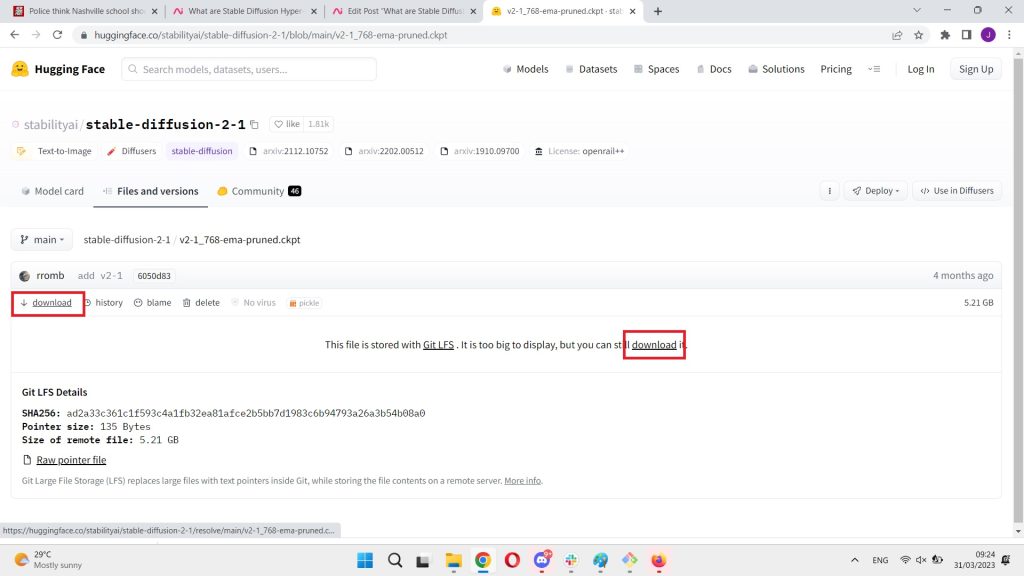
Step 4: Download Stable Diffusion Checkpoint Model
Go to the Stable Diffusion 2.1 Hugging Face.
Then, you simply download the CKPT file.
B. Move To The Correct Filepath
Once it's downloaded, move it to the following filepath:
C:\Users\Your+Name\Stable Diffusion\stable-diffusion-webui\models\Stable-diffusion
When you run the AUTOMATIC1111 Web UI, it will automatically run the latest model of Stable Diffusion.
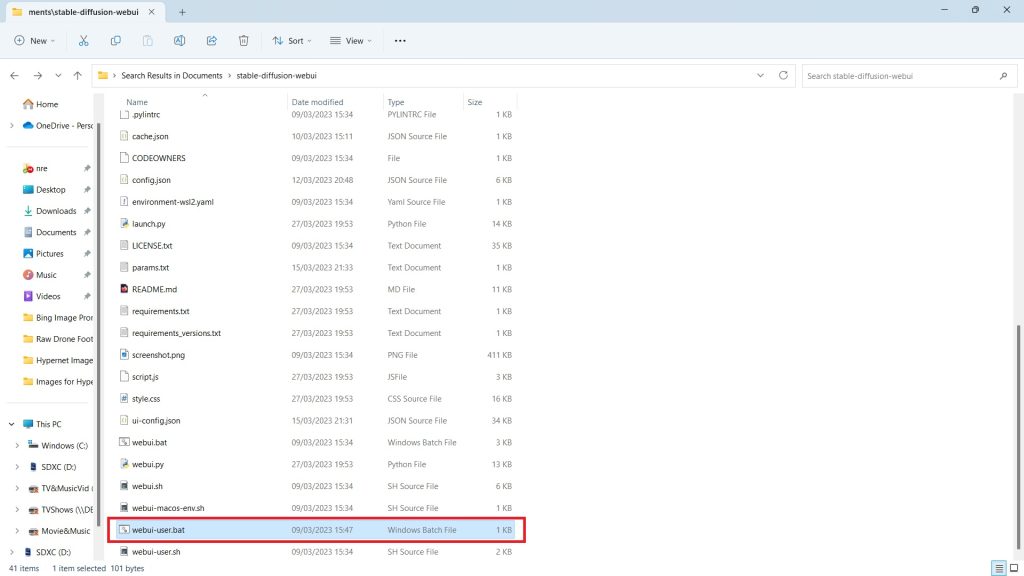
Step 5: Run Stable Diffusion with AUTOMATIC1111 Web GUI
Click on webui-user.bat to run Stable Diffusion AUTOMATIC 1111 Web GUI.
Enter the following URL in Google Chrome. This is the provided local URL you use to access Stable Diffusion.
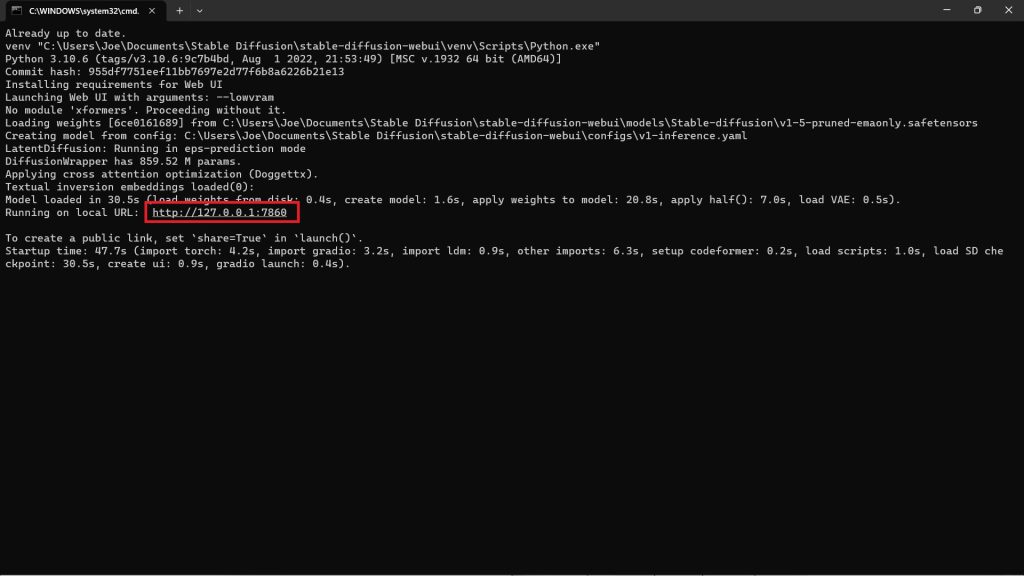
You may copy and paste it from below:
http://127.0.0.1:7860Step 6: Training
A. Creating a Hypernetwork
Firstly, click on the Training Tab on Stable Diffusion's UI.
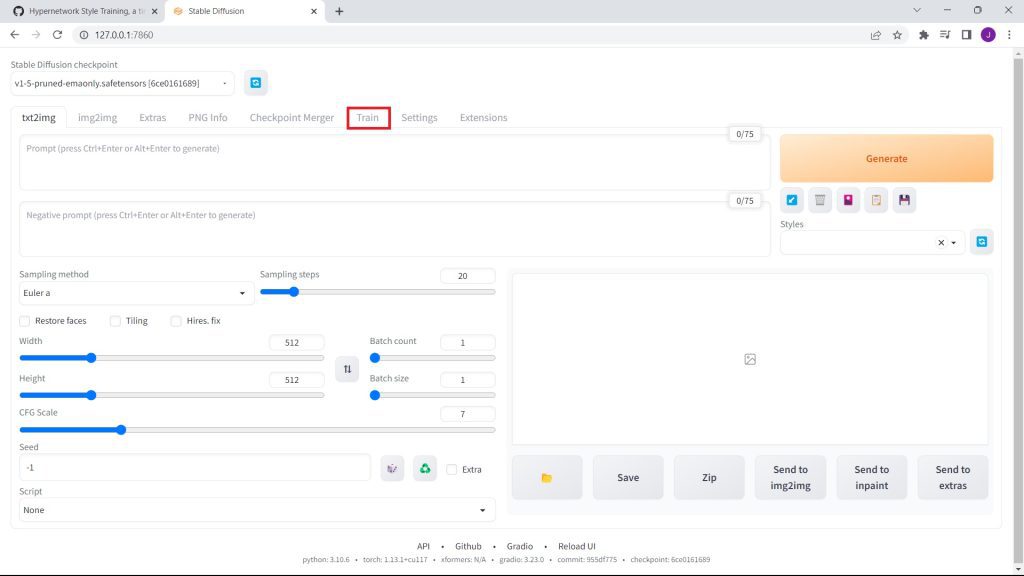
Then, click on Create Hypernetwork.
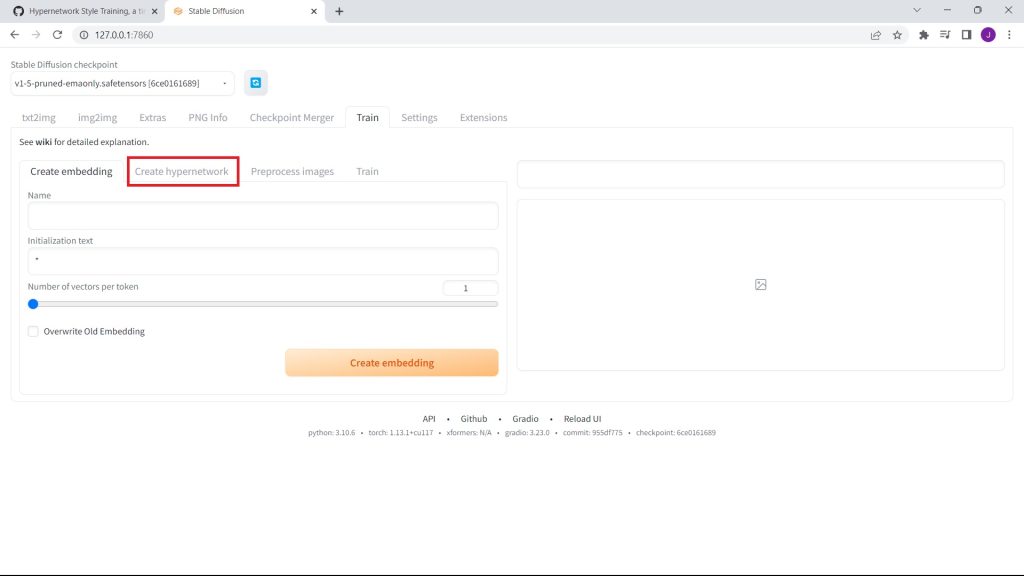
Name your hypernetwork. Then, click on Create Hypernetwork.

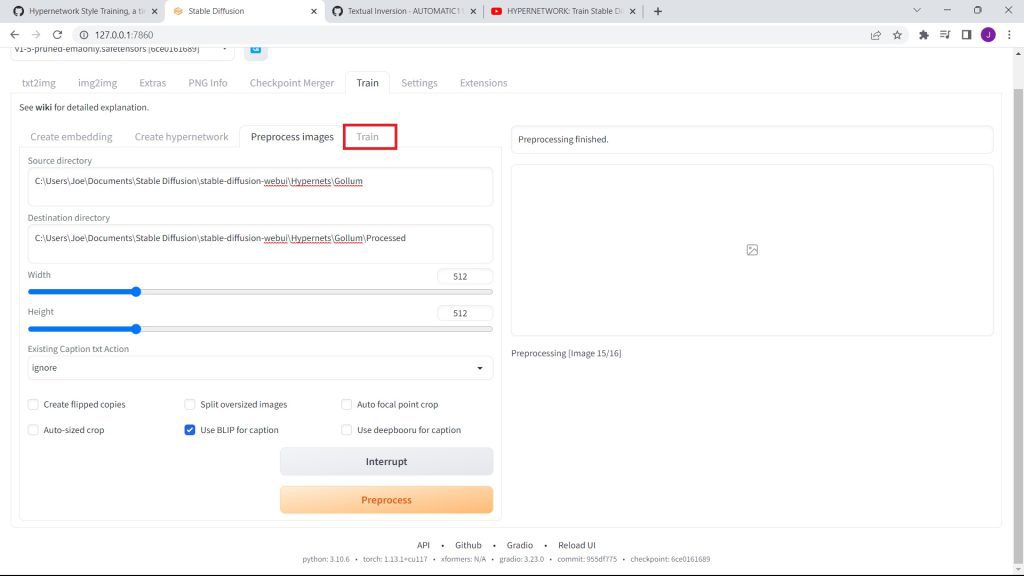
B. Pre-Processing Images
Then, click on Preprocess Images.
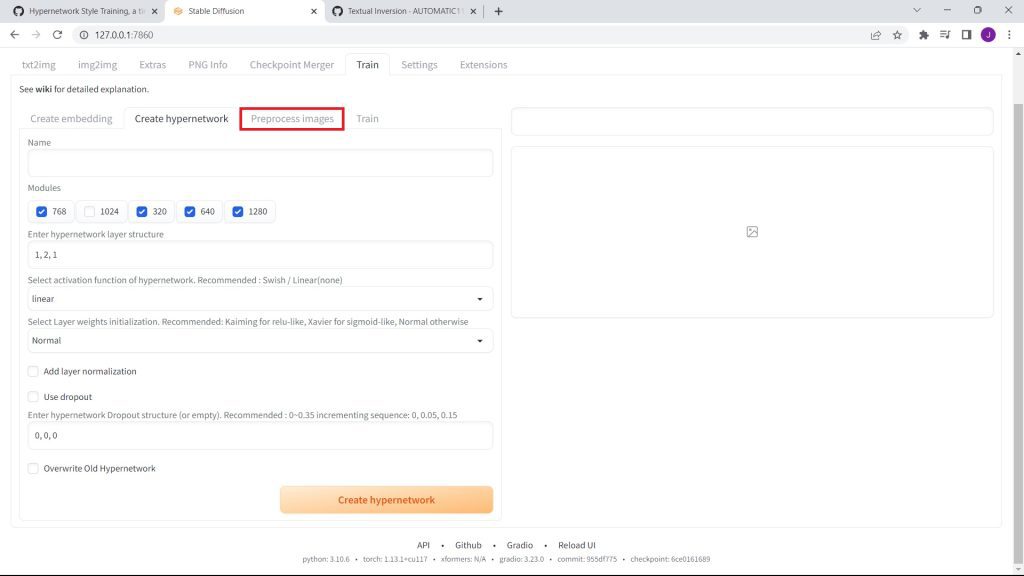
On Preprocess Images, enter the source directory of your hypernet. Then, your destination directory.
This demonstration, it's the sub-folders we created earlier.
Simply, copy and paste their directories from Windows File Explorer to the appropriate text fields.
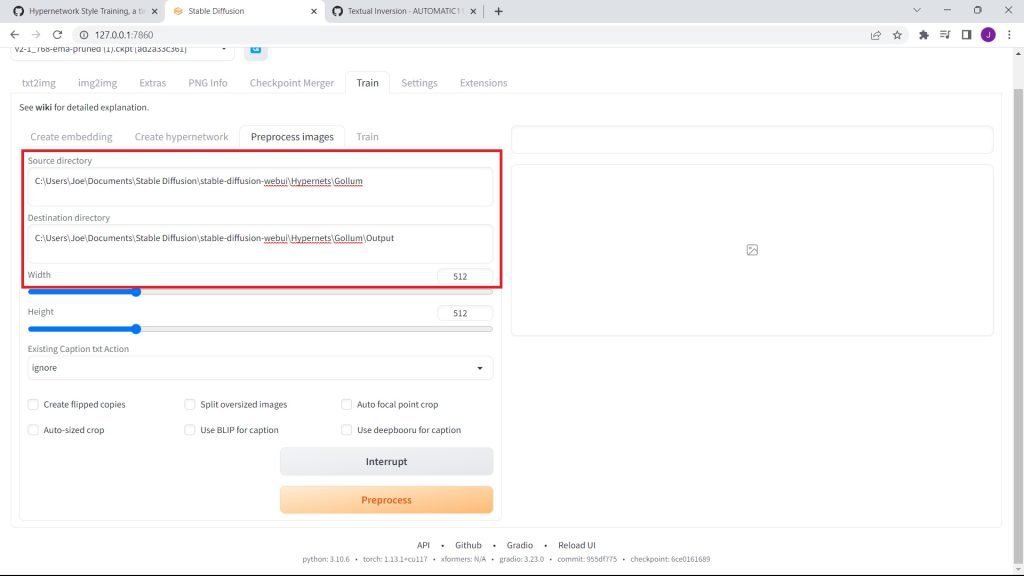
In our case, the file paths are:
Source Directory
Ours: C:\Users\Joe\Documents\Stable Diffusion\stable-diffusion-webui\Hypernetworks\Gollum
C:\Users\Your_Name\Stable Diffusion\stable-diffusion-webui\Hypernetworks\Model_NameDestination Directory
Ours: C:\Users\Joe\Documents\Stable Diffusion\stable-diffusion-webui\Hypernetworks\Gollum\Processed
C:\Users\Your_Name\Stable Diffusion\stable-diffusion-webui\Hypernetworks\Model_Name\ProcessedNote: Mine is in the documents folder. For some reason, Stable Diffusion fails to run when moved to another library. Avoid making this mistake.
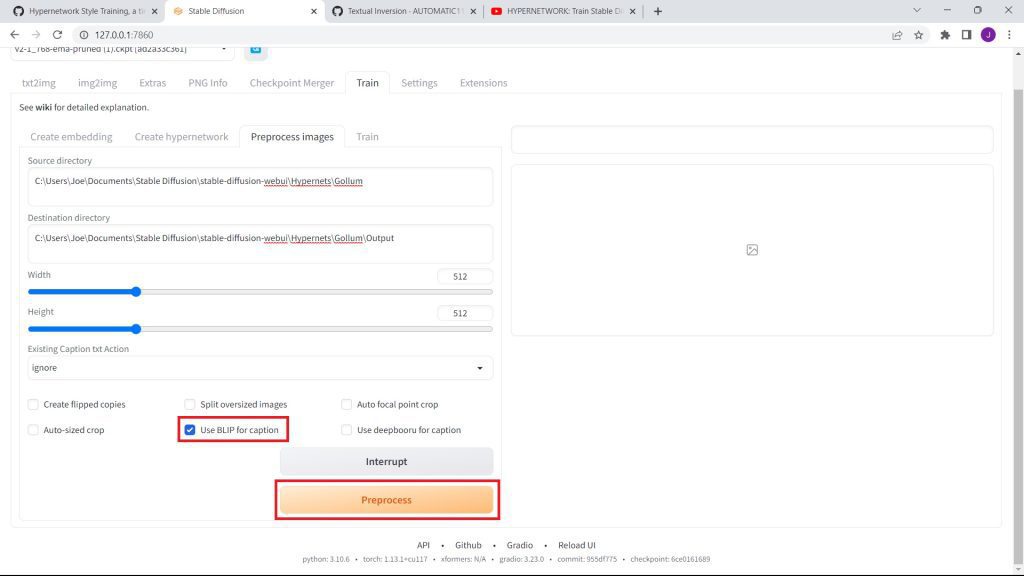
C. Using BLIP for Captioning
Now, click the checkbox for using BLIP to caption your images. This will add a unique caption to each of your images.
If you're using anime images, opt for Deepbooru, which is specialist for anime images.
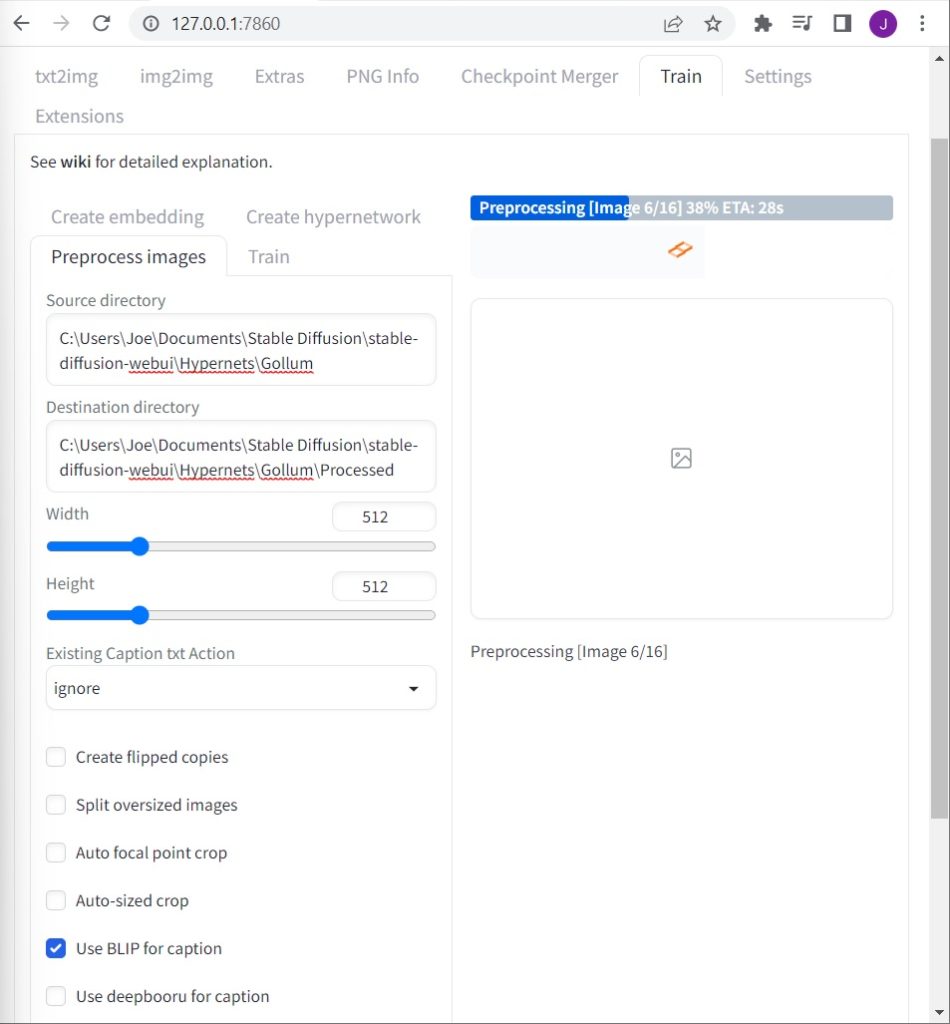
Then, click on preprocess images.
Once you click preprocess, you may need to wait around 1 minute.
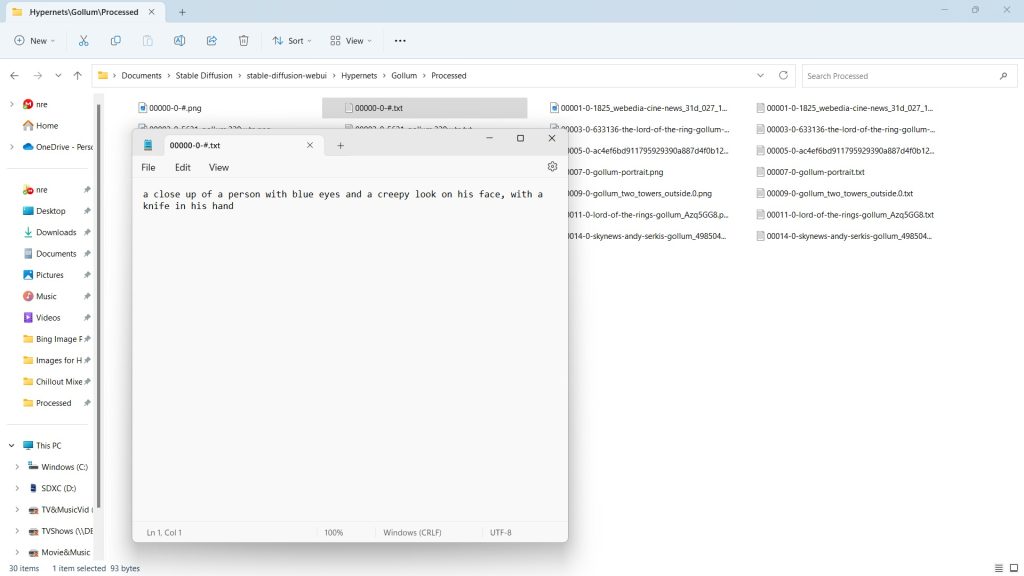
After, go to your processed file. You'll see a text file right next to each of your images.
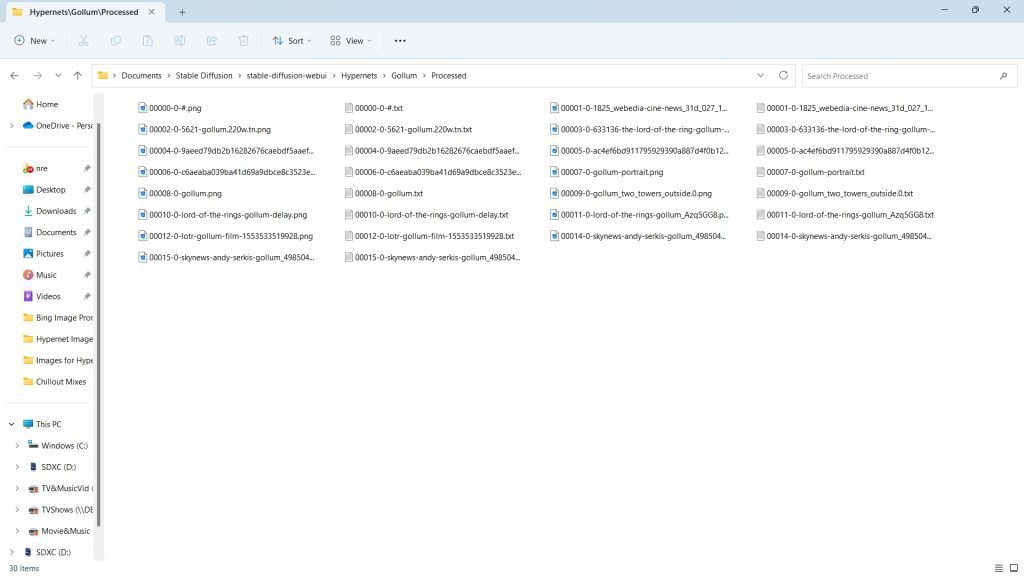
Your generated text files are descriptions of each image.
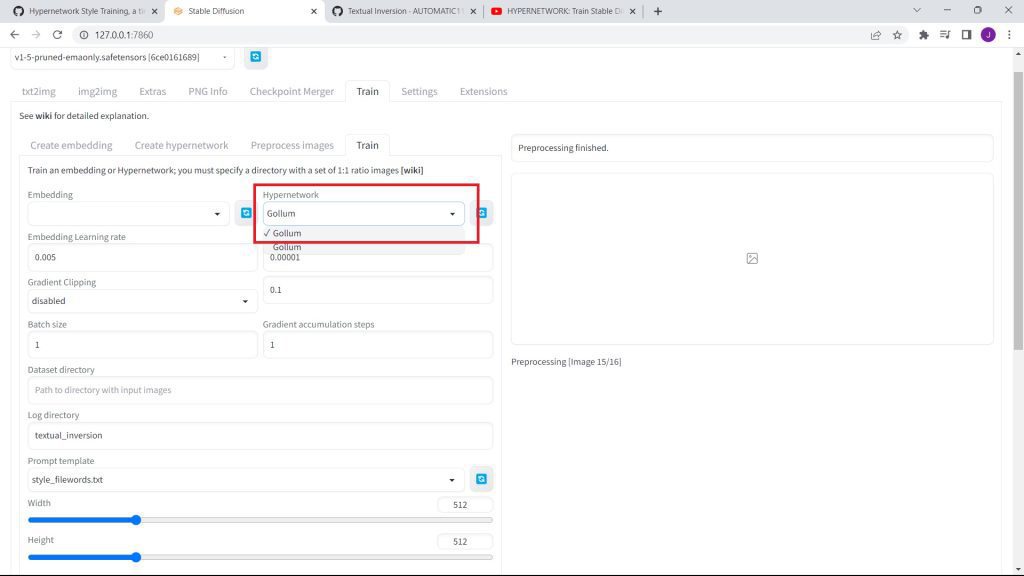
D. Select your Hypernetwork
Now, that you've created a Hypernetwork, it's time to use it.
Go back to Stable Diffusion. Then, click on the Train Tab. You need to click on the Train tab next to the Preprocess Images Tab.
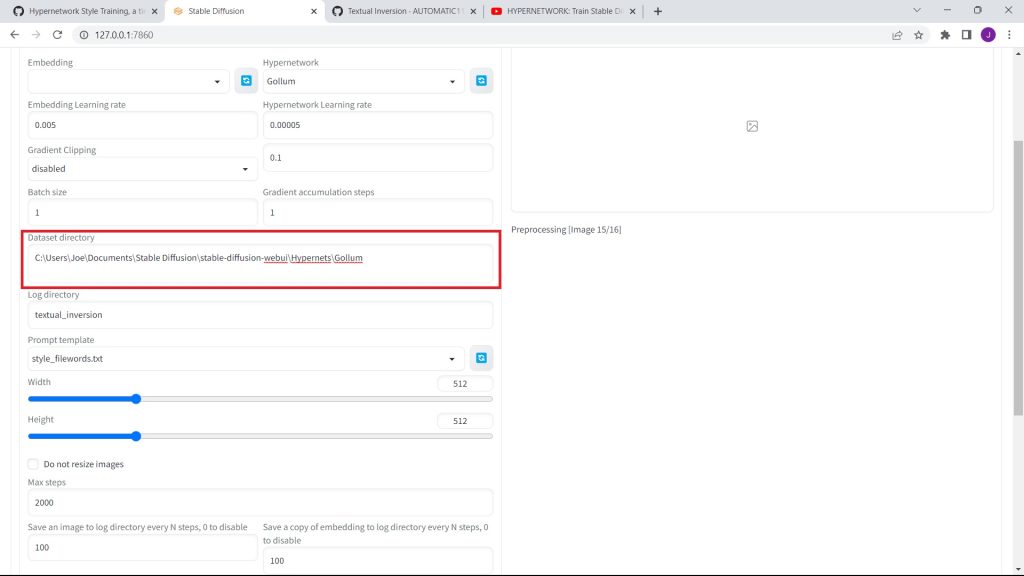
Then, select your Hypetnetwork on the dropdown under Hypernetwork.
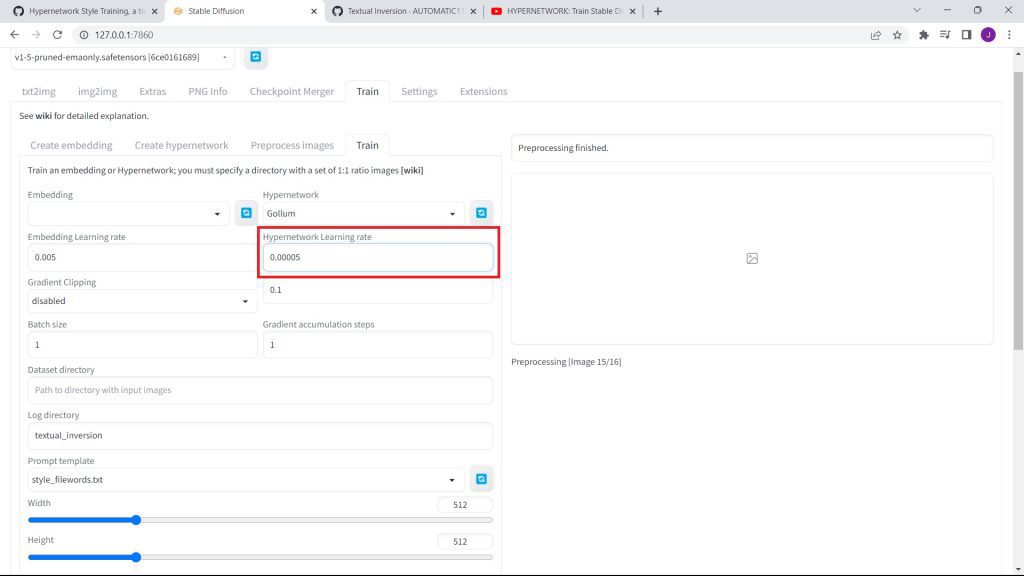
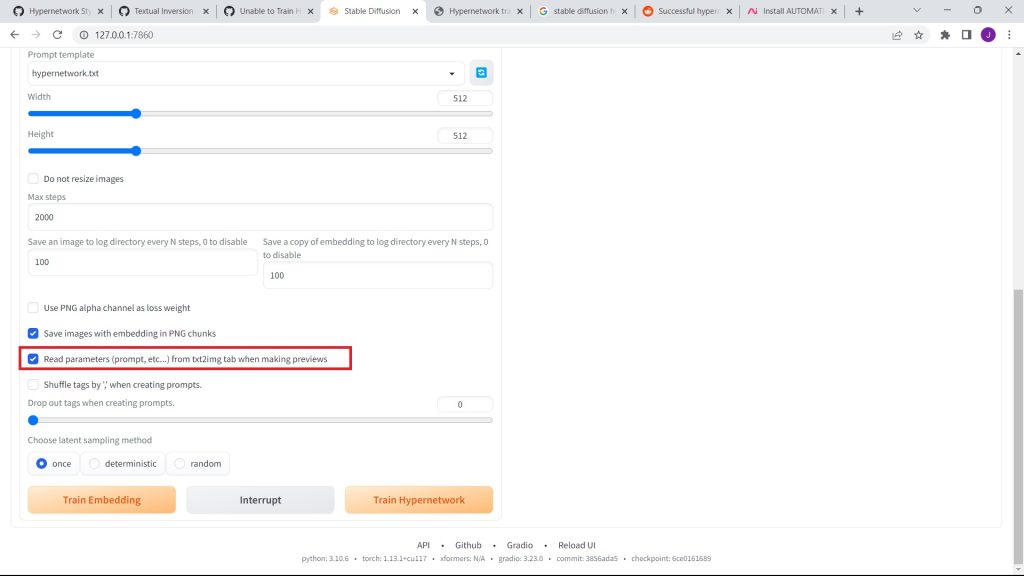
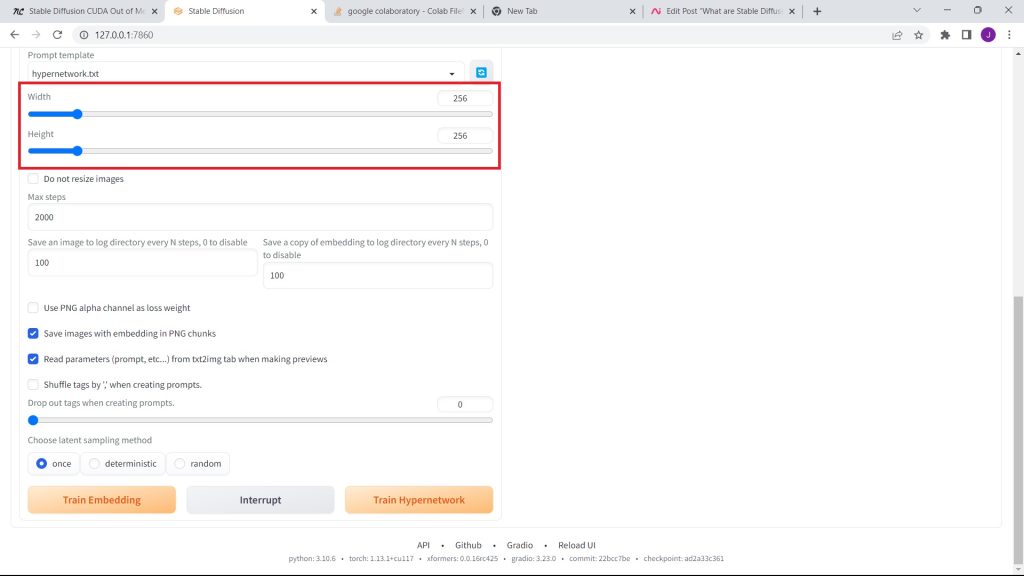
E. Setting Up The Training
Set the Hypernetwork Learning Rate to 0.0005.
Then, set the max steps to 2,000.
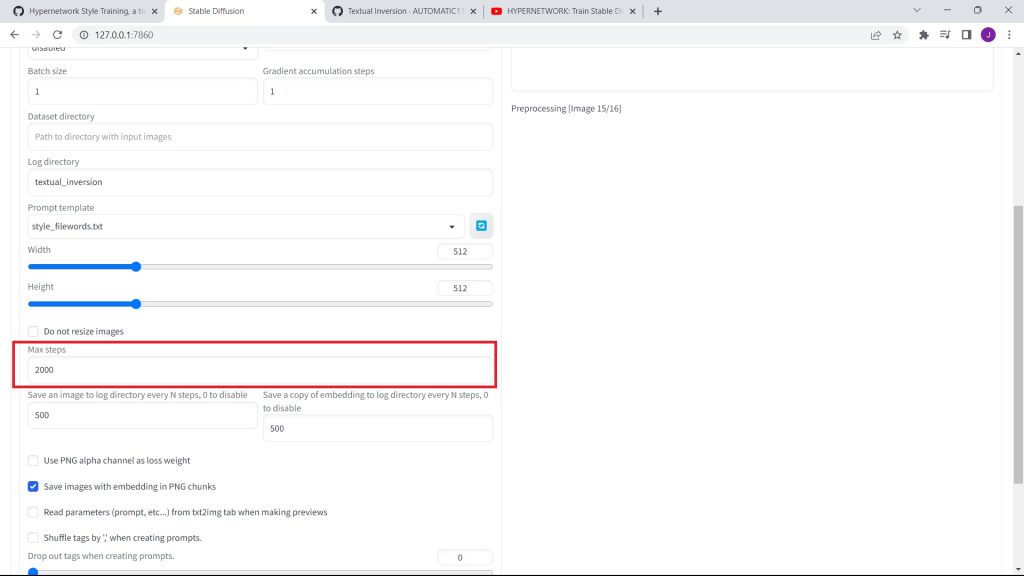
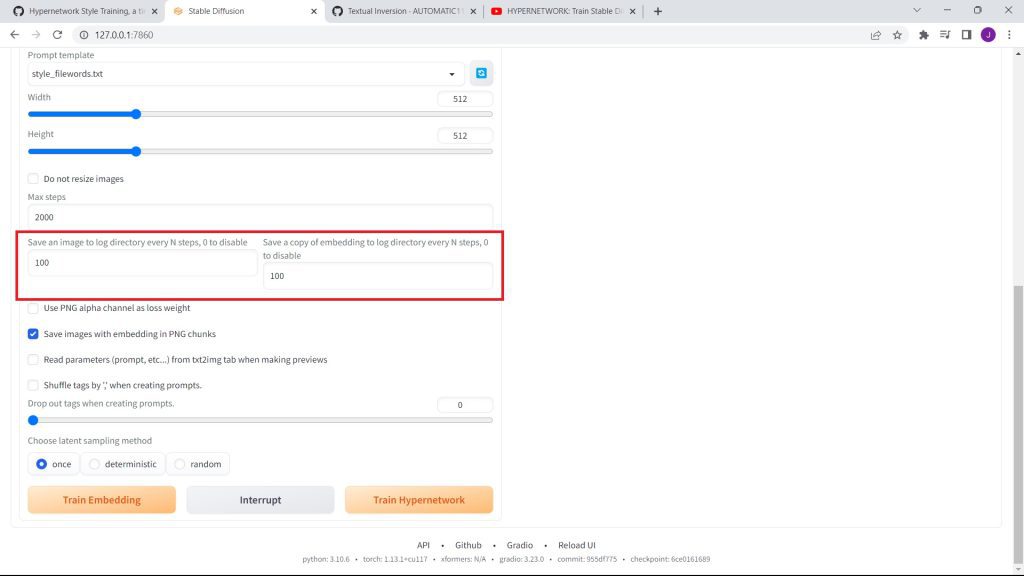
After, set the numbers under 'Save an image to log directory every N steps, 0 to disable' and 'Save a copy of embedding to log directory every N steps, 0 to disable' to 100.
In the dataset directory, copy and paste the filepath of your set of images.
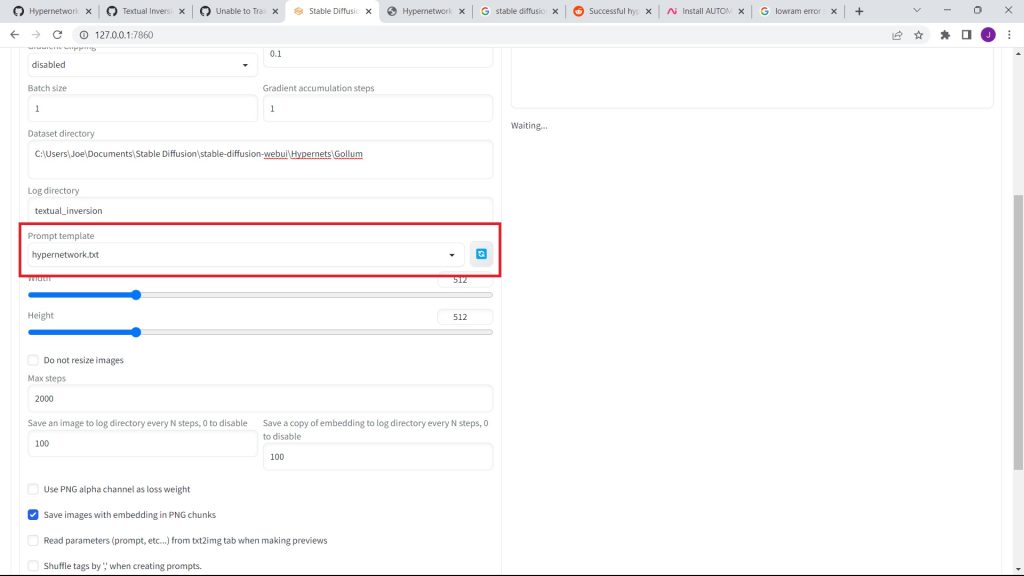
Also, set the prompt template to hypernetwork.
Check the 'Read Parameters (Prompts, etc...) from Text2Image When Generating Previews' checkbox.
Go onto the text2image tab, and enter a prompt of how you want your hypernetwork to be.
Feel free to feature art styles, as I have below:
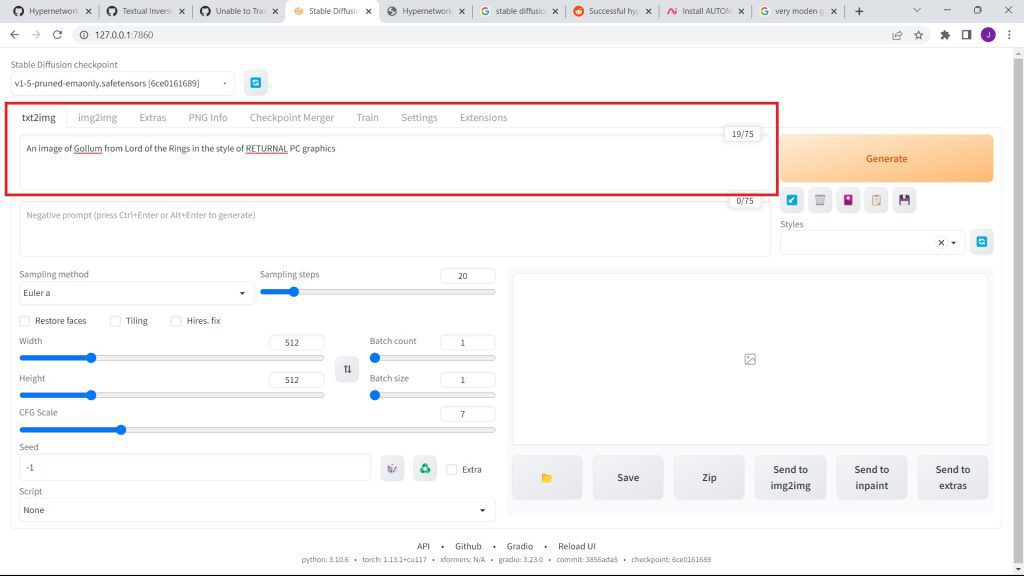
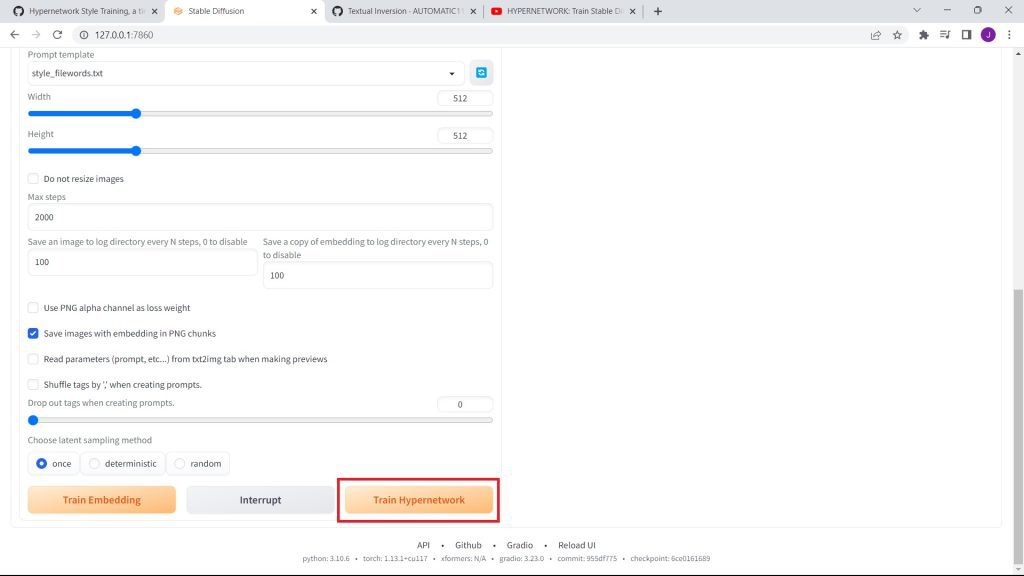
Then, go back to the hypernetwork tab, and click on Train Hypernetwork.
F. Overcoming the Low VRAM Error
When you try to train your hypernetwork, you may come across a VRAM error - despite having enough RAM to begin with.
To resolve the Low RAM error, first you can try lowering the resolution of your images to 256x256.
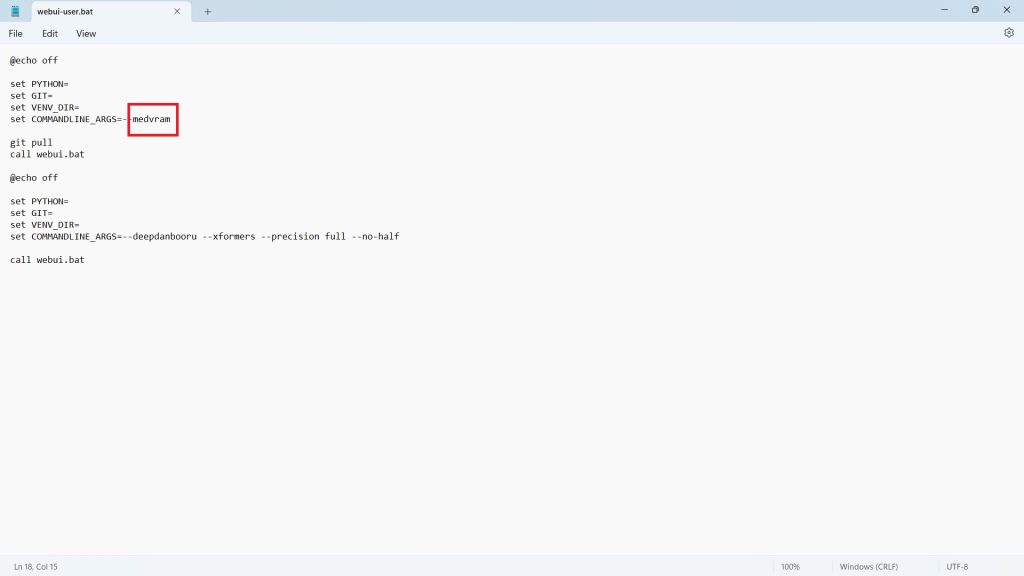
Alternatively, switch from lowvram to medvram in the web-user.bat file - if you have 8GB or less.
If you have 4GB or less, stick with lowvram.
G. The Training
Once you've clicked Train Hypernetwork, the training will begin.
It will take up to an hour, so be patient.

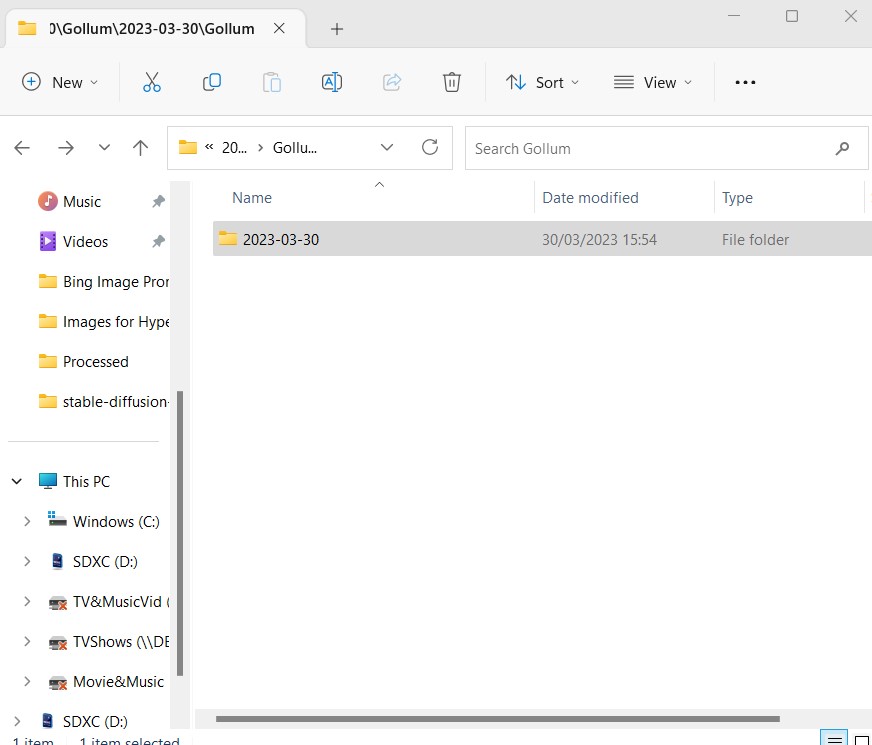
After around 60-70 minutes, you'll find 50-100 images in your dated folder - created by the AI. Each image should be better than the others.
The following filepath should appear as follows:
C:\Users\Your_Name\Stable Diffusion\stable-diffusion-webui\Hypernetworks\Output\2023-03-30\Gollum\In other words, it'll be in a new sub-folder with today's date in your Hyper Network's sub-folder.
You can increase the number of steps to around 2,500. Although, you may find distortion in the final results.
If you get distortion, simply copy and paste the image generated right before distortion occurs. Then, copy it to the hypernetwork's sub-folder.
Then, make the hyper network's sub-folder file-path to the dataset entry.
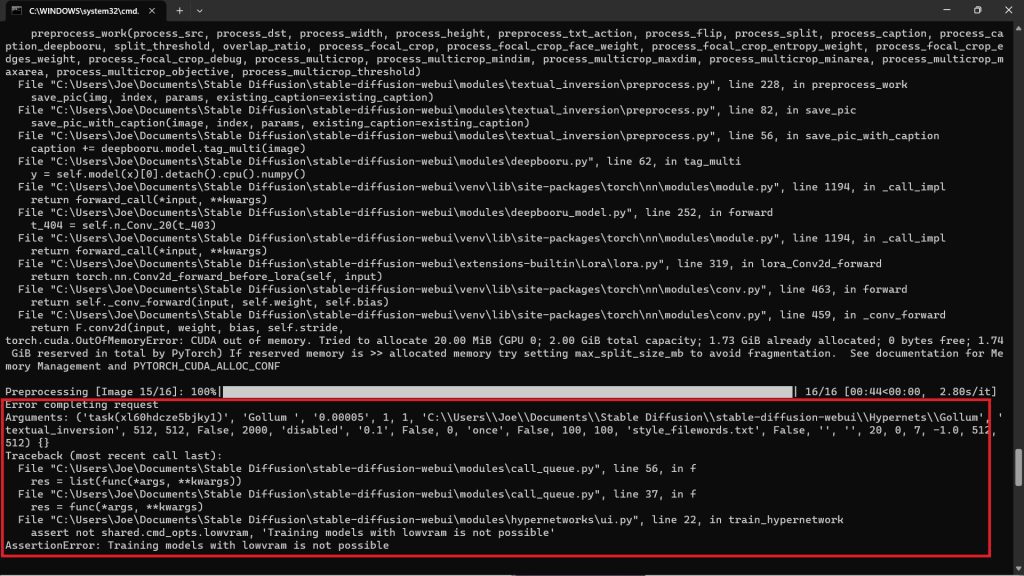
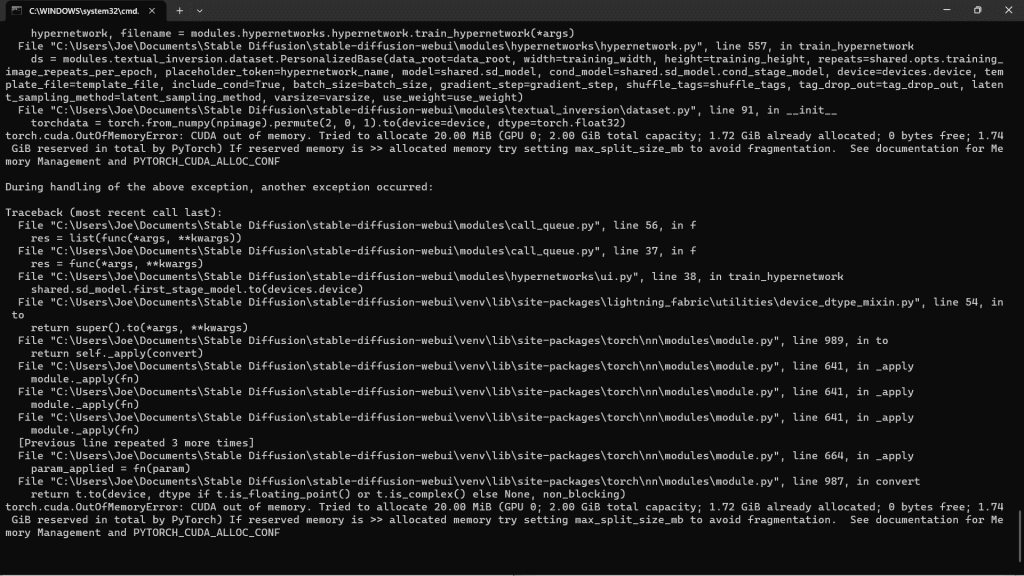
H. Tackling the CUDA Error
About 1 minute into your training, you may across these errors, which abort the entire process:
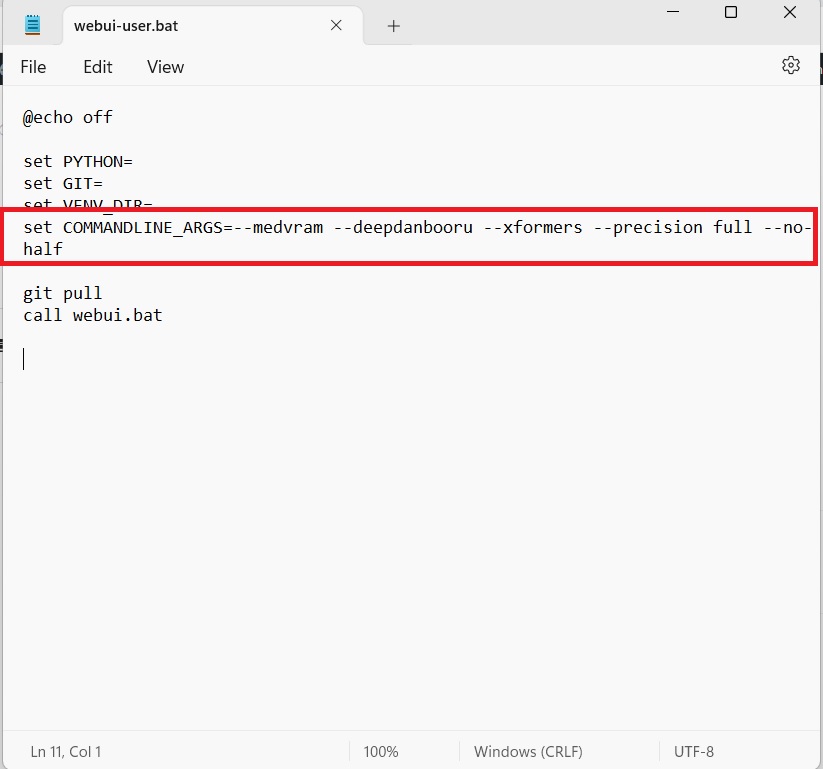
To solve this issue, go into your webui.user.bat file, and enter --deepbanbooru -- xformers --precision full --no-half. Then, save the file.
set COMMANDLINE_ARGS= --medram --deepdanbooru --xformers --precision full --no-half
Also, resize the output to 256x256.
After, the model should start training.
Some people suggest overclocking the GPU clock and RAM, but I don't recommend risking your hardware for this. I certainly won't be. If you're willing to take a risk, go for it.
Conclusion
In conclusion, training a hypernetwork isn't a straightforward task.
Although, if you have the right hardware, you won't come across the 2 RAM errors listed above. Thus, it should work well for you.