Dreambooth allows you to take any subject (person, pet, object) and put it in a Stable Diffusion model. Here's the official paper.
You have multiple options for running Dreambooth. We'll be using one of the most popular methods: JoePenna's Google Colab.
Google Colab is free to use normally, but Dreambooth training requires 24GB of VRAM (the free GPU only has 16 GB of VRAM). You'll need to upgrade to Colab Pro ($10/mo).
n this guide I'll use myself as an example to show you how to use Dreambooth to create a model that generates images of you.
Here are the kind of images that I used to train my model:
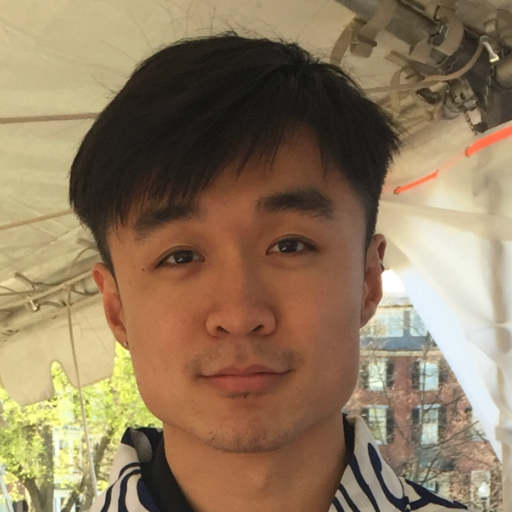


Here are some of the images my model generated:


The entire process is easier than it seems. The most difficult part will be gathering the best images.
Collecting Images
Anywhere between 12-20 images will work well for Dreambooth.
In these training images, everything should be different except for the thing you want to train.
If you're training on you're own face, that means you should choose photographs of you with:
- different backgrounds
- different lighting conditions
- different angles
- different facial expressions
- wearing different clothing
The only thing that should be consistent is your face.
Choose images that are as close as possible to what you want the output to look like. If you want attractive generations, select photos where you look good!
Selfies are not the best images to use (they have a bit of a unnatural zoomed-in look), but they are acceptable.
Try to get the following images:
- 5-10 close-up on face (get close)
- 3-5 upper body
- 2-3 full body
Make sure you have an EVEN number of images.
Here are some examples with my pictures:


Next, you'll want to crop every image to 512x512 resolution.
Birme.net is a site that automates this. Open the link and then drag and drop all your images to the site:

Save these images into a folder and title the folder anything.
Next, you'll want to rename the images using the following convention:
TRIGGER (NUMBER).jpg
Where TRIGGER is the word you will use in your prompts to activate your face, and NUMBER is an ordered sequence starting from 1.
Whether you are using .jpg or .png does not matter, and you can use a mix of both.
I'll use my name as the TRIGGER so my images will be named:
yubinma (1).jpgyubinma (2).pngyubinma (3).jpg
And so on. Now we have our training images we can move on to the next step.

Training with JoePenna's Colab
Open JoePenna's Google Colab.
It's much more straightforward than it looks.

The Play buttons on the gray blocks run different cells of code.
All you have to do is run every cell in order, and you'll get Dreambooth to train a new model based on your likeness.
Check GPU and VRAM available. (Optional)
You will need more than 24GB, so make sure you have the A100 GPU selected. Go to Runtime (header menu) -> Change runtime time to change the GPU you are using.

Then you can run the test:

Cell 1: Clone & Download The Repo
This will download the repo, the code needed to run everything.

Cell 2: Build the Environment
This will install the required packages.

You might get warnings about restarting the runtime. Look for the button in your error logging to restart your runtime.

Cell 3: Just to ensure you are in the right directory
This just makes sure that your current working directory is Dreambooth-Stable-Diffusion (in case you restarted the runtime).

Cell 4: Download the 1.5 SD model with the improved VAE
This cell downloads the Stable Diffusion 1.5 model that we will train on.

Cell 5: Download Regularization Images
This will download the regularization images.
Regularization is a machine learning concept.
In our case, it takes images made from the base model you are training on, and uses them as a part of the training process for your subject.
It will help prevent over training, and make sure your images do not affecting the overall model too much.

Cell 6: Training Images
Run this cell and a button will appear at the button called Choose Files. Click on this button, and select all the images (cropped to 512x512) you prepared in the first step.

Cell 7: Final Setup & Training
This is actually do the training and is the longest step in the process. Before you start you'll need to enter some information:

project_name: the folder of your project that will be created in Google Drive, does not matter too muchtoken: unique token that will trigger your concept in your prompt. I will use my name "yubinma"class: what broader category of things your concept falls under. The default is "person", no need to change this unless you are doing something else, like "animal"max_training_steps: The number of training steps where training will stop. 2000 is the default for a dataset of 12–20 or so training images.i_am_training_a_persons_face: If checked then images will not be flipped during training.save_every_x_steps: if you would like to have a model saved at specific intervals then enter a value higher than 0.
There is no "perfect number" of training steps. Everybody will have a different experience, based on their subject matter and their training data. 2000 is the default, and should be the minimum. Anything less then your subject’s likeness may not be quite right (this is called undertrained).
You can improve quality by training on more steps, but you risk overtraining, when the model is trained too well on your images and no longer has any flexibility.
Experienced model trainers will train for a large number of steps, and then save the model along the way.
For example, somebody might train for 3000 steps, and then save a model every 500 steps. They would end up with 6 models trained as 500, 1000, 1500, 2000, 2500 & 3000 steps. Then they would test each one to see which is best.
Run this cell and the model will start training.
You will see output like this:

An epoch is a single pass through the entire dataset during training. Each image in your dataset will be presented to the model repeated times before the model is altered.
An epoch is measured in steps. Steps equals the total number of training images multiplied by the number of repeats (100 is the default + 1 validation repeat = 101 repeats). I used 14 training images so 14 * 101 = 1414, so an epoch = 1414 steps.
It starts with Epoch 0, so Epoch 1 is the second epoch.
Remember the maximum number of steps we entered for training?
If I go with 2000 maximum steps, and 1 epoch is 1414 steps, training will stop before my second epoch finishes.
This isn’t a problem as the model should be quite well trained by this point.
However if max steps is less than 1 epoch, it means not all your training data has been presented to the model with equal number of repeats.
You will see the following when training completes/stops.
✅ Download your trained model(s) from the 'trained_models' folder and use in your favorite Stable Diffusion repo!Your model will be in the folder trained_models in Dreambooth-Stable-Diffusion (click the folder icon on the left).
Cell 8: Save model into google drive
This step saves the models to your Google Drive.

Run the cell and give permissions to connect to your Google Drive. Once your Google Drive is mounted, all of the .ckpt model files will be copied to the root folder of your Google Drive.
Testing your models
Now that you've finished your models you can test them.
You can use a local version of AUTOMATIC1111's WebUI. Here are the installation instructions:
Download the models from Google Drive and place them in the folder stable-diffusion-webui/models/Stable-diffusion
Now when you run the WebUI you can select these models in the dropdown.
Test with:
An exquisite portrait photo of TRIGGER CLASS
For me this would be:
An exquisite portrait photo of yubinma person

Make sure the class "person" is always in your prompt.
What are all of the options for Dreambooth Colab?
JoePenna, ShivamShrirao and TheLastBen are the most popular options. I recommend JoePenna for high quality and TheLastBen for being the most easy to use.
JoePennahttp://github.com/JoePenna/Dreambooth-Stable-DiffusionShivamShrirao
http://github.com/ShivamShrirao/diffusers/tree/main/examples/dreamboothTheLastBenhttp://github.com/TheLastBen/fast-stable-diffusionGammagechttp://github.com/gammagec/Dreambooth-SD-optimizedHuggingFacehttp://github.com/huggingface/diffusers/tree/main/examples/dreamboothkohya-sshttp://github.com/kohya-ss/sd-scriptsEveryDream2http://github.com/victorchall/EveryDream2trainerStableTunerhttp://github.com/devilismyfriend/StableTunerSD Webui Dreambooth Extensionhttp://github.com/d8ahazard/sd_dreambooth_extension