Colaboratory, or “Colab” for short, is a product from Google Research that lets you run Python code on Google's servers.
It's the most commonly recommended solution for people who can't run Stable Diffusion on their own computers.
Colab is based on the open source project Jupyter.
Anybody can create and share a Jupyter notebook, a document that contains code that can be executed with a single click.
In this guide we'll cover using Google Colab to run Stable Diffusion, using the SDXL model as an example.
Is Google Colab free for Stable Diffusion?
In the past, you could run Stable Diffusion for free on Google Colab.
However, Google has revised their policies. Now you must pay for Colab Pro ($9.99/mo) to use any Stable Diffusion notebook.
Colab Pro gives you access to better GPUs, 100 compute units per month. Compute units roll over months, however expire 90 days after usage.
How to use Google Colab
To use Google Colab, first open the link to your notebook of choice.
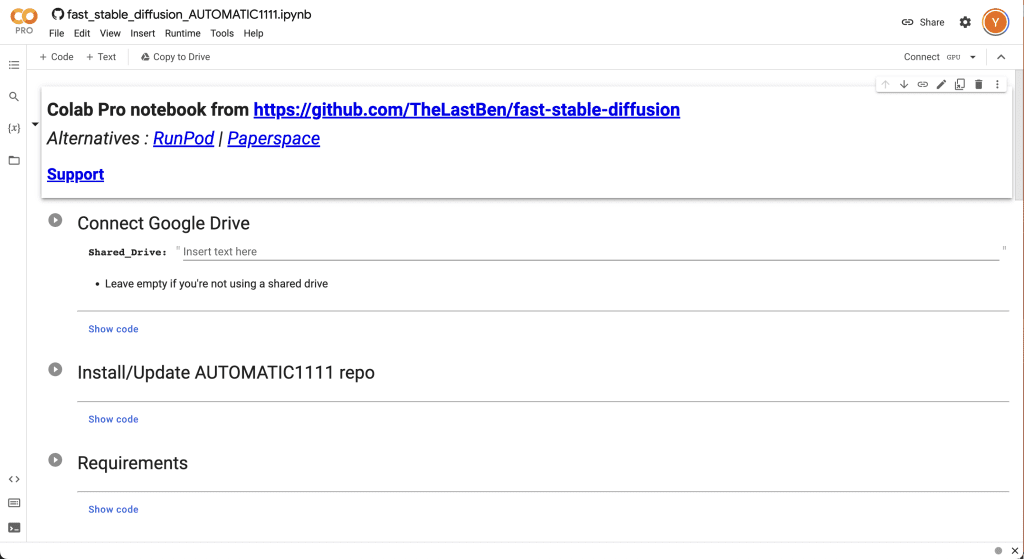
The Stable Diffusion community recommends TheLastBen's Fast Stable Diffusion notebook.
This guide will use TheLastBen's Fast Stable Diffusion notebook, however the process will be very similar for other notebooks.
Here's what you'll see when you open the notebook:
Starting a session
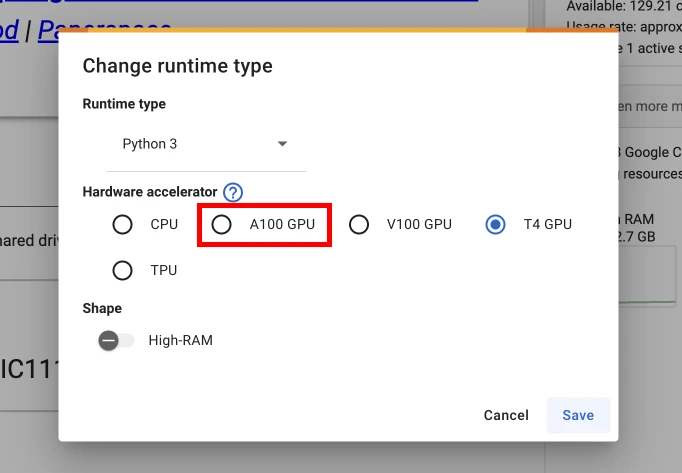
First, change the runtime type.
Since you've purchased Colab Pro, you have access to the V100 and A100 GPUs. Click on the dropdown -> Change runtime type.
Select the A100 (you will be assigned a V100 if there is no A100 availability) and click Save.
Note: The A100 uses around 15 compute units per hour, the V100 5 compute units per hour.
Then, click on the Connect button in the top right to start the runtime.
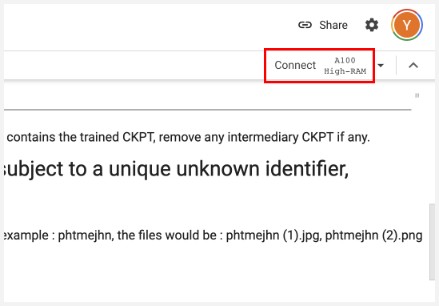
A runtime is the virtual machine (a software emulation of a physical computer) allocated to you by Colab, with a 12 hour maximum lifespan. Connecting to a runtime will start a session.
Closing the tab will not end the session (re-opening the notebook will let you access your earlier session), however sessions will time out after 12 hours.
If you're not using the Colab notebook and it is running some code, end your session or else your compute units will be used up.
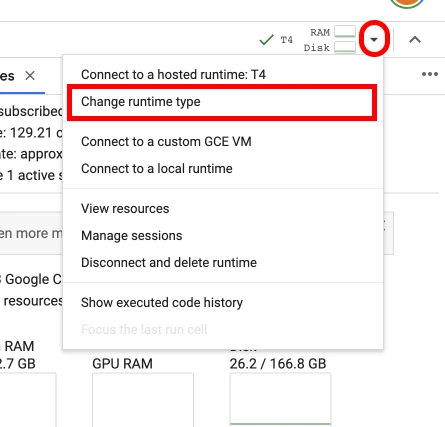
When your runtime is created, you'll see your GPU, and RAM and Disk usage.
Click on the GPU name to see more details:

Run Cells
Notebooks are comprised of cells, each of which runs a bit of code.
By running the cells in order, we'll connect to our Google Drive, install required software, and install AUTOMATIC1111's WebUI.
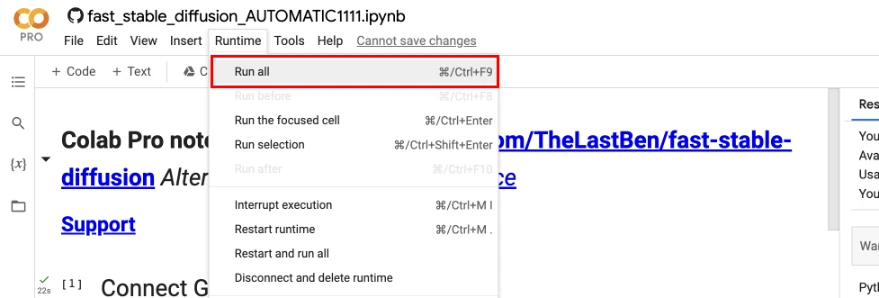
You can click the Play buttons on the cells to execute the code within, but the fastest way to use this notebook is click Runtime -> Run all, which will run all the cells automatically.
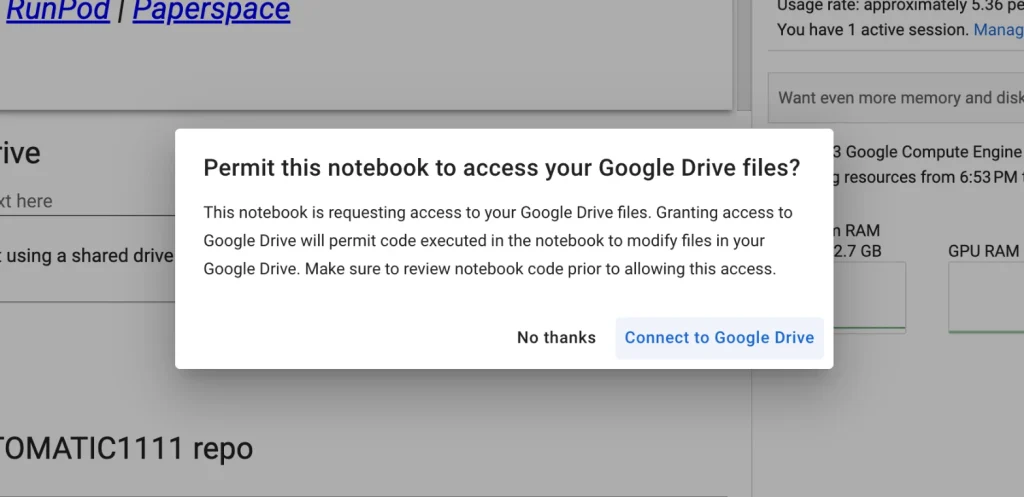
When prompted, connect your Google Drive.
Required software and files will be downloaded to your Google Drive. By default, this notebook will download the SDXL v1.0 model to your Google Drive.
If you have already downloaded things, you will not have to download them again the next time you run this notebook.
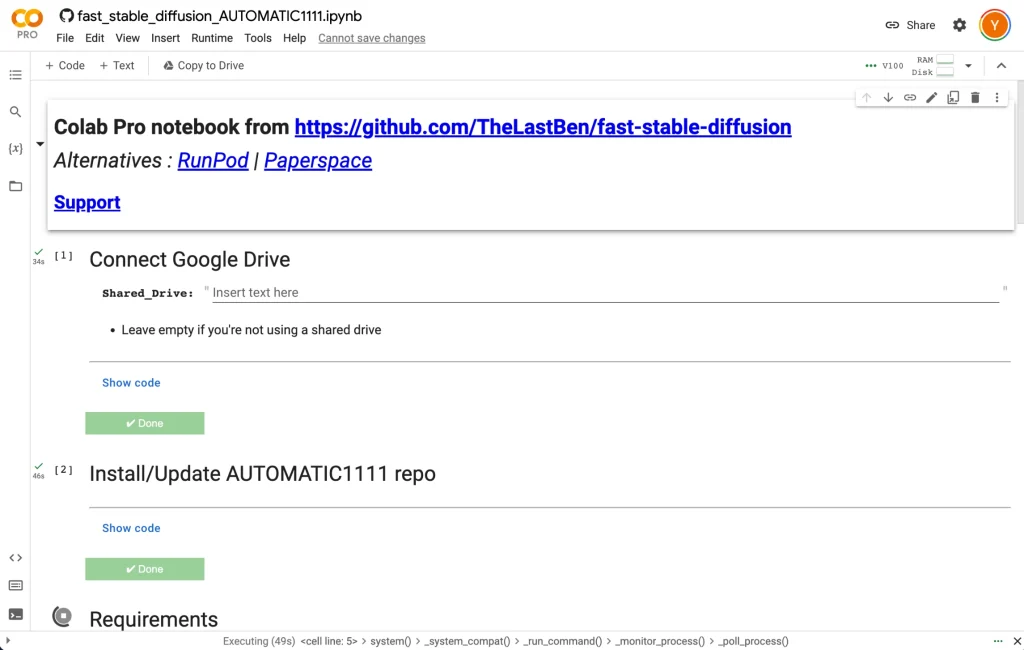
A spinner around a stop button indicates that a cell is currently being run. Cells that are complete will show a green Done box.
Scroll down to the last step Start Stable Diffusion.
Wait until this step gets to the line
Running on public URL:

Click on the URL that is listed afterwards.
AUTOMATIC1111's Stable Diffusion WebUI will open in a new tab, and you can now use it to run Stable Diffusion.
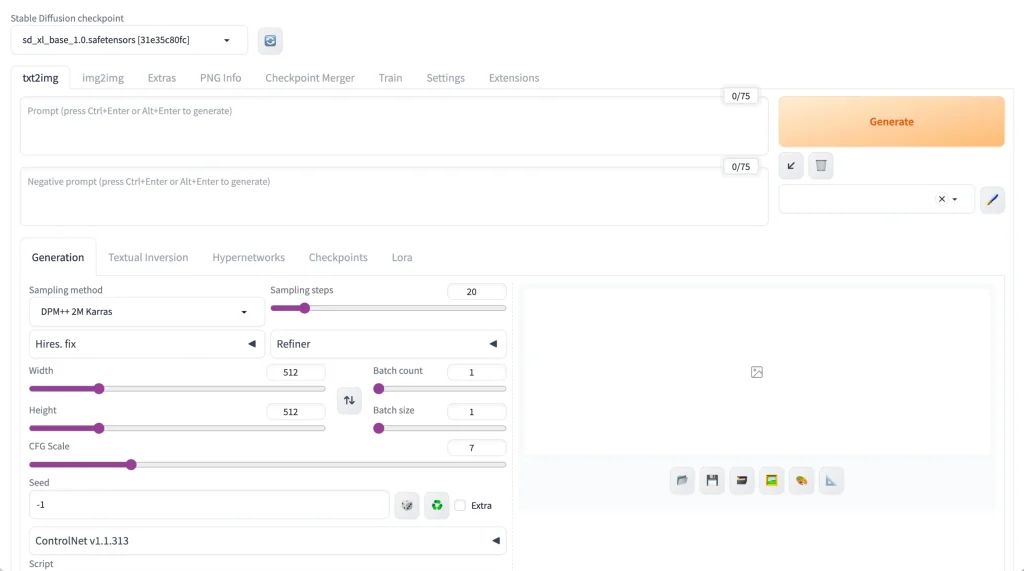
Make sure to adjust these settings before you prompt:
- Resolution: 1024 Width x 1024 Height
- Sampling steps: 30 or greater
- Sampling method: DPM++ 2M Karras (or any DPM++ sampler that uses Karras)
Prompting
Check out these guides to Stable Diffusion prompts and Stable Diffusion settings.